Visual Studio 2019: Attach To Process takes a very long time to show up and how to fix it

I have VS 2019 enterprise edition and its attach to process took very long time to show up and that have impacted my productivity drastically. So far I have been complaining McAfee Anti-virus for this issue but turned out it was not due to McAfee at all.

Once I deselected Python Development workload in the VS installer screen below, it seems to resolve the issue and attach to process screen above pops up quicker.

Backup and Restore MySQL database on Linux Platform

A while back probably couple years ago I wrote bash scripts to backup and restore MySQL db on Linux platform mainly for debugging and/or troubleshooting purposes and here they are:

########################################
### backup.sh Backup mysql db script ###
########################################
#!/bin/bash
 
userhome=$(eval echo "~$USER")
echo "Executing under $USER context"
 
echo "Enter db username: "
read -s  USER
echo "Enter db password: "
read -s PASS
read -p "Enter database name: " DBNAME
 
### Backing up database ###
mysqldump -u$USER -p"$PASS" $DBNAME > $userhome/$DBNAME.sql
 
 
echo "---------------------------------------------------------------------------------"
echo "if no error, $DBNAME backup will be saved to $userhome/$DBNAME.sql"
echo "---------------------------------------------------------------------------------"
##########################################
### restore.sh restore mysql db script ###
##########################################
#!/bin/bash
 
userhome=$(eval echo "~$USER")
echo "Executing under $USER context"
 
echo "Enter dba username: "
read -s  USER
echo "Enter dba password: "
read -s PASS
read -p "Enter database name: " DBNAME
read -p "Enter database backup location (.sql): " DBBACKUPSQL
 
### restore backup database ###
mysql -u$USER -p"$PASS" -e "drop database $DBNAME;"
mysql -u$USER -p"$PASS" -e "create database $DBNAME;"
mysql -u$USER -p"$PASS" $DBNAME < $DBBACKUPSQL
 
echo "---------------------------------------------------------------------------------"
echo "if no error, $DBBACKUPSQL backup has been restored"
echo "---------------------------------------------------------------------------------"
To backup, at terminal execute backup.sh
# bash backup.sh 

it will prompt you for the database username and password and db.sql will be saved to the home directory of the user you use to execute this script.

To restore, at the terminal execute restore.sh

it will prompt you for the database admin username, password, and the backup script .sql location.

Centos/Oracle Linux switching from Desktop to CLI and how to start GUI application under CLI

Sometime we might want to login to CLI (Command Line Interface) where Desktop won’t be available and only terminal is accessible. Most of the time the reason we login under CLIs is that it is lightweight so it is running faster than running with Desktop. So how do we boot Centos or Oracle Linux into CLIs?

To switch from Desktop to CLI, execute below command:
# sudo systemctl set-default multi-user.target 
# sudo reboot

To switch from CLI back to Desktop, execute below command:
# sudo systemctl set-default graphical.target
# sudo reboot

Now under CLIs, we do not have Desktop (Windows system) available so how do we launch GUI App (X app) in CLI environment then? Yes we can please follow:

Example, how to we launch GUI App like Google Chrome under CLIs (Desktopless).

We need to use startx to launch it under X session (so-called X windows system or simply Graphical session)
you can read more about startx here https://www.x.org/releases/X11R7.5/doc/man/man1/startx.1.html

 startx [ [ client ] options ... ] [ -- [ server ] [ display ] options ... ] 

In our case, client is going to be the Google Chrome and please note that startx requires the full path of the client, Google Chrome.
To locate the full path of Google Chrome, execute below command:
#which google-chrome
/usr/bin/google-chrome

so now we are ready start it in single X Windows system by execute below command:
#/usr/bin/startx /usr/bin/google-chrome https://chanvicheka-ouk.com  -- vt1

You might wonder what is -- vt1 for?
vt1 means we will display it in x windows system at virtual terminal number 1.
Linux in CLI has six virtual terminals total which you can switch between them using ctrl+alt+F# where # is the number of the terminal (1-6)
google-chrome open url “https://chanvicheka-ouk.com” in CLI at virtual terminal#1

Install Chrome on Oracle Linux Server release 7.6

You can follow below steps:

You can check your Oracle Linux Release by execute below command at the terminal
# sudo cat /etc/oracle-release 

Ok, now it is the time to install Chrome
#sudo wget https://dl.google.com/linux/direct/google-chrome-stable_current_x86_64.rpm
#sudo yum -y install redhat-lsb libXScrnSaver 
#sudo yum -y localinstall google-chrome-stable_current_x86_64.rpm

Remark: If you run into following issue:
Error: Package: google-chrome-stable-88.0.4324.182-1.x86_64 (/google-chrome-stable_current_x86_64)
           Requires: libvulkan.so.1()(64bit)

you can resolve it by execute following two commands:
#sudo yum-config-manager --enable ol7_optional_latest
#sudo yum -y localinstall google-chrome-stable_current_x86_64.rpm

Installed:
  google-chrome-stable.x86_64 0:88.0.4324.182-1

Dependency Installed:
liberation-fonts.noarch 1:1.07.2-16.el7        
liberation-mono-fonts.noarch 1:1.07.2-16.el7      
liberation-narrow-fonts.noarch 1:1.07.2-16.el7      
liberation-serif-fonts.noarch 1:1.07.2-16.el7     
vulkan.x86_64 0:1.1.97.0-1.el7
vulkan-filesystem.noarch 0:1.1.97.0-1.el7

Voila, it is installed. you can find it here:

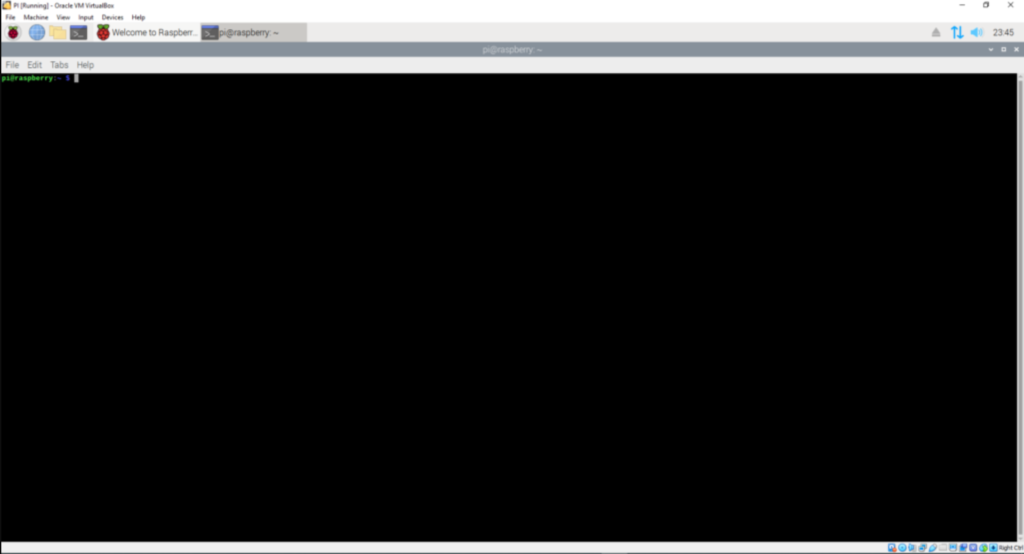
Fixing VirtualBox Raspberry pi small screen resolution

First, if you do not know how to download its iso and load it in the virtualbox, please refer to tutorial at this url: https://roboticsbackend.com/install-raspbian-desktop-on-a-virtual-machine-virtualbox/

And once you have it setup and running then you will need to install virtualbox guest additions as describe here:

First mount it to the virtual OS
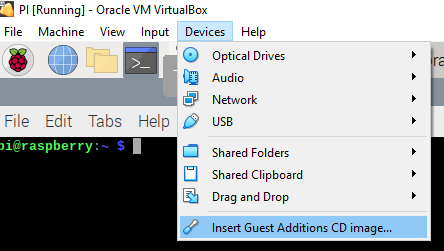
  • Click on Devices menu and then Insert Guest Additional CD Image
  • This will popup. Click Ok
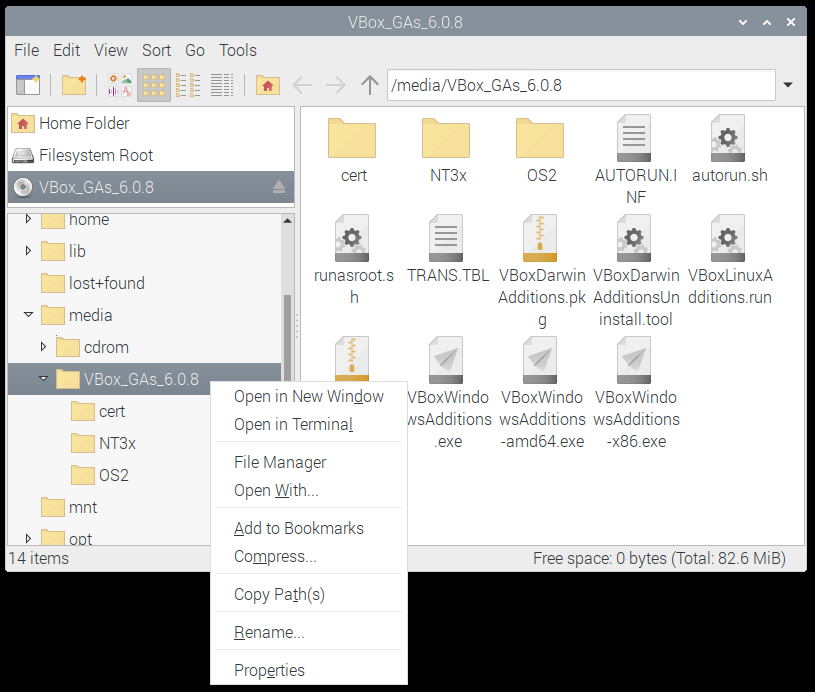
  • Right click on VBox _GAs… and Open in Terminal
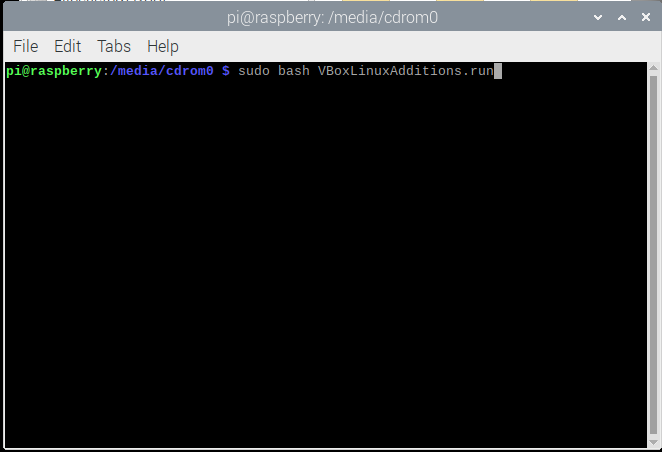
  • Execute this below command with sudo meaning you elevated yourself as privileged user.
  • sudo bash VBoxLinuxAdditions.run
  • Hit enter and wait till it complete
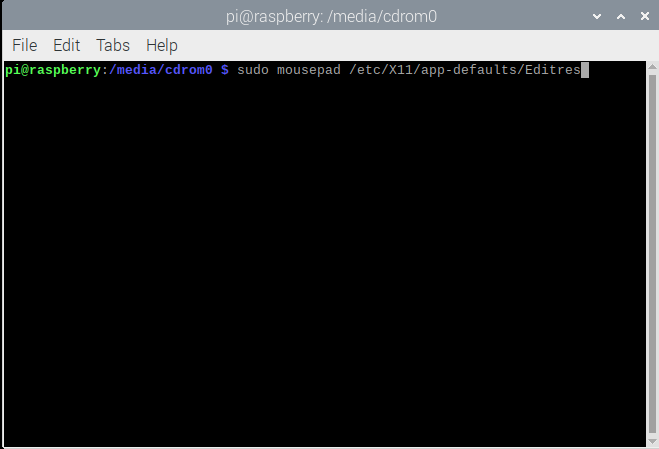
  • Next we need to edit /etc/X11/app-defaults/Editres
  • Execute below command
  • sudo mousepad /etc/X11/app-default/Editres
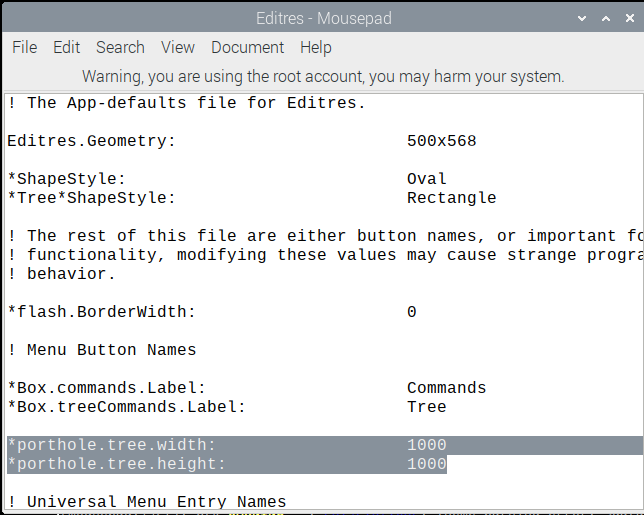
  • Next give it a desired resolution we like. in my case I gave 1000 width/height.

Hello everyone!

Welcome to my new personal blog. This is my first blog on the new hosting. I switched from free hosting to a paid one and unfortunately I didn’t back up my site so i have lost all contents. I will keep posting again so stay tune.