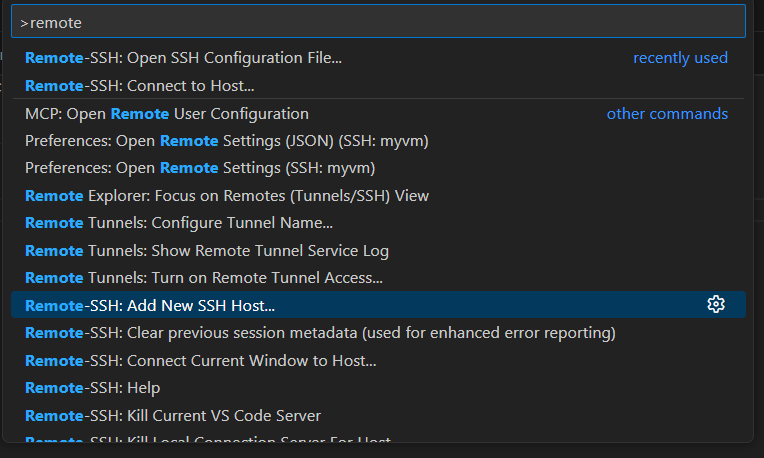
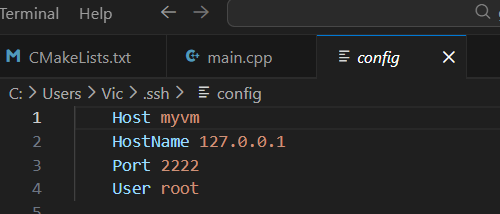
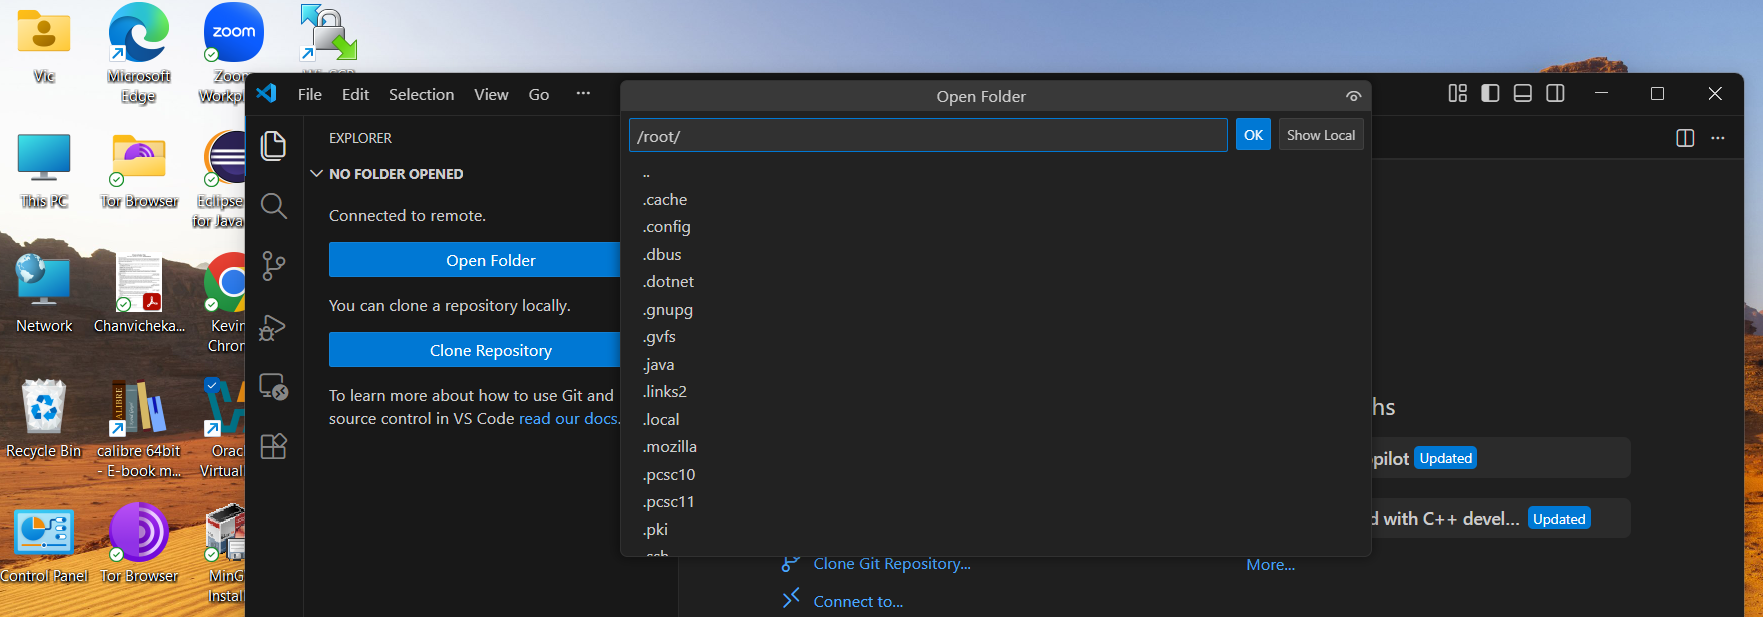
the most common cmake commands that you would use professionally

usually, cmake needs to know source folder and build folder

and below are the most common cmake commands that you would use professionally.

  • To config and generate your build folder from your CMakeLists.txt (CMakeLists.txt lives under your project source folder)
$cmake -S . -B build
or just
$cmake -B build

-S is where your project source is located so if you are already in your project source folder you simply typed -S . or just omitted it entirely like the second version so . (dot) mean current dir
-B is where your build output is located. if build folder does not exist cmake will automatically create one.

  • by default, it sets build mode to Release mode so if you want to build debug so you can debug it you can simple tell cmake during build config as seen below
$cmake -B build -DCMAKE_BUILD_TYPE=Debug
  • Last but not least, when you are ready to compile your project you simple tell cmake below
$cmake --buid build

where build is the build folder generated from earlier step

Note:

  • you can add — -j8 to the compilation whcih mean you want it to use 8 compilation jobs in parallel. 8 also means usually 8 processors.
cmake --build build -- -j8
  • if you want to compile specific targets (your binary, linked library etc) you can simple tell cmake
$cmake --build build --target myLib -- -j8
$cmake --build build --target net -- -j8

where myLib, net are what you target as linked libraries in your CMakeLists.txt
e.g:
add_library(mylib STATIC lib.cpp)
add_library(net SHARED net.cpp)

$cmake --build build --target myApp -- -j8

where myApp is what you target as your binary in your CMakeLists.txt
e.g:
add_executable(myapp main.cpp)

  • To do cmake clean but keep build folder
cmake --build build --target clean
  • To do a full cmake clean: you simply remove the build folder and regenerate it
$ rm -rf build
$ cmake -B build

Overwrite a Keyboard Shortcut in VS Code

1. Open the Keyboard Shortcuts menu

Ctrl+K Ctrl+S

This opens the full keybinding editor.

Note: we can also go to File -> Preferences -> Keyboard shortcuts

2. Search for the command we want to change

Use the search bar at the top and type the command name, for example:

Graphviz: Show Preview

or any other command we want to rebind.

3. Click the pencil icon

On the right side of the command row, click the pencil icon to edit the shortcut.

4. Press the new keybinding

VS Code enters “listening mode.”

Press the shortcut you want to assign, such as: e.g

Ctrl+Alt+G

5. Confirm the overwrite

If the shortcut is already used, VS Code will show a conflict message.

Click Yes to overwrite the existing keybinding.

6. (Optional) Edit the JSON directly

If you prefer manual control:

  1. Press Ctrl+Shift+P
  2. Search: Open Keyboard Shortcuts (JSON)
  3. Add your override:

json

{
"key": "ctrl+alt+g",
"command": "graphviz.showPreview"
}

This always overrides the default.

Visualizing CMake Dependencies with Graphviz in VS Code

CMake Graphviz Dependency Graph:

1. Generate the dependency graph

Run this inside our build directory:

cmake --graphviz=dependency.dot 

This creates:

  • dependency.dot: the actual graph
  • dep.* files: internal fragments (safe to delete anytime)

2. Install Graphviz (the rendering engine)

We need this in WSL:

sudo apt install graphviz

This provides the dot command that VS Code uses to render the graph.

3. Install Graphviz Preview extension (the viewer)

In VS Code:

  1. Press Ctrl+Shift+X
  2. Search: Graphviz Preview
  3. Click Install in WSL: Ubuntu

This registers the preview command inside WSL.

4. Open the .dot file in VS Code

Just open:

dependency.dot

5. Render the graph

Press:

Ctrl+Shift+P

Type:

Graphviz: Show Preview

Select it -> our.dot file renders as a graph.

That’s the entire working pipeline

  • Generate DOT
  • Install Graphviz
  • Install Graphviz Preview
  • Open DOT
  • Run Graphviz Preview

Mocking Unit Test with Catch2 regarding Pub/Sub client and message broker (nats-server) using protobuf cross-platform data format

I have wrote them and posted to my GitHub repos from the official Alpine docker image

testing_nats_msg_broker_pub_sub_client_with_protobuf_alpine/README.md at main · chanvichekaouk/testing_nats_msg_broker_pub_sub_client_with_protobuf_alpine

🧪 Mock Publisher–Broker–Subscriber Unit Test (Catch2 v3 + Protobuf + Alpine) This project demonstrates a mock unit‑test workflow between:

a Publisher client

a NATS message broker

a Subscriber client

using a cross‑platform Protobuf data format, tested with the Catch2 v3 framework and built on the official Alpine Linux image.

The goal is to validate message flow, multi‑subscriber behavior, and protobuf serialization/deserialization in a lightweight, reproducible environment.

🛠️ Compiling Tests Manually (g++) You can compile the test suite directly from the terminal:

g++ -Iinclude tests/*.cpp -o test_runners \
    -I/usr/local/include -L/usr/local/lib \
    -lCatch2Main -lCatch2

Run all tests under a tag:

./test_runners "[tag]"

Run only a specific section under a tag:

./test_runners "[tag]" -c "section_name"

Example:

Run all sections under the tag:

./test_runners "[multi_sub_receive_msg]"

Run only a specific section:

./test_runners "[multi_sub_receive_msg]" -c "Client connects successfully"

Another example:

./test_runners "[multi_sub_receive_msg]" -c "Multiple subscribers receive the same published message"

Screenshots 

image

📦Using Protobuf Data Format

Example .proto schema:

syntax = "proto3";

message Telemetry {
    int32 id = 1;
    int32 temp = 2;
}

🐧 Alpine vs glibc: Why Linking Protobuf Is Harder on Alpine On most Linux distributions that use glibc, linking Protobuf with Abseil is simple. But Alpine uses musl, and Abseil depends on glibc‑specific internals such as futex.

Because musl does not provide these interfaces, Alpine maintainers must:

  • patch Abseil heavily
  • disable unsupported features
  • split Abseil into ~130 micro‑libraries

Starting with Protobuf 4.x, Abseil became a mandatory dependency, which makes linking more complex on Alpine.

On glibc‑based systems (Ubuntu, Debian, Fedora) You can link with just a few Abseil libraries:

-labsl -labsl_strings -labsl_log

On Alpine (musl) You must explicitly link the micro‑libraries required by your generated Protobuf code:

-lprotobuf -lprotobuf-lite
-labsl_base -labsl_strings
-labsl_raw_logging_internal
-labsl_log_internal_check_op
-labsl_log_internal_message
-labsl_log_internal_nullguard

Example:

g++ -Iinclude -Iproto \
proto/*.cc tests/*.cpp \
-o test_runners \
-lprotobuf -lprotobuf-lite \
-labsl_base -labsl_strings \
-labsl_raw_logging_internal \
-labsl_log_internal_check_op \
-labsl_log_internal_message \
-labsl_log_internal_nullguard \
-lCatch2Main -lCatch2
image

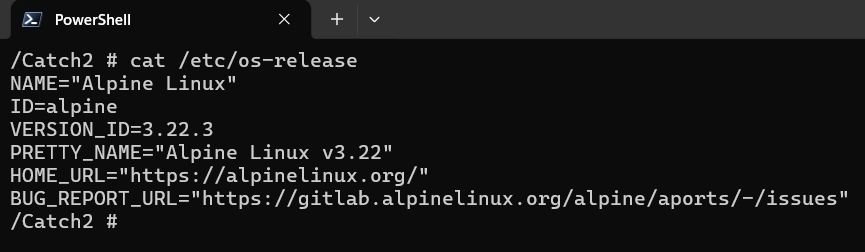
Getting Catch2 v3 to work in alpine docker image

I have tried it today and so far Catch2 v2 works either using package installer or through dropping its header file or compiling its library from its github source code.

But for Catch2 v3, it also works but to compile our binary, we have to either use library Catch2Main to autogenerate main or create our own main code because alpine with Catch2 v3 does not work with auto-generation of main using #define CATCH_CONFIG_MAIN flag

test_main.cpp (alpine with catch2 does not work with this kind of auto-generated main flag)

#define CATCH_CONFIG_MAIN
#include <catch2/catch_all.hpp>

main.cpp (works since we defined our own main)

#include <catch2/catch_session.hpp>

int main(int argc, char* argv[]) {
Catch::Session session;
return session.run(argc, argv);
}

Or also work with Library mode with Catch2main to auto generate main

✅ this works since we use Catch2Main library

g++ test_math.cpp -o test -I/usr/local/include -L/usr/local/lib -lCatch2Main -lCatch2 
❌ this does not work as I have verified that #define CATCH_CONFIG_MAIN flag is not working

g++ test_main.cpp test_math.cpp -o test -I/usr/local/include

✅this works since we wrote our own main

g++ main.cpp test_math.cpp -o test -I/usr/local/include -lCatch2

Resize existing VirtualBox HD

This must be done while the VM is powered off.

Caution: it won’t work if your VM has a snapshot. You either have to restore your snapshot then resize or delete your existing snapshot(s) or clone the disk and resize and attached the resize to the current state. Also be careful with it as there is no shrinking support so in case you accidentally resize it virutally to sth much larger than your host hdd then there won’t be easy to revert it (unless you have a snapshot but restoring snapshot you will loss your current state)

PHASE 1 — VirtualBox layer

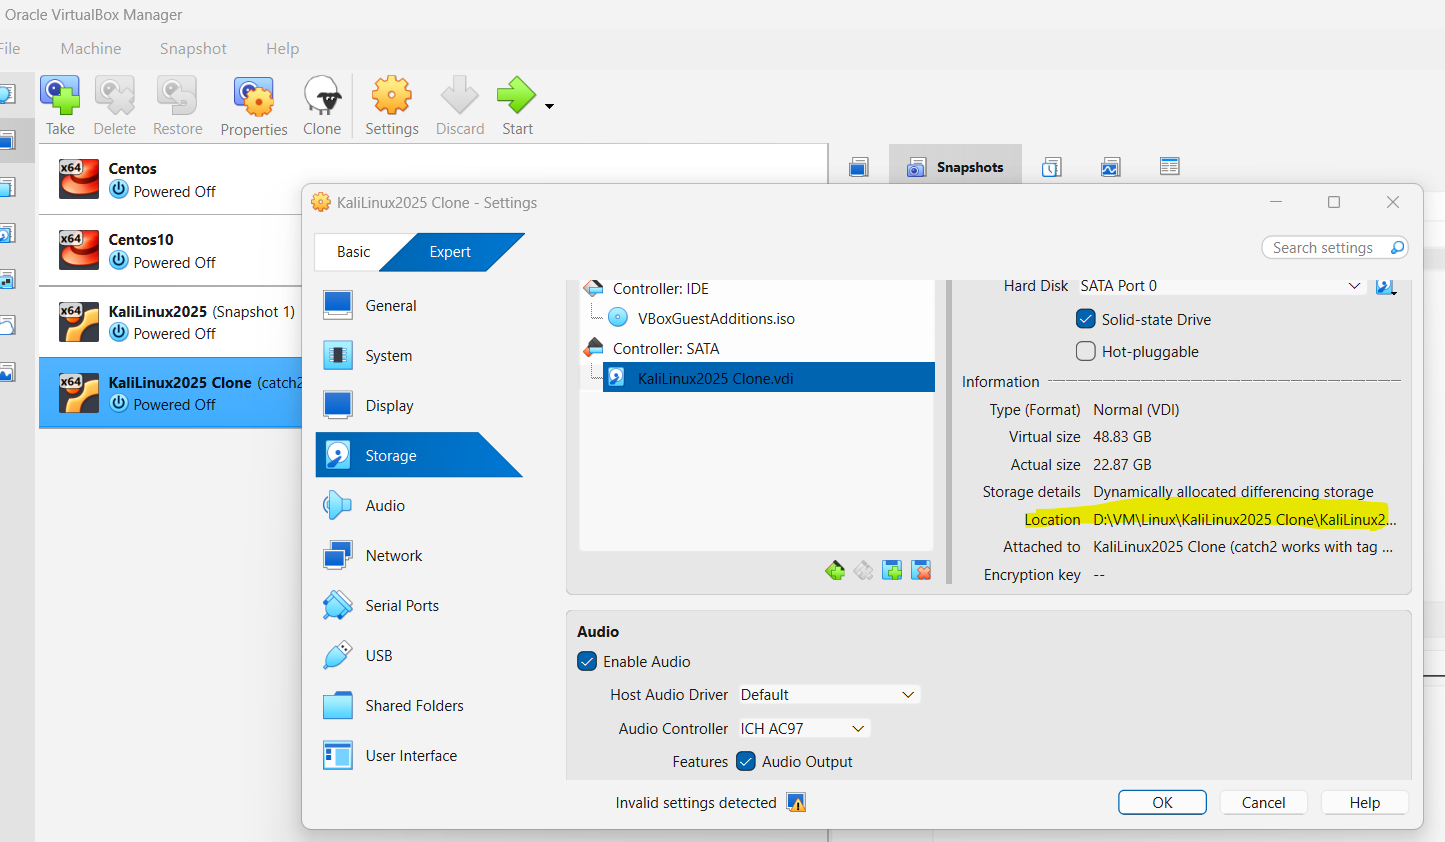
Find the disk path

In VirtualBox Manager:

  • Select your VM
  • Settings → Storage
  • Click the disk → look at the Location field

Step 1: copy the location of hd you wish to resize

e.g mine is D:\VM\Linux\KaliLinux2025 Clone\KaliLinux2025 Clone.vdi

Step 2: Then go to directory where you installed your virtualbox to

e.g mine is C:\Program Files\Oracle\VirtualBox

3. At command prompt, execute as seen here where I wish to resize mine to 50GB

.\VBoxManage.exe modifyhd "D:\VM\Linux\KaliLinux2025 Clone\KaliLinux2025 Clone.vdi" --resize 50000

You should see something like this:

0%…10%…20%…30%…40%…50%…60%…70%…80%…90%…100%

This enlarges the virtual disk container, but not the partitions inside it.

PHASE 2 — Partition table layer

After resizing the VDI, the guest OS sees a bigger disk, but the partitions still end at the old size.

Step 4: Resize the partitions

For your Kali VM (MBR layout):

  • sda2 = extended partition
  • sda5 = logical LVM partition

You must expand both.

Inside parted:

sudo parted /dev/sda
(parted) resizepart 2 100%
(parted) resizepart 5 100%
(parted) quit

Now the partition table matches the new disk size.

PHASE 3 — LVM layer

Step 5: Resize the physical volume (PV)

sudo pvresize /dev/sda5

This tells LVM: “The partition is bigger now — use the new space.”

Step 6: Resize the logical volume (LV)

sudo lvextend -l +100%FREE /dev/mapper/kali--vg-root

This expands the LV to fill all free space in the VG.

PHASE 4 — Filesystem layer

Step 7: Resize the filesystem

For ext4:


sudo resize2fs /dev/mapper/kali--vg-root

This expands the filesystem to fill the LV.

FINAL CHECK

df -h /

C++ interface (pure abstract class) && C# interface

1- C# Interface

public interface IShape
{
double Area();
double Perimeter();
}

2- C# Implementation (Rectangle)

public class Rectangle : IShape
{
private readonly double width;
private readonly double height;

public Rectangle(double width, double height)
{
this.width = width;
this.height = height;
}

public double Area() => width * height;

public double Perimeter() => 2 * (width + height);
}

3- Using the C# interface

IShape shape = new Rectangle(3.0, 4.0);
Console.WriteLine($"Area: {shape.Area()}");
Console.WriteLine($"Perimeter: {shape.Perimeter()}");

A- C++ Interface (pure abstract class)

class IShape {
public:
virtual ~IShape() = default;
virtual double area() const = 0;
virtual double perimeter() const = 0;
};

B- C++ Implementation of the Interface

class Rectangle : public IShape {
public:
Rectangle(double width, double height)
: w_(width), h_(height) {}

double area() const override {
return w_ * h_;
}

double perimeter() const override {
return 2 * (w_ + h_);
}

private:
double w_;
double h_;
};

C- Using the Interface in C++

#include <iostream>
#include <memory>

int main() {
std::unique_ptr<IShape> shape = std::make_unique<Rectangle>(3.0, 4.0);

std::cout << "Area: " << shape->area() << "\n";
std::cout << "Perimeter: " << shape->perimeter() << "\n";
}

Configure GitHub in your Linux system using public\private ssh keys instead of username/password

🟩 Step 1 — Generate your SSH key pair (public key .pub and private key) at ~/.ssh/

ssh-keygen -t ed25519 -C "your_email@example.com"

🟩 Step 2 — Start the SSH agent

eval "$(ssh-agent -s)"

You should see something like:

Agent pid 1234

🟩 Step 3 — Copy your pub key to GitHub

cat ~/.ssh/id_ed25519.pub

copy the conent of your .pub key to GitHub

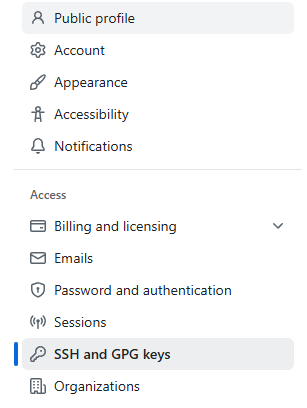
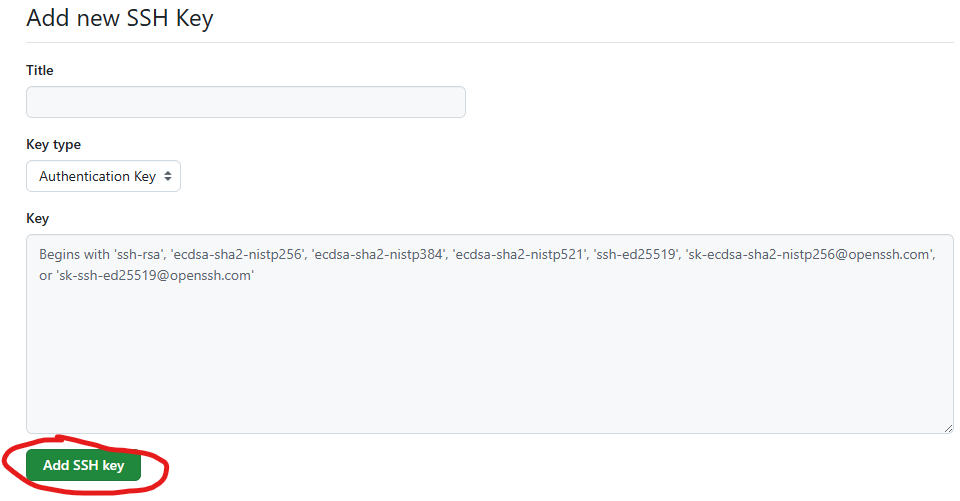
Go to your github profile ➤ Settings ➤ SSH and GPG kyes ➤ New SSH key

Paste the content of your pub key in text box above under the word “Key” and give it a name in textbox above under the word “Title”

🟩 Step 4 — tell SSH client which private key to use which is paired to the pub key used at GitHub earlier

e.g under current’s user .ssh folder

mkdir -p ~/.ssh
chmod 700 ~/.ssh
nano ~/.ssh/config

Add:

Host *
AddKeysToAgent yes
IdentityFile ~/.ssh/id_ed25519

ctrl-o to write and ctrl-x to close nano.

Then secure it:

chmod 600 ~/.ssh/config

🟩 Step 5 – testing it

ssh -T git@github.com

you should see sth like this:

Hi github_username! You've successfully authenticated, but GitHub does not provide shell access.

Linux Tree command

tree -f -I build

where -f is to include file with full path. -I mean to exclude specific folder

I do like this util tool in Linux though it does not always come with the distro and I have to install it.

e.g: sample output from my kali linux VM:

┌──(root㉿kali)-[/home/catch2-mini-book/project]
└─# tree -f -I build
.
├── ./CMakeLists.txt
├── ./external
│   ├── ./external/catch_amalgamated.cpp
│   └── ./external/catch_amalgamated.hpp
├── ./id_git_hub_chanvicheka_ouk
├── ./id_git_hub_chanvicheka_ouk.pub
├── ./include
│   ├── ./include/account.hpp
│   ├── ./include/logger.hpp
│   ├── ./include/logic.hpp
│   ├── ./include/service.hpp
│   └── ./include/shape.hpp
├── ./README.md
├── ./src
│   └── ./src/logic.cpp
├── ./test_example
├── ./test_main.o
├── ./test_runner
└── ./tests
├── ./tests/test_example.cpp
├── ./tests/test_main.cpp
├── ./tests/test_oop_composition_class_with_dependencies.cpp
├── ./tests/test_oop_inheritance_polymorphism.cpp
├── ./tests/test_oop_simple.cpp
├── ./tests/test_oop_using_fixture.cpp
└── ./tests/test_parameterization.cpp

5 directories, 22 files

git pull –no-rebase (default) vs git pull –rebase

🟩 git pull --rebase

This is the modern, clean, recommended workflow for most developers.

What it does

  • Fetches the latest remote commits
  • Replays your local commits on top of the updated branch
  • Produces a linear, easy‑to‑read history
  • Avoids unnecessary merge commits

Visual example

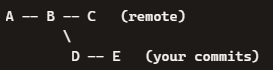
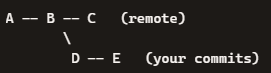
Before rebase:

After:

Your commits are rewritten to sit on top.

When to use it

  • Solo development
  • Feature branches
  • Clean, audit‑friendly history
  • Government‑grade or enterprise workflows
  • When you want to avoid messy merge commits

Why pros prefer it

  • History stays linear
  • git log is readable
  • CI/CD pipelines behave more predictably
  • Easier code reviews
🟦 git pull --no-rebase (default merge behavior)

This performs a merge instead of a rebase.

What it does

  • Fetches remote commits
  • Creates a merge commit combining remote + local work

Visual example

Before:

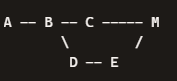
After:

Where M is a merge commit between C head from remote and E head from your commit so M was a merged result of C & D, E.

When to use it

  • Shared branches with many contributors
  • When rewriting history is not allowed
  • When you want to preserve the exact order of events
  • When your team explicitly requires merge commits

Downsides

  • History becomes noisy
  • Merge commits pile up
  • Harder to read
  • Harder to bisect

How to check if your local git is default –no-rebase or configured to –rebase

git config list

user.name= my name
user.email=my.name@gmail.com
pull.rebase=true
core.repositoryformatversion=0
core.filemode=true
core.bare=false
core.logallrefupdates=true
remote.origin.url=git@github.com:chanvichekaouk/catch2-hpp-unit-test.git
remote.origin.fetch=+refs/heads/:refs/remotes/origin/
branch.main.remote=origin
branch.main.merge=refs/heads/main
branch.main.vscode-merge-base=origin/main

or retreive value of specific config:

git config --get pull.rebase

if it shows true then yes it is configured to –rebase.

show empty or false then yes it is default to –no-rebase

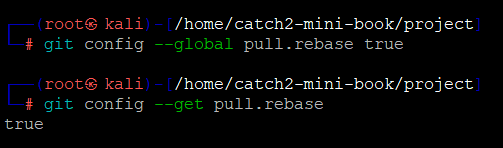
How to set it to –rebase by default

For all repositories:

git config --global pull.rebase true

For just this repo:

git config pull.rebase true

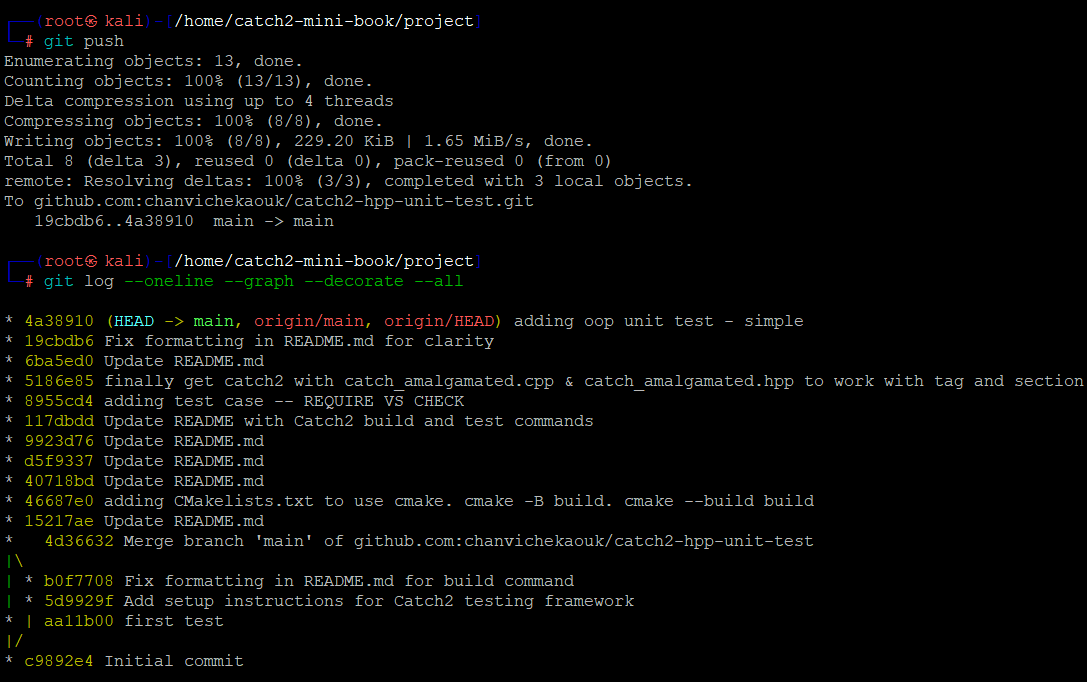
e.g here initially my local git is set to default –no-rebase so you can see the deviation of the line as it is a merge btw remote head and my local commit since then I have configured global to –rebase so my history log will be a linear line which as pointed out would be easy to read.

git log --oneline --graph --decorate --all

(From my local personal laptop & git hub repo: chanvichekaouk/catch2-hpp-unit-test)