To refresh our memory: What is GitLab runner?
Runner is a GitLab component that actually executes our CI/CD pipeline (Continuous Integration (CI)/Continuous Delivery (CD) ).
We define our CI/CD pipeline stage and job using its .gitlab-ci.yml (.yaml) file which defines jobs (like builds, tests, deploys), the runner is what runs those scripts on some compute environment e.g our aws ec2 cloud instance amazon linux.
Example of .gitlab-ci.yml looks like
stages:
  - build
  - test
  - deploy

build-job:
  stage: build
  script:
    - echo "Hello, $GITLAB_USER_LOGIN!"

test-job1:
  stage: test
  script:
    - echo "This job tests something"

test-job2:
  stage: test
  script:
    - echo "This job tests something, but takes more time than test-job1."
    - echo "After the echo commands complete, it runs the sleep command for 20 seconds"
    - echo "which simulates a test that runs 20 seconds longer than test-job1"
    - sleep 20

deploy-prod:
  stage: deploy
  script:
    - echo "This job deploys something from the $CI_COMMIT_BRANCH branch."
  environment: production
with .yml above, it is like set of instruction that we tell how GitLab would run the runners for our CI/CD pipeline. Like above, we tell GitLab that the runner would have 3 stages
first stage is build, second stage is test, and third stage is deploy.
then we can add job that linked to the stage by
stage: <stage_name>
stage:
   - <stage_name>

<job_name>:
    - stage: <stage_name>
    - script:
             <script_statements>
e.g above Example of .gitlab-ci.yml, we only have one build job, two run jobs (one short, one longer), last but not least, we have one deploy job.
How it works
When we use GitLab SaaS (e.g., our project is hosted at gitlab.com):
- We define CI/CD jobs in
.gitlab-ci.yml. - GitLab’s shared runners (SaaS runners) automatically pick up our jobs.
- They execute them in isolated environments (typically Docker containers).
- Results (logs, artifacts, statuses) are sent back to our GitLab project.
But Saas runner is just one type of runners that GitLab supported.
GitLab Runner SaaS refers to GitLab’s managed runners — runners hosted and maintained by GitLab itself.
Types of Runners
| Type | Description | Managed By |
|---|---|---|
| SaaS / Shared Runner | Preconfigured runners available for all projects on GitLab.com | GitLab |
| Group or Project Runner | Dedicated to our group or project, still hosted by GitLab | GitLab |
| Self-Managed Runner | Installed and maintained by us (e.g. on our own VM or cluster) | Us |
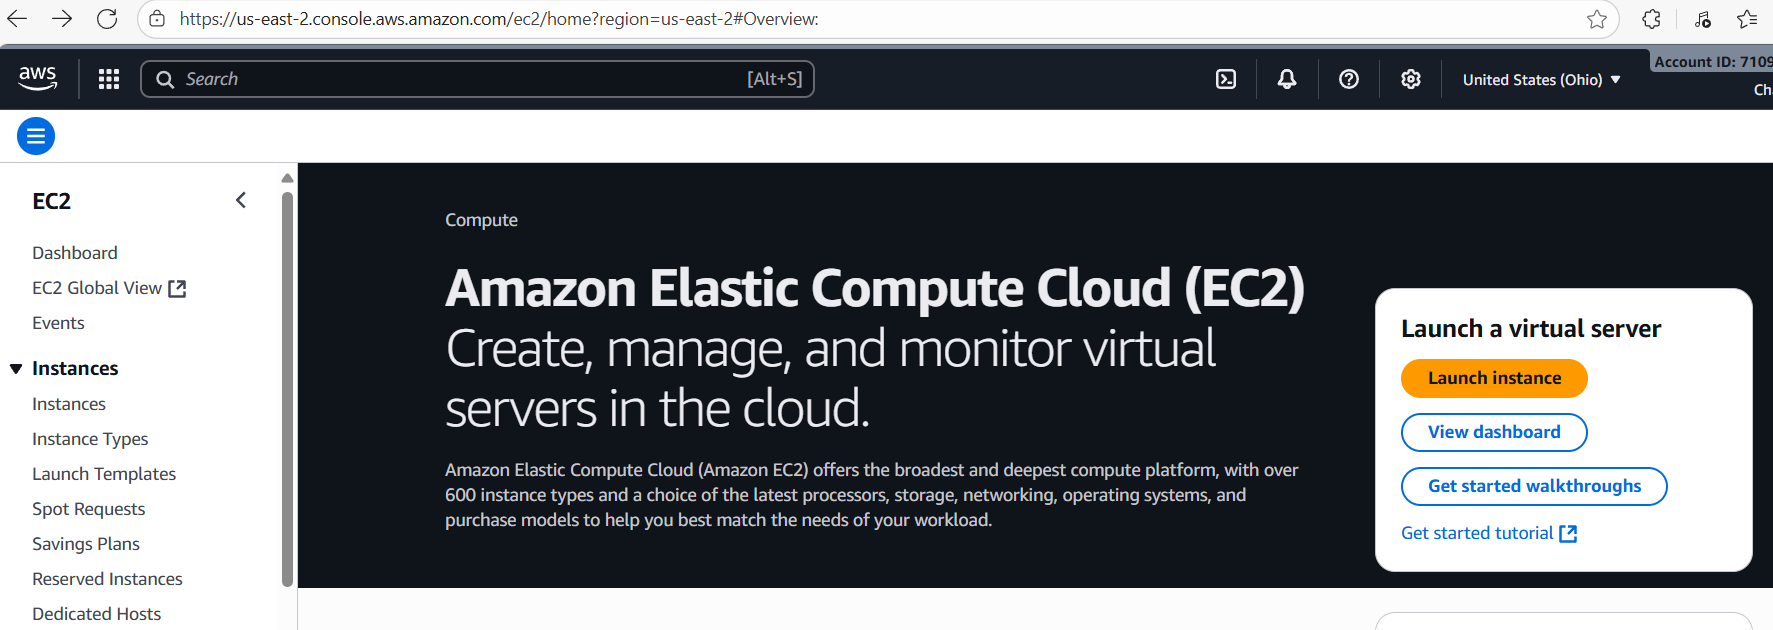
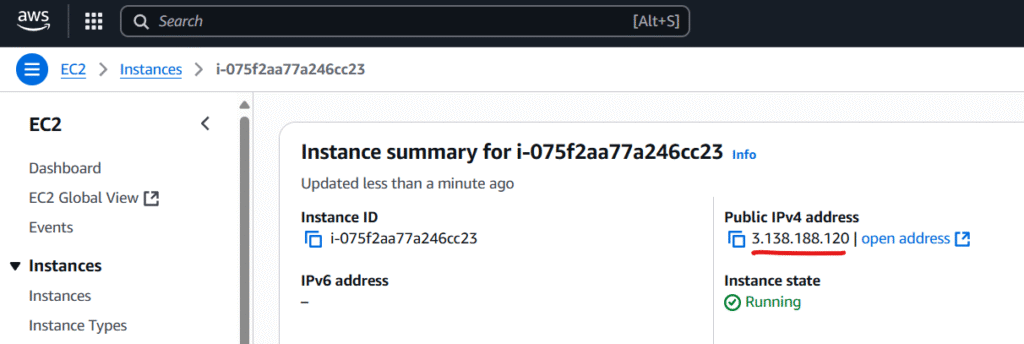
So today, we explore how we can setup and managed our runner. And we will use AWS ec2 cloud Amazon Linux to demonstrate it here:
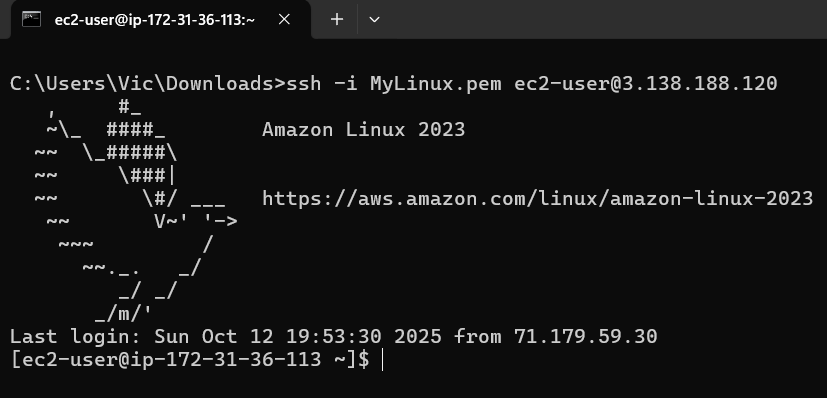
Please have a look at below link which I already covered briefly how to get AWS ec2 instance running and ssh to it remotely using private key:
Connecting local git repo with remote GitHub repo in AWS Linux instance – csforce.de | VIC: Setup self-managed GitLab runner on AWS ec2 cloudFirst we will have to add GitLab runner repo and then yum install it:
by executing below curl piped command to add the repo & yum install command to install it at terminal:
# Add the official GitLab Runner repository
curl -L https://packages.gitlab.com/install/repositories/runner/gitlab-runner/script.rpm.sh | sudo bash

# Install the runner
sudo yum install gitlab-runner -y
after the piped command we should see this which mean our gitlab repo is added to our amazon linux distro repos:
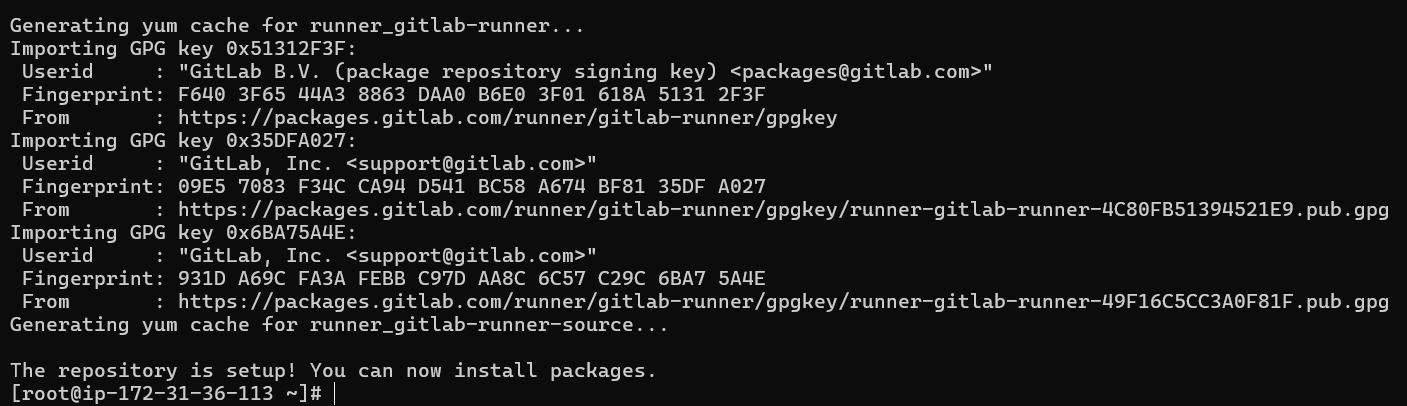

This looks good our GitLab’s runner is now installed in our AWS ec2 cloud linux distro successfully.
Next, we need to setup our GitLab’s repo and point our runner to our AWS ec2 cloud linux runner instance.
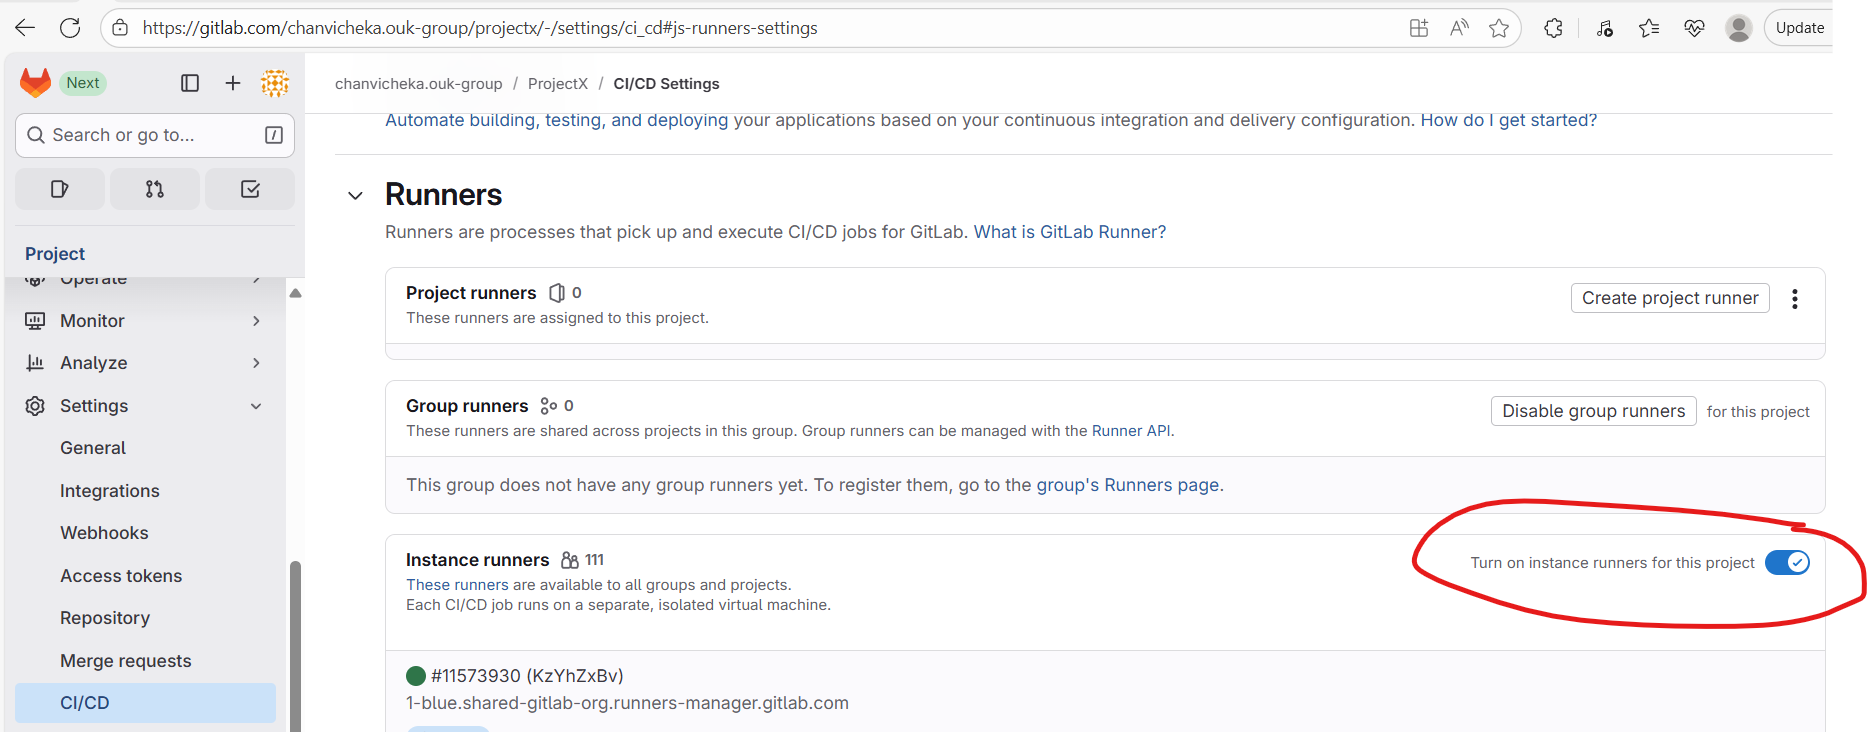
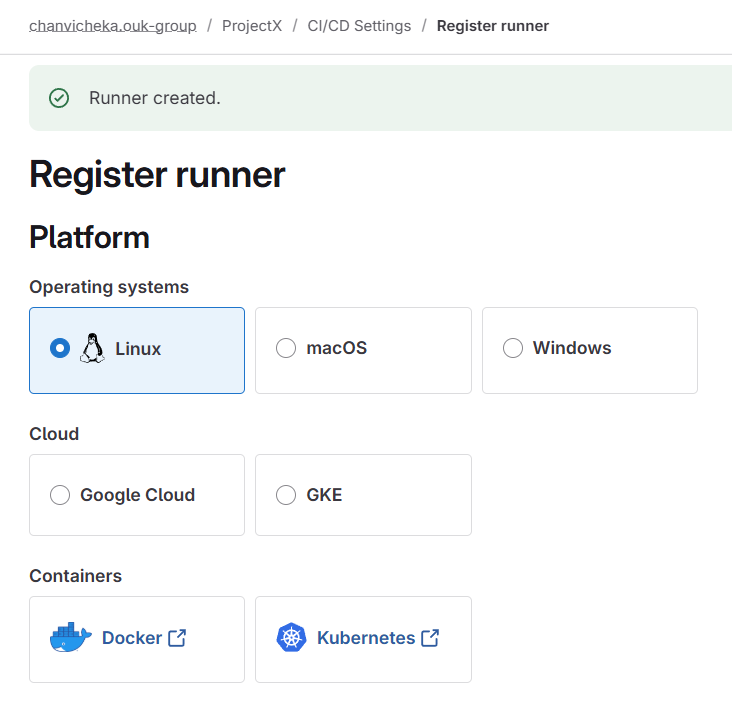
Go to our project’s repository, then navigate to Settings → CI/CD → Runners, and disable the instance (SaaS) runners by toggling them off.
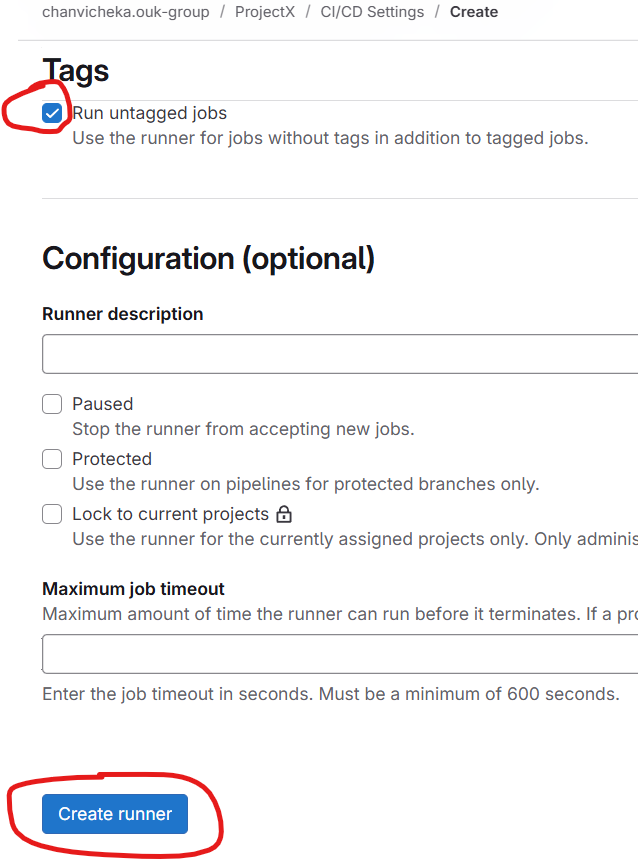
Next, go to Project Runners → Create project runner

For the simplicity, we will check untagged and click create runner
Choose Linux since our AWS cloud is EC2 Amazon linux
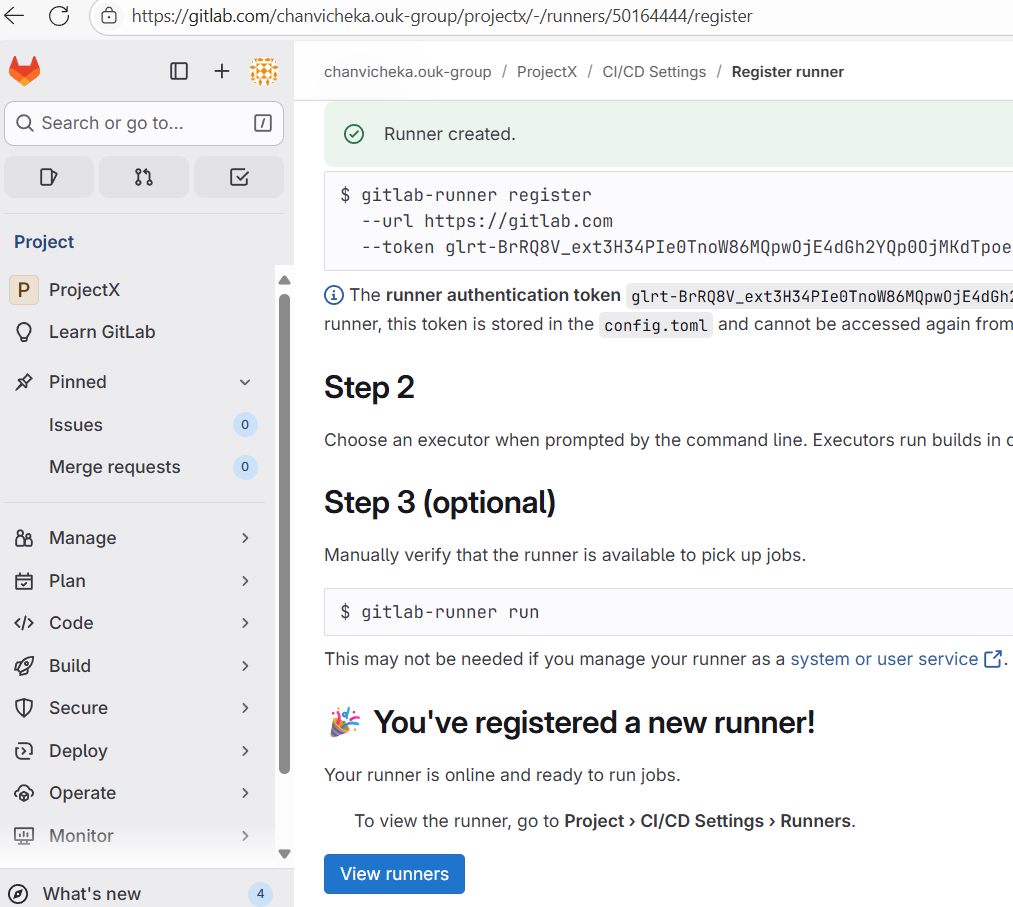
And copied and paste the following command at our aws ec2 cloud instance (amazon linux) to register it there (to link them: Gitlab <-> aws ec2 linux runner instance)


hit enter since we will use the default url https://gitlab.com
and enter “linuxrunner” as the name our self-managed runner here:

next type shell for the executor and hit enter (since this is a simple demonstration of the setup of self-managed runner, we chose shell for our .gitlab-ci.yml’s script aka bash, but if you want you can choose vm, or docker etc and chose by typing the executor type here)

This looks good:
- we use https://gitlab.com as instance url,
- named it “linuxrunner”
- and chose shell as an executor.
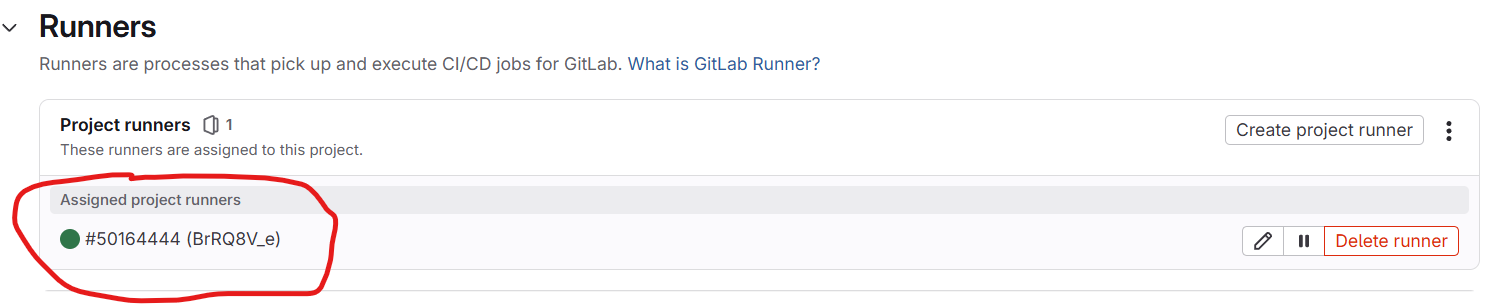
At our GitLab project settings CI/CD we would see this below:
Click on View runners and we should see our project runner is registered successfully and online (green means it is online)
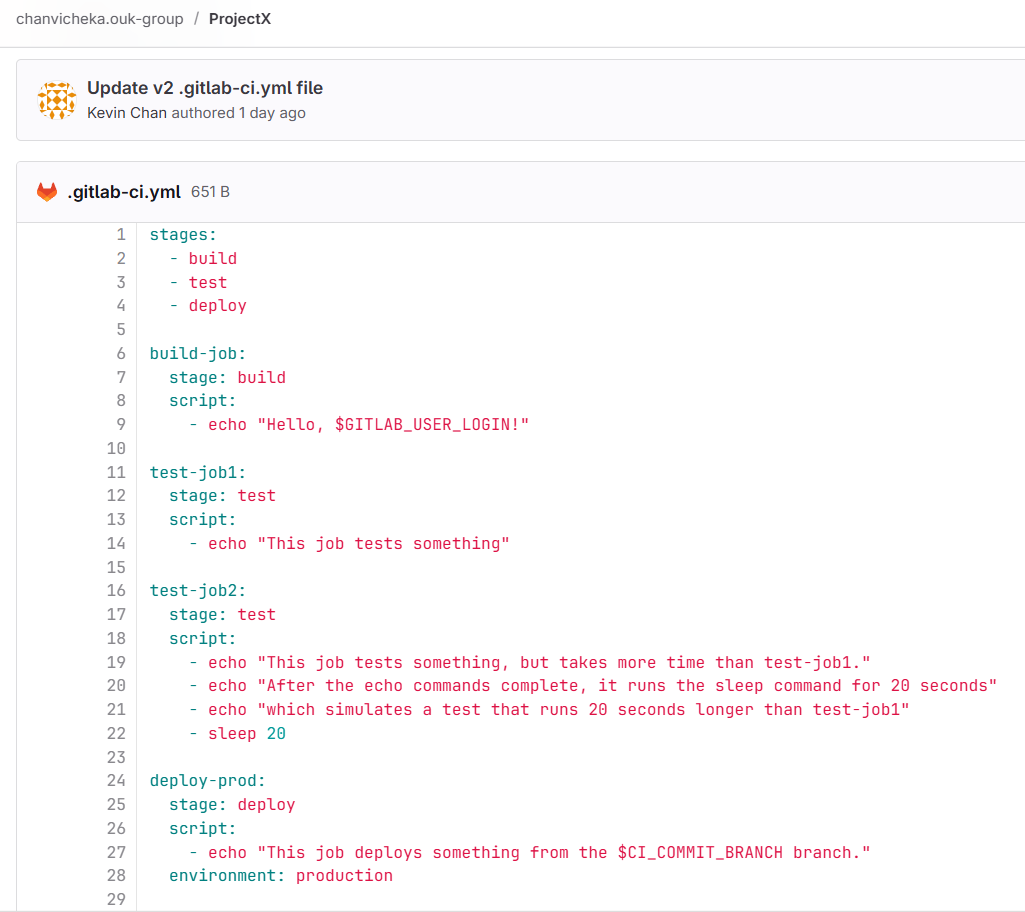
Note that our simple .gitlab-ci.yml is as below: 3 stages (build, test, deploy), 1 build job, 2 test jobs, and one deploy job.
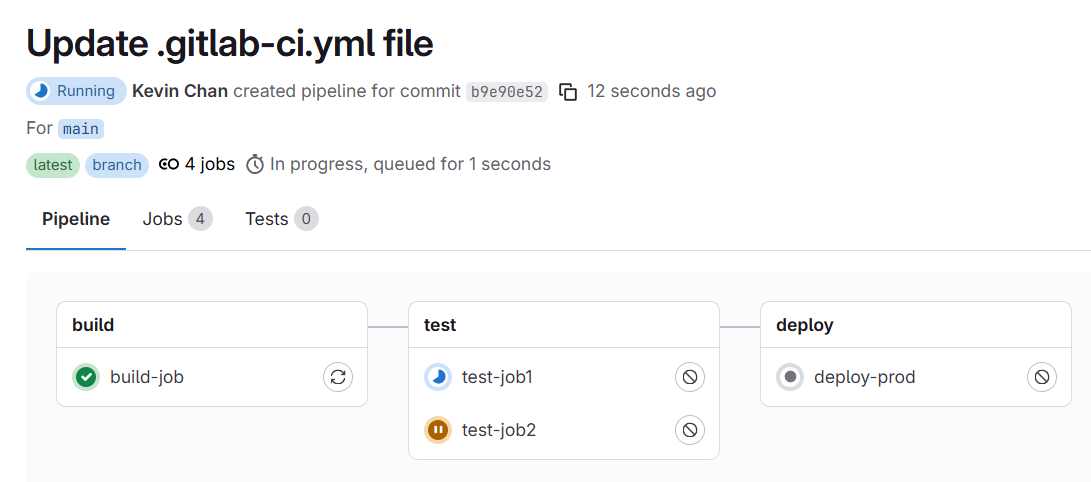
so any commit to our main branch of our project branch would trigger the pipeline as seen below:
All the jobs completed and passed successfully
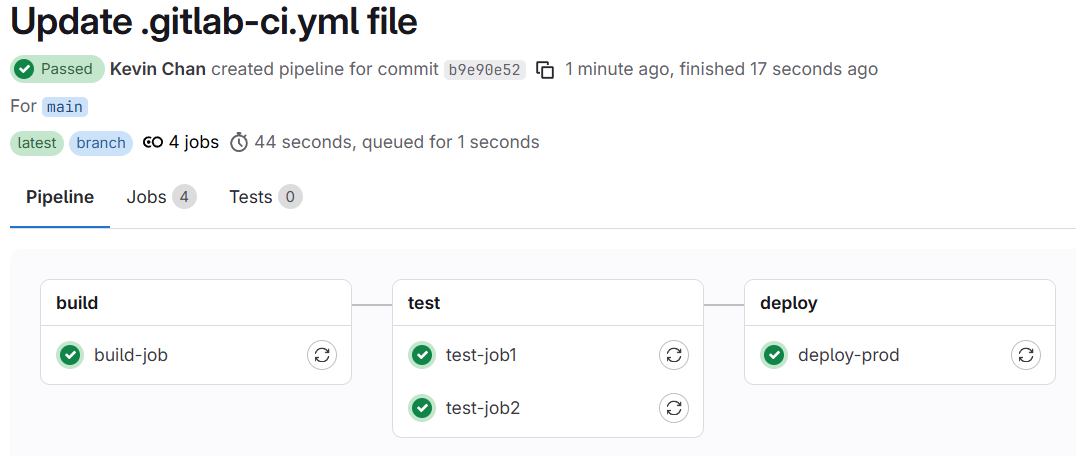
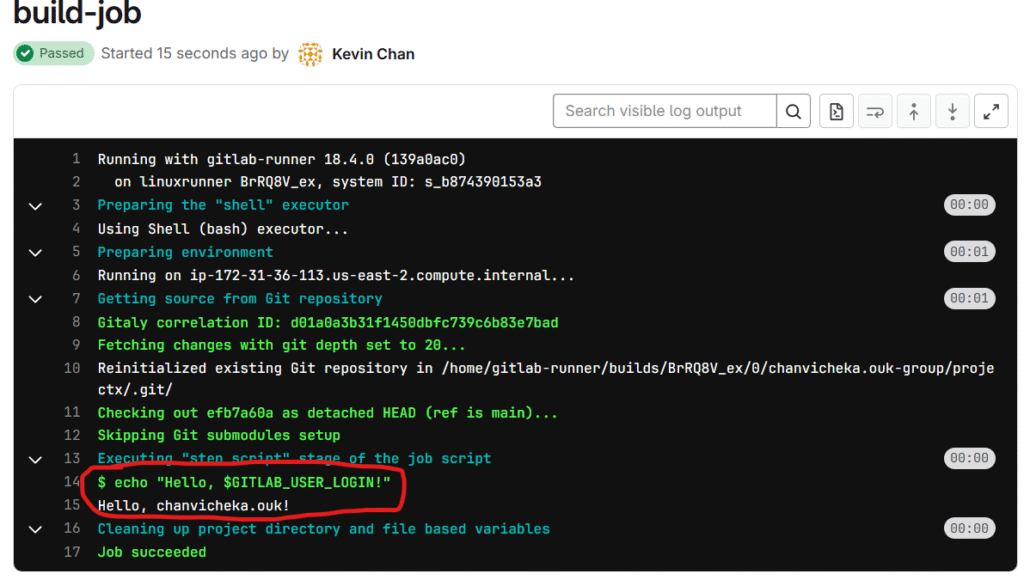
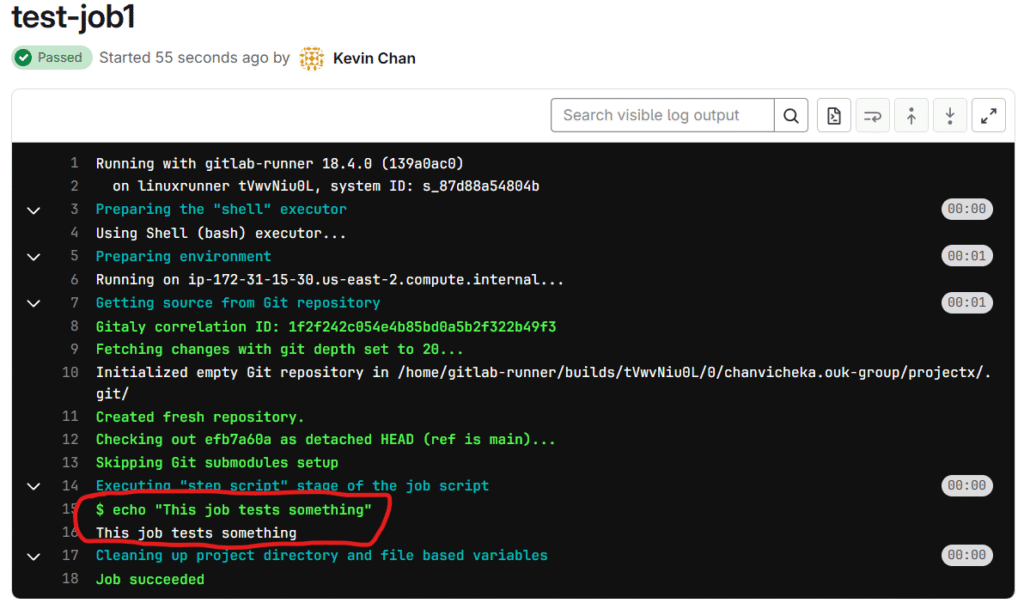
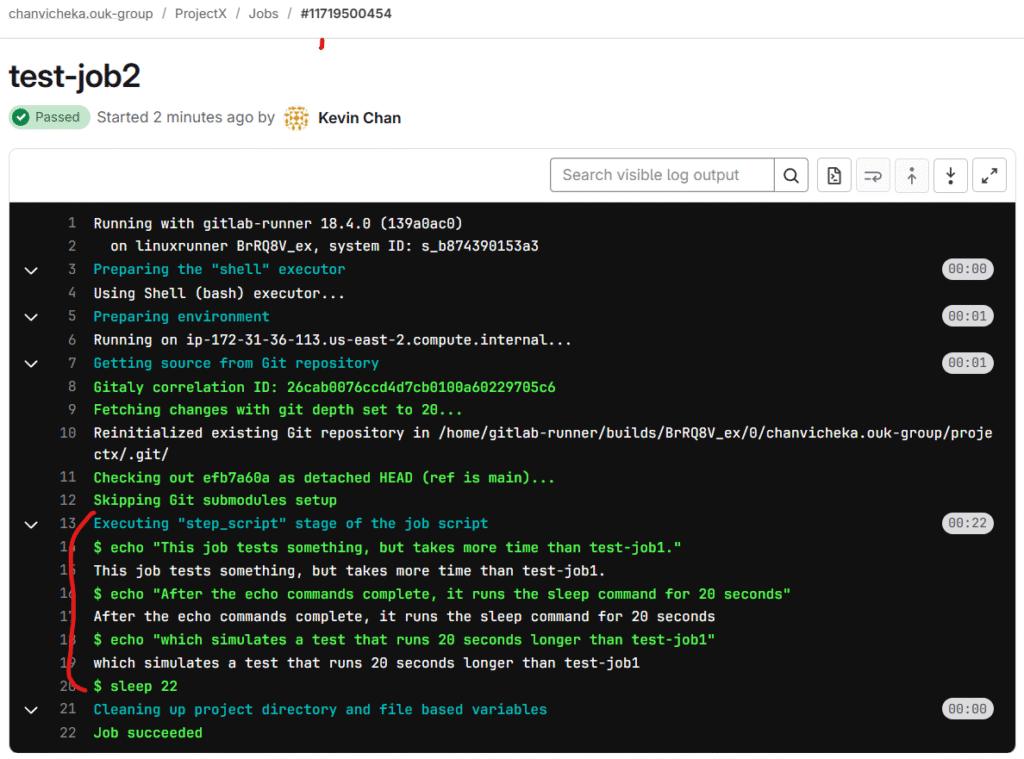
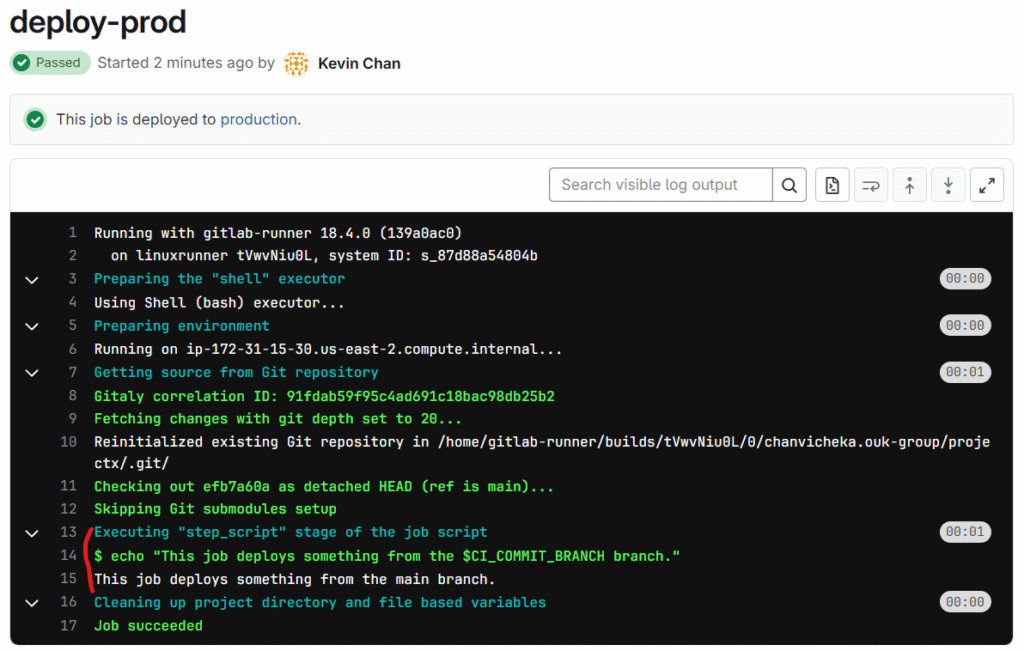
We can check our ci/cd pipeline jobs log as seen above and we saw that our script were executed successfully.
This concluded that we have pointed our project’s CI/CD pipeline runner to our self-managed runner on AWS EC2 cloud Amzon Linux successfully.
In addition, how do we check the status of our runner whether it is running or not?
our runner is actually a daemon. think of daemon like a windows service which we can check using service.msc but how do we check the status of daemon service in linux?
A Linux daemon service is a background process that runs continuously on a Linux system, typically without direct user interaction. Daemons are often used for system or network services — like web servers, database servers, or schedulers — and are managed using the systemd service manager in most modern Linux distributions.
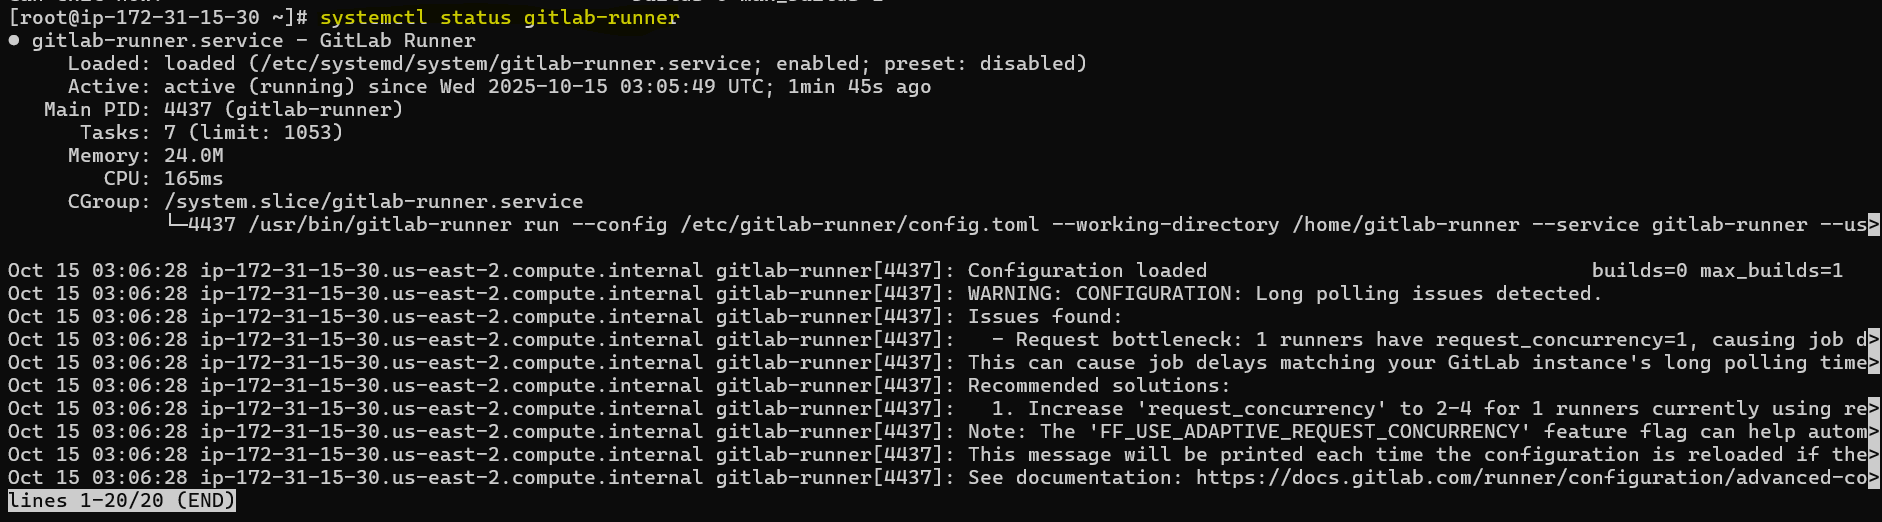
in centos family like Amazon linux distribution, we can check it using
sudo systemctl status <daemon_service_name>
e.g:sudo systemctl status gitlab-runner
to make gitlab-runner daemon service run automatically at start up we can execute command below:
sudo systemctl enable gitlab-runner
To start/stop it:
sudo systemctl start gitlab-runner
sudo systemctl stop gitlab-runner