Setup aws ec2 cloud amazon linux and install Apache HTTP WebServer (httpd)
Configure the handshake between GitLab’s CI/CD pipeline and Apache WebServer through ssh using private/public key
Give GitLab CI/CD pipeline instruction in .gitlab-ci.yml
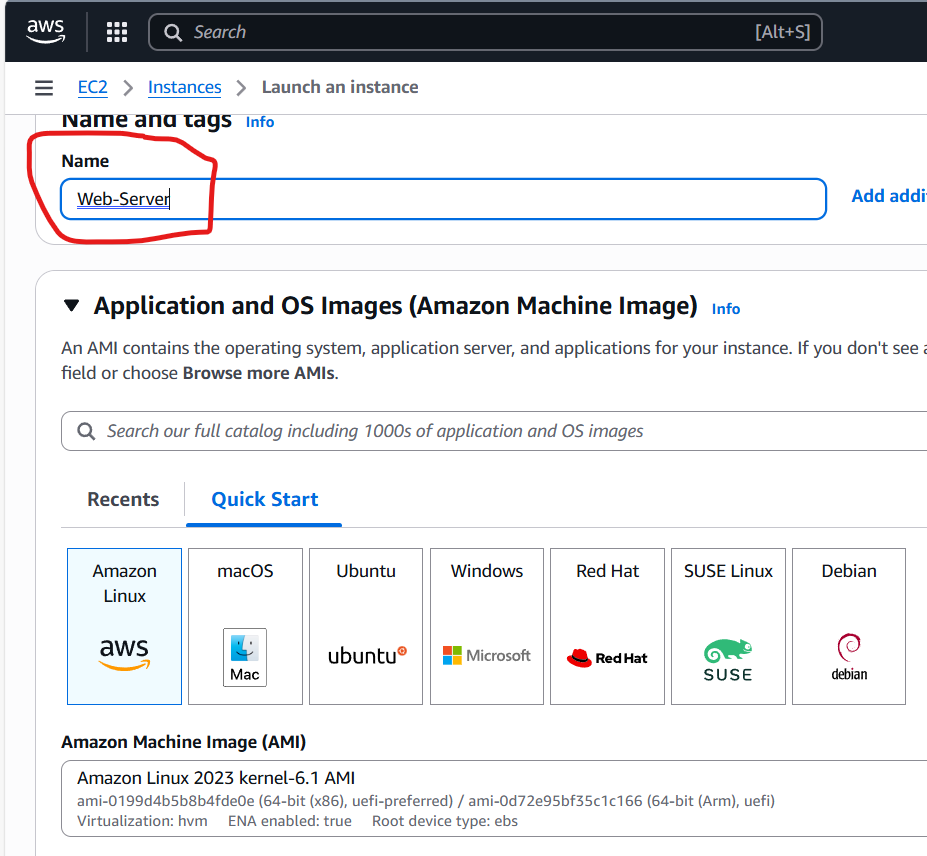
First, let setup our web server using aws ec2 cloud amazon linux instanceand then install Apache WebSever
Name: Web-Server
Choose Amazone Linux
Use my existing keypair
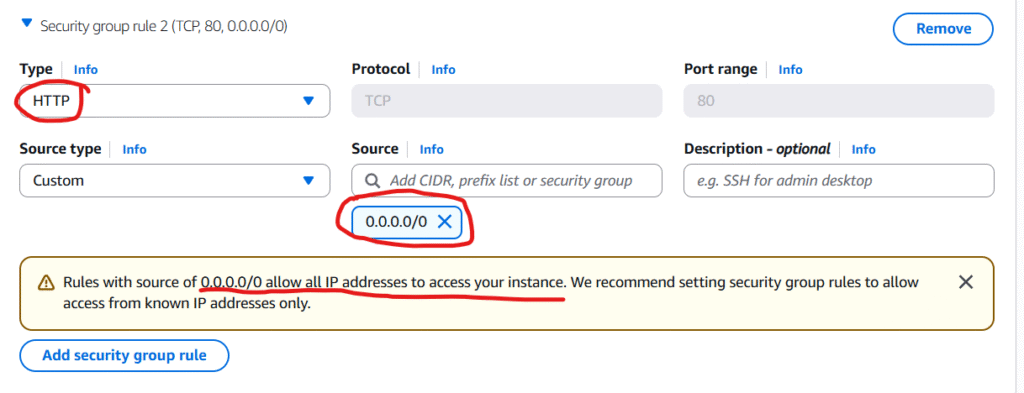
In Network settings section, we are going to click on Edit and Click Add security group rule
Note: for the simplicity of this post/demonstration, I choose http type (I know it is not secured) because if we choose https we have to configure and use tls for traffic encryption but that is not the intention of this post so I will go with http for simplicity’s sake.
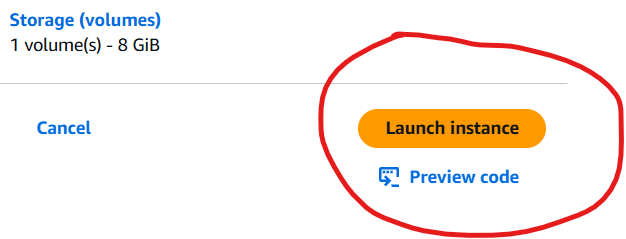
Go ahead and we click on Launch instance ec2
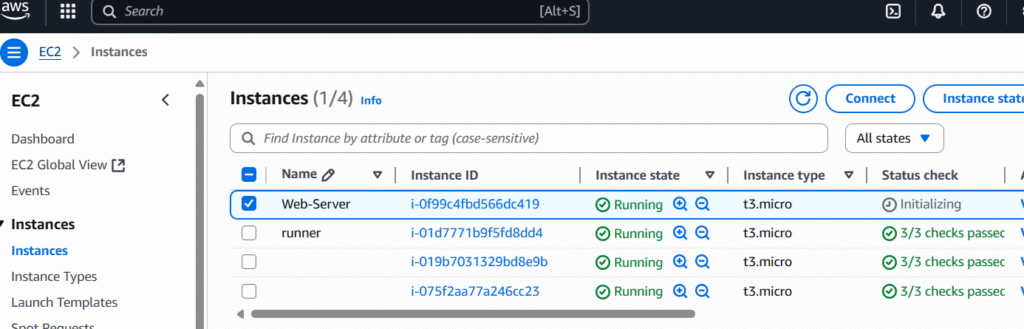
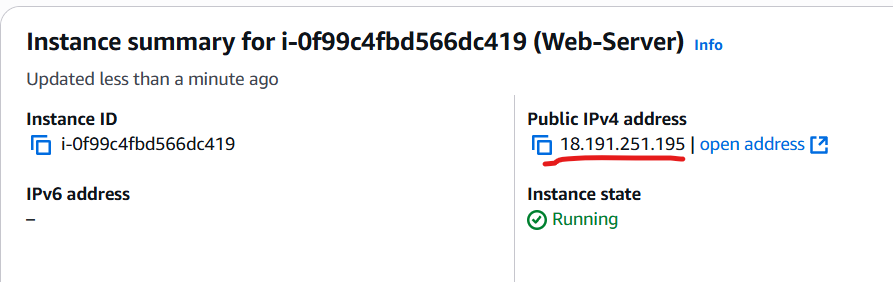
Ok our designated Web-server linux instance is running.
Note down its ip address above
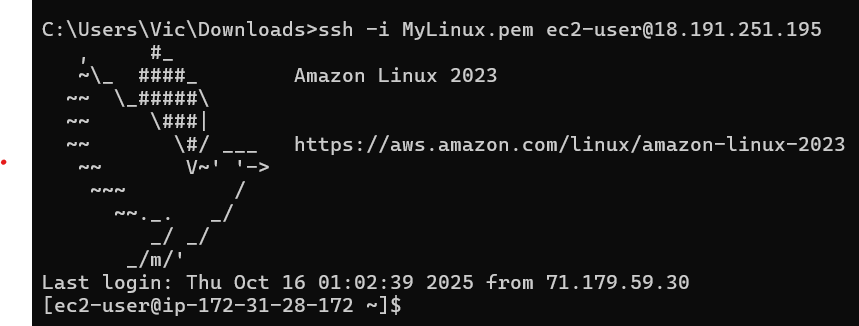
at our win machine, we will remote ssh to it using private key MyLinux.pem so we can then install our Apache web server there
we are connected. next, we will have to elevate ourselves to root with sudo -i so we can install the Apache web server
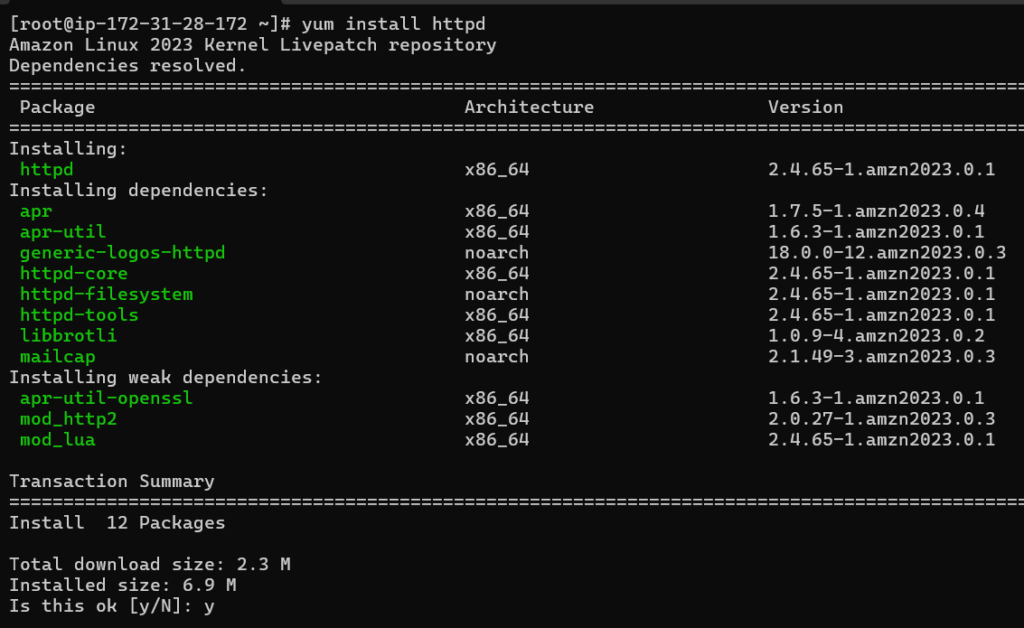
Next, we will yum install it where httpd is the Apache Web Server.
type y and enter to confirm the installation
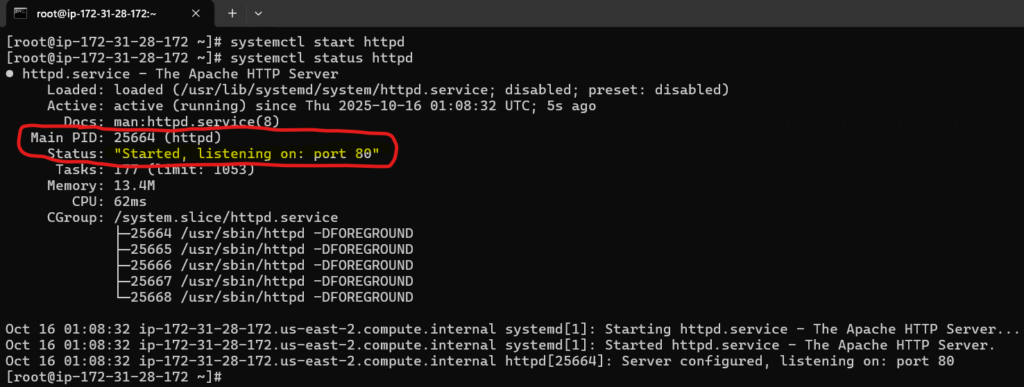
install completed and this looks good so let start and check the status of our Apache web server daemon service
systemctl start httpd
systemctl status httpd
Good, it started and running with pid 25664
we can check it in the task managers with ps aux | grep 25664
yes it is there running as daemon /usr/sbin/httpd -DFORGROUND
let makes it run at start up with systemctl enable httpd
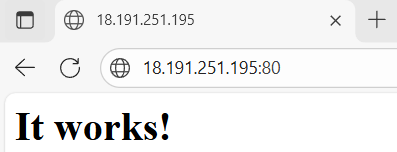
let check our web server through the browser client to make sure it is actually running as well and listing on port 80 that we have configured in the security group rule
By going to the browser and type our web server amazon linux public ip address (note we don’t have to specify its default 80) and yes it is running and listening on port 80 as expected
Second, we need to configure the handshake between our web server here and gitlab.
that is being said, we will do that through ssh where gitlab will use private key and our apache webserver would then use the mactching public key so gitlab can remotely deploy stuff to our apache web server. So let turn on public key authentication for our apache web server:
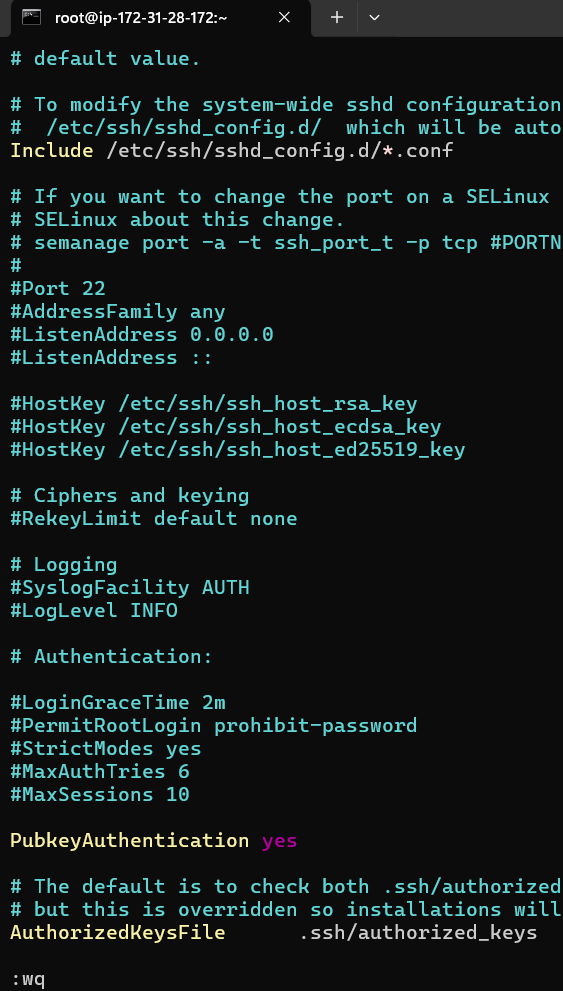
Enable Public Key Authentication in SSH Server
sudo vi /etc/ssh/sshd_config
scroll down and we will see that pubkey auth is commented out by default so we are going to uncomment it. press i for writing mode and remove #
press esc then type :wq to write and quit
since we made a change in its configuration file, we need to restart it so the change will be taken into account with systemctl restart httpd
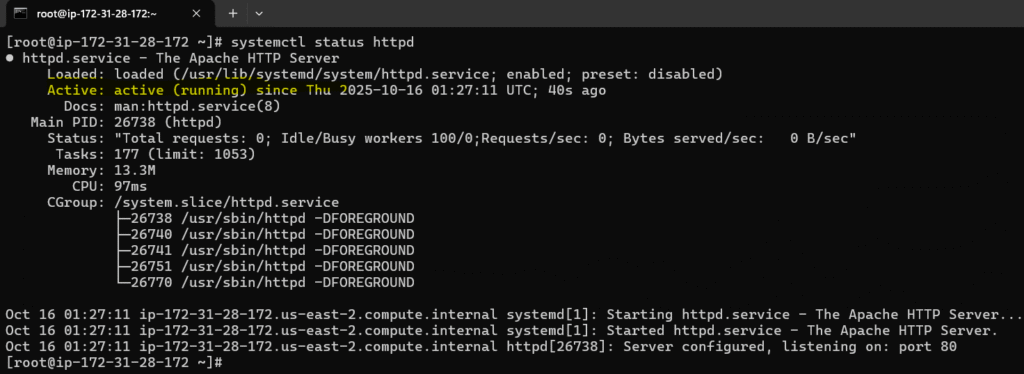
check its status: systemctl status httpd
Ok good it is running and taken into account our configuration change.
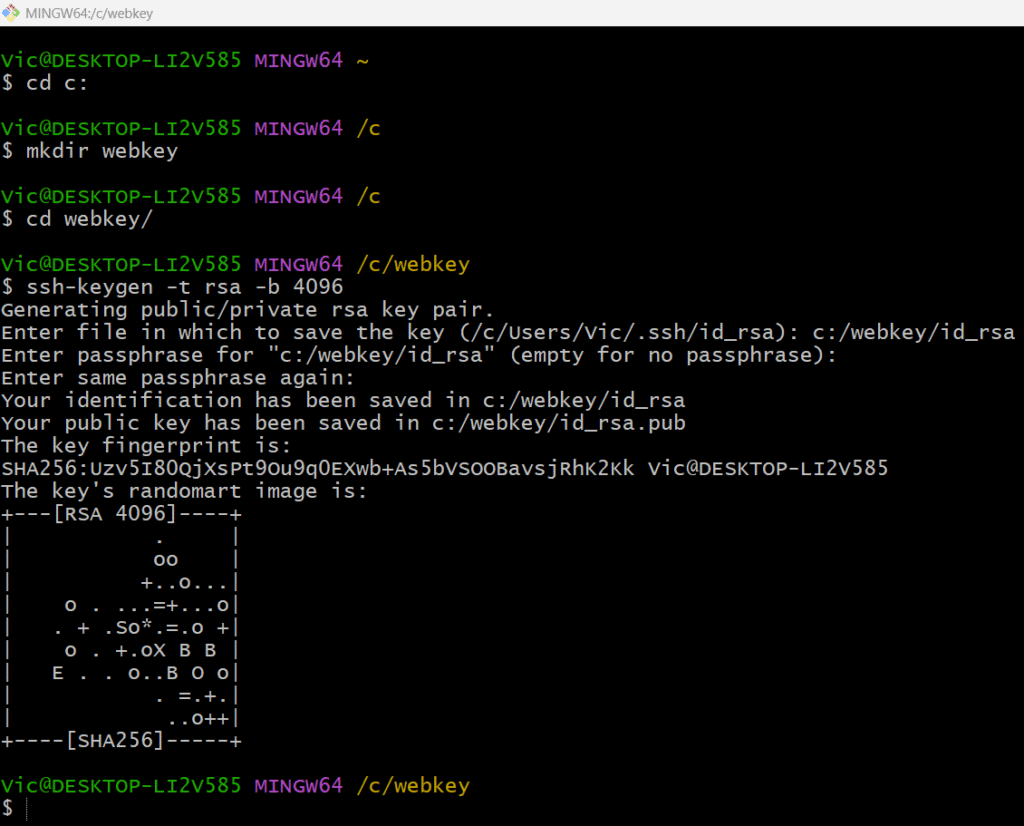
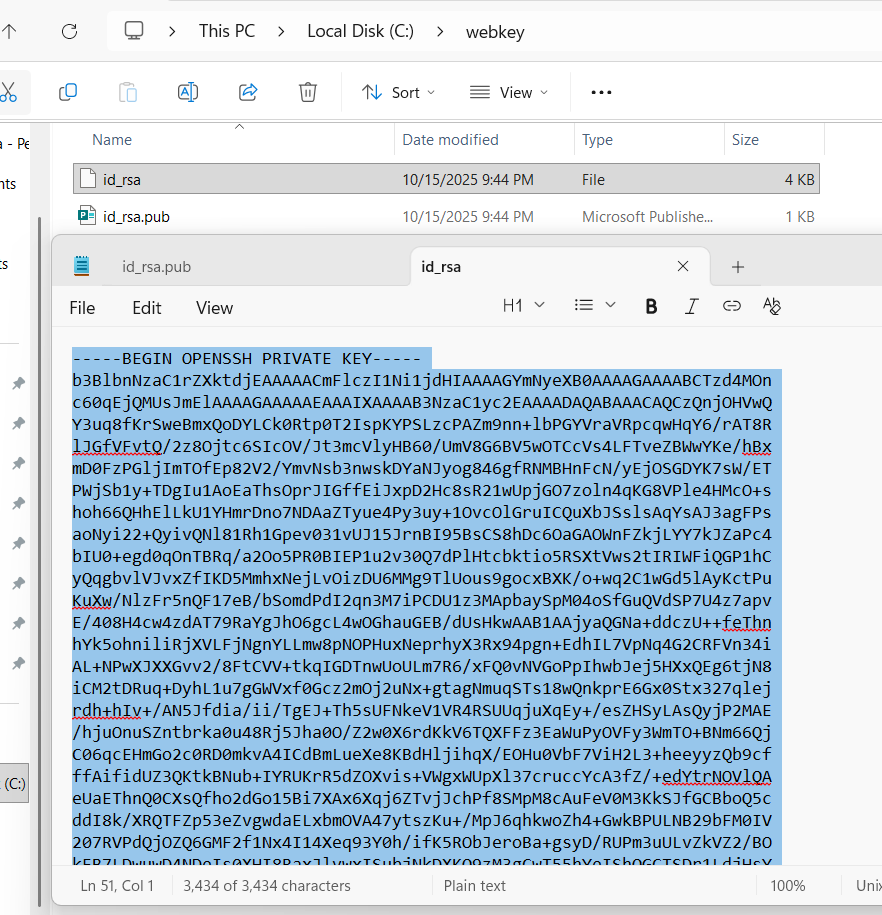
Next we will need to generate public/private key pair from our local repo which is windows
and save it at c:\webkey folder with ssh-keygen -t rsa -b 4096
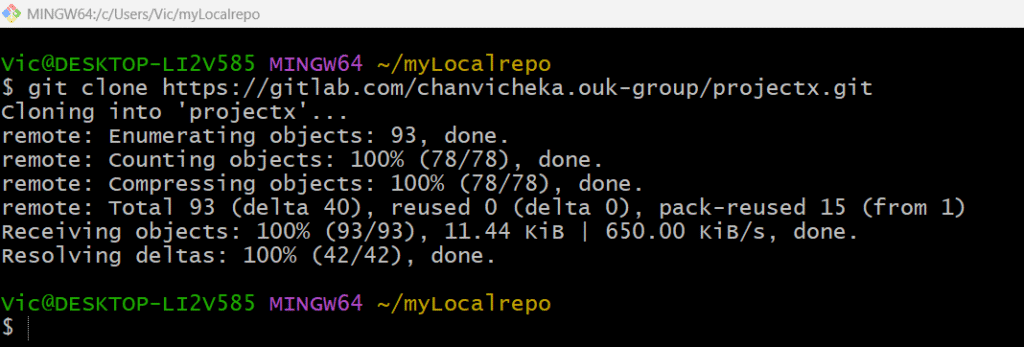
Next, getting my remote repo “projectX” to my local repo since I already have remote repo “projectX” at the GitLab so I will just clone it in my local directory
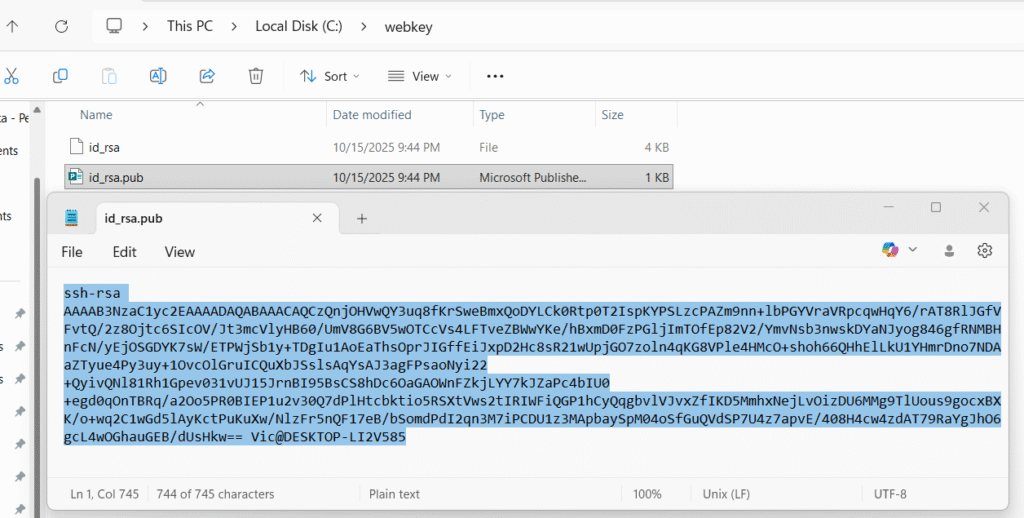
Next, copy our public key id_rsa.pub from our local repo id_rsa.pub and input it in our webserver’s public key aka “authorized_key”
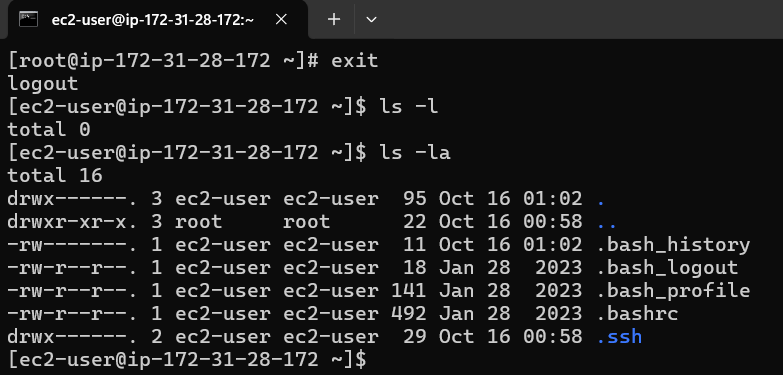
Logout from root and cd to the hidden folder .ssh
cd to the hidden .ssh and we will see authorized_keys file there
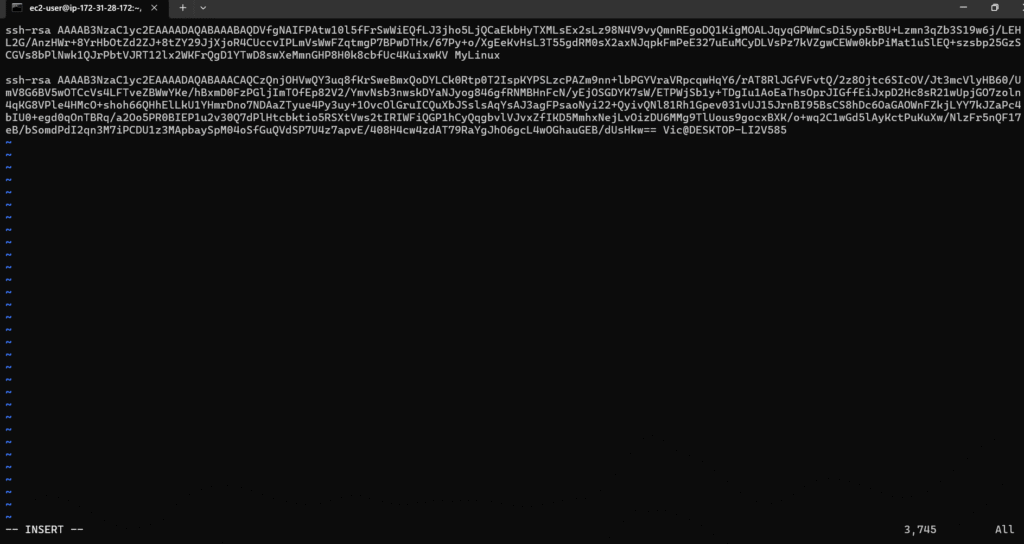
vi authozied_keys
press i for writing mode and then copy our public key from our windows local repo id_rsa.pub
and paste in this authorized_keys file and save it
press esc then :wq to write and quit vi
Good that concludes that we have configure public key in our designated webserver Apache.
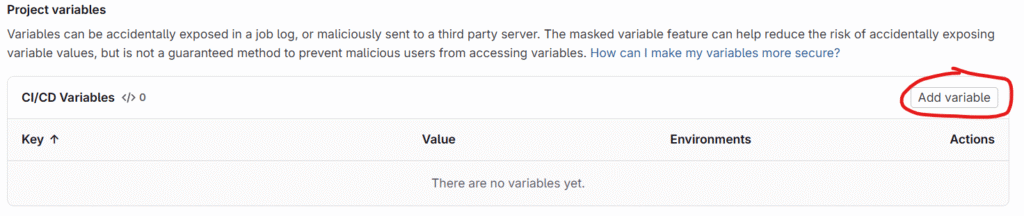
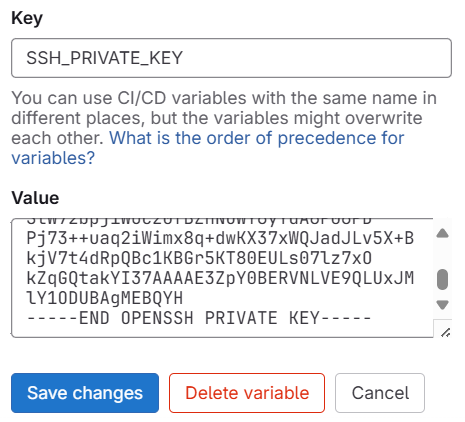
Next we will configure private key in our GitLab.
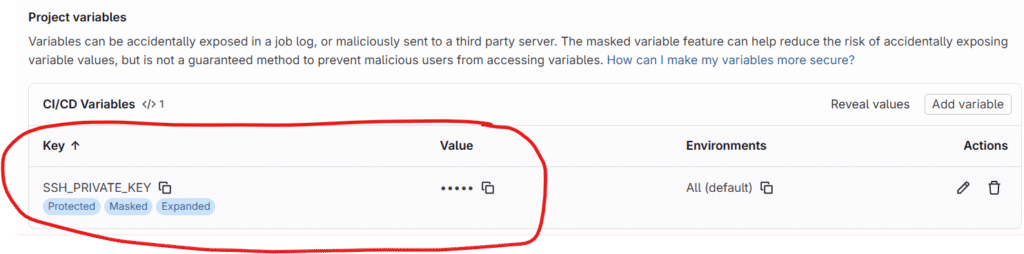
Project → Settings → CI/CD → Variables → Project variables and click on Add varaible
scroll down till you see below two value key/value pair
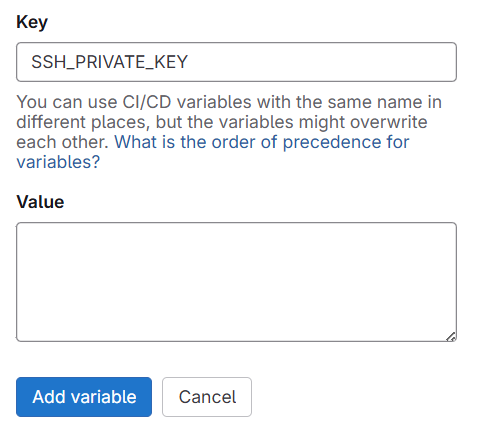
Give Key as SSH_PRIVATE_KEY and Value we will copy and paste the private key we generated from our local repo in windows PC
this concludes the handshake btw our GitLab’s CI/CD pipeline and AWS EC2 Linux Apache WebServer where CI/CD would use privatekey and the WebServer would use the matching public key.
Third, we will have to configure our .gitlab-ci.yml for set of instruction for ci/cd pipeline
image: node:latest
stages: - test - deploy
# ------------------------- # Test Stage # ------------------------- test-job: stage: test script: - npm install -g html-validator-cli - html-validator --file=index.html --verbose only: - main
First we tell gitlab that we want an image that have node js already installed as it has a dependency with html-validator-cli that we used in the test job on ubuntu runner.
2nd we only want two stage test and deploy
For test job, we will use ubuntu and install html-validator-cli and use it to valide our index.html for html syntax (note index.html I already created in the repo ProjectX)
For deploy job, we update our ubuntu and install openssh-client.
create .ssh at root home directory on Ubuntu
then write the privatekey value from our gitlab project variable SSH_PRIVATE_KEY to ~/.ssh/id_rsa on Ubuntu (~ mean home directory and in this case the home of the root user)
Finally securely copied index.html from Ubuntu over the network to our designated AWS ec2 cloud Apache Webserver at ec2-user@18.191.251.195 and put it in directory /var/www/html which is the main directory of our Apache webserver : authentication with ~/.ssh/id_rsa which is the private key value written from $SSH_PRIVATE_KEY variable.
only: - main means: “Run this job only when the pipeline is triggered from the main branch.”
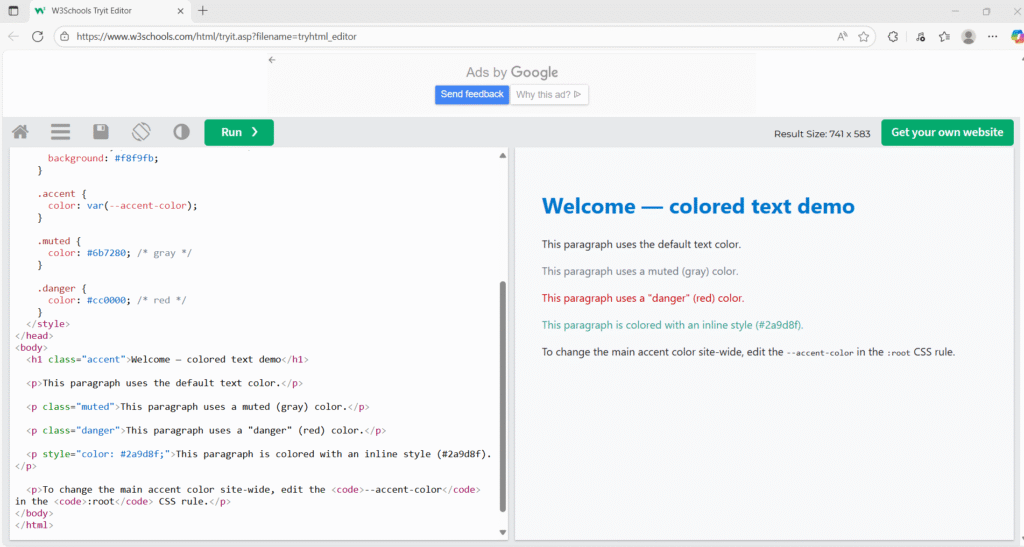
Our index.html from GitLab should look like this after GitLab CI/CD validate its html syntax and deploy it to the target webserver at AWS EC2.
<!doctype html>
<html lang="en">
<head>
  <meta charset="utf-8" />
  <meta name="viewport" content="width=device-width,initial-scale=1" />
  <title>Colored Text Example</title>
  <style>
    :root {
      --accent-color: #0077cc; /* change this to update the accent color site-wide */
    }

    body {
      font-family: system-ui, -apple-system, "Segoe UI", Roboto, "Helvetica Neue", Arial;
      line-height: 1.5;
      padding: 2rem;
      color: #222; /* default text color */
      background: #f8f9fb;
    }

    .accent {
      color: var(--accent-color);
    }

    .muted {
      color: #6b7280; /* gray */
    }

    .danger {
      color: #cc0000; /* red */
    }
  </style>
</head>
<body>
  <h1 class="accent">Welcome — colored text demo</h1>

  <p>This paragraph uses the default text color.</p>

  <p class="muted">This paragraph uses a muted (gray) color.</p>

  <p class="danger">This paragraph uses a "danger" (red) color.</p>

  <p style="color: #2a9d8f;">This paragraph is colored with an inline style (#2a9d8f).</p>

  <p>To change the main accent color site-wide, edit the <code>--accent-color</code> in the <code>:root</code> CSS rule.</p>
</body>
</html>
our index.html
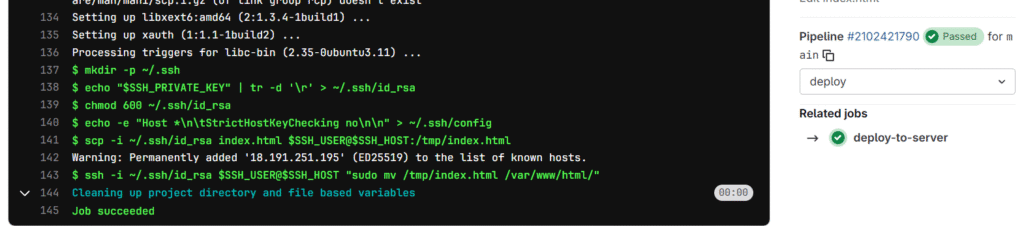
Now let check our CI/CD pipeline deploy stag’s logging.
It runs successfully and deployed index.html from remote repo in GitLab to the target AWS EC2 cloud Apache Web server at default directory /var/www/html
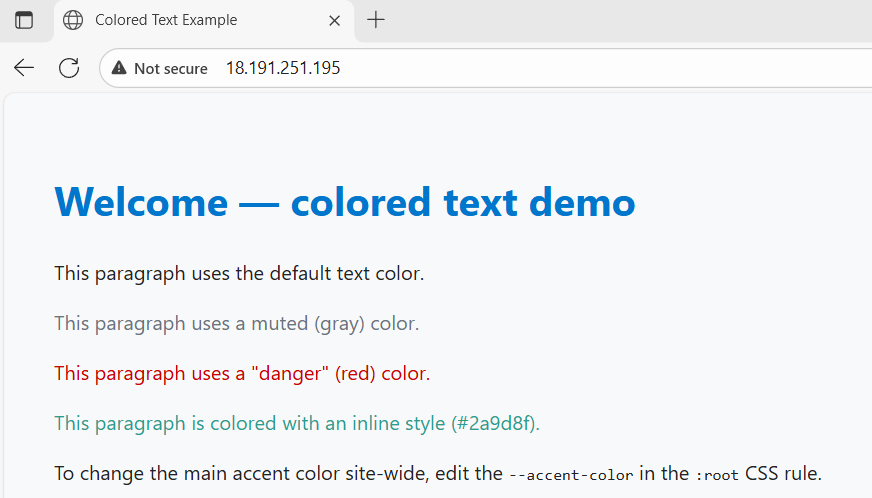
so if we go to the browser and put in our web server public ip, the web server should render our index.html. (note the Not Secure because we use http protocol instead of https as using https requires TLS configure which is not intended for this simplicity of this post)
Voila works as expected.
This conclude that our CI/CD deploy stage is able to deploy work to targeted AWS EC2 cloud Apache web server on Amazon Linux successfully.