Connecting local git repo with remote GitHub repo in AWS Linux instance

First of all, go to Amazon AWS and create our free AWS account and saved its private key.

Once we login to our aws console, we can search ec2 and since I have visited it before here I will just click on EC2
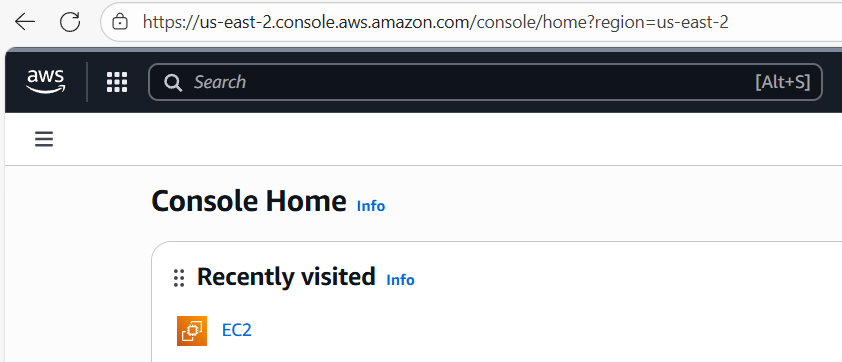
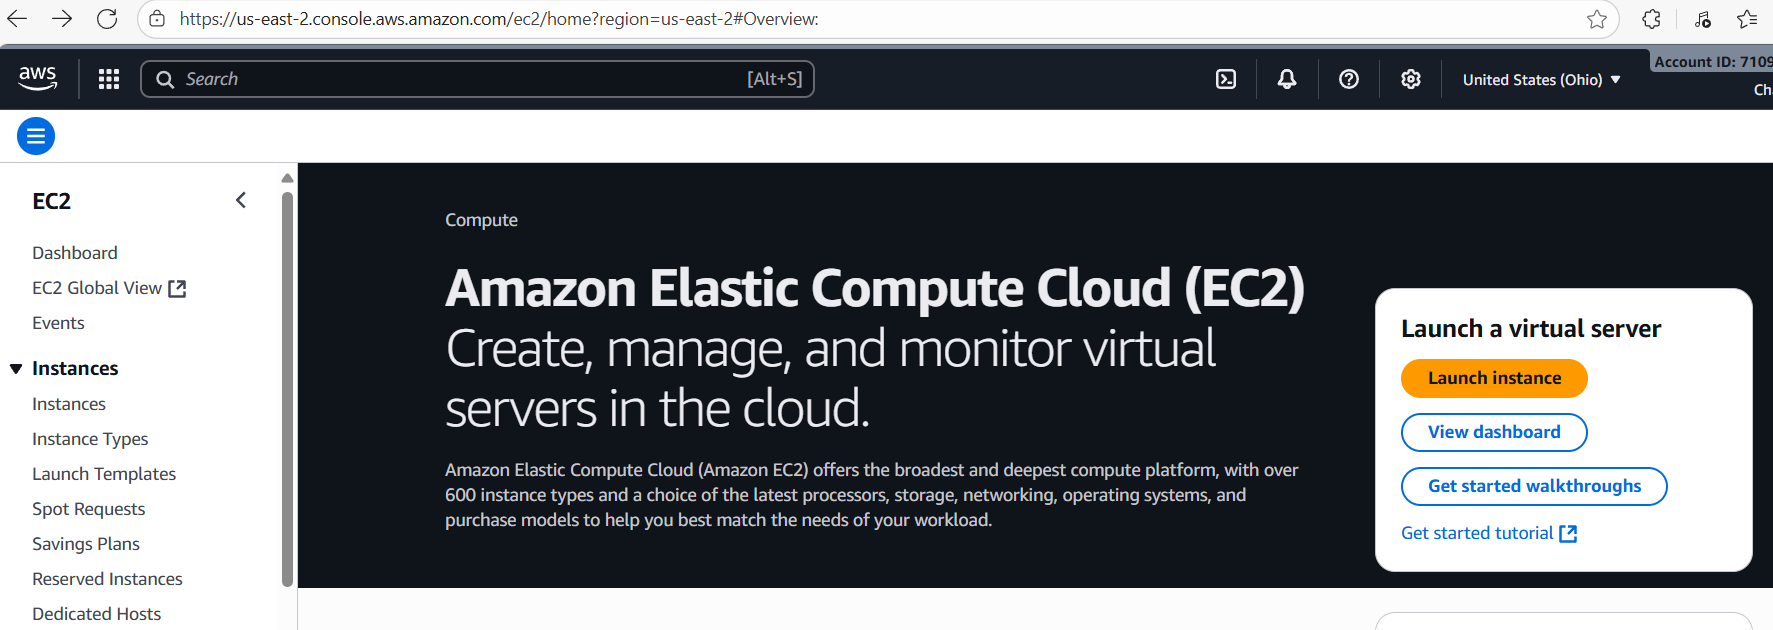
Then click on Launch instance
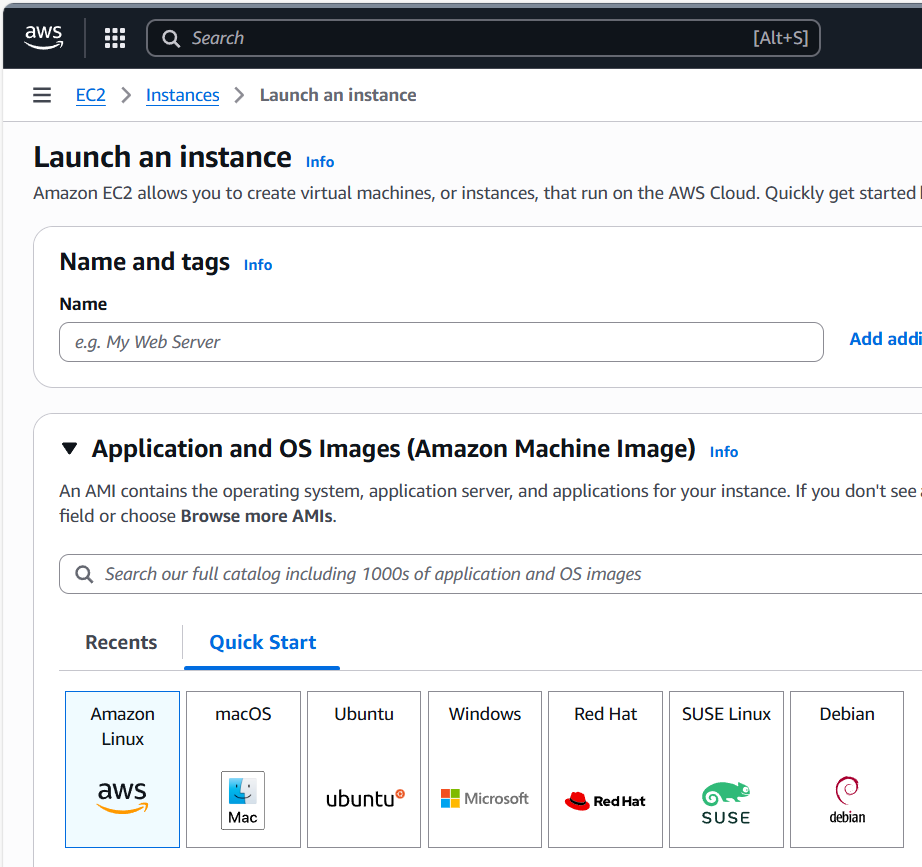
We are going to use Amazon Linux
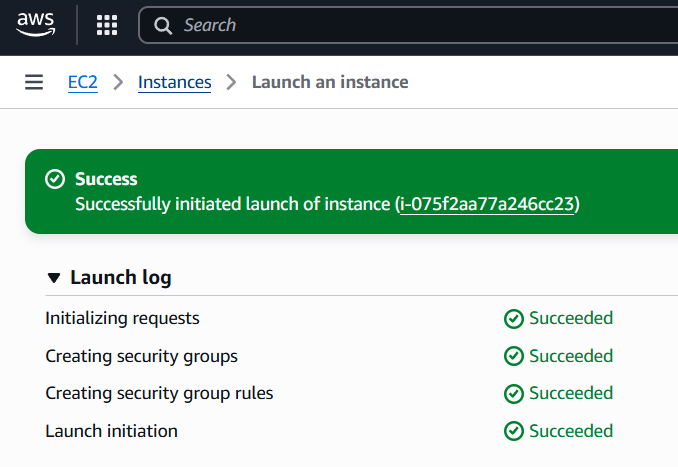
Ok it launched successfully. Then click on its instance name guid as seen above “i-075f2…”
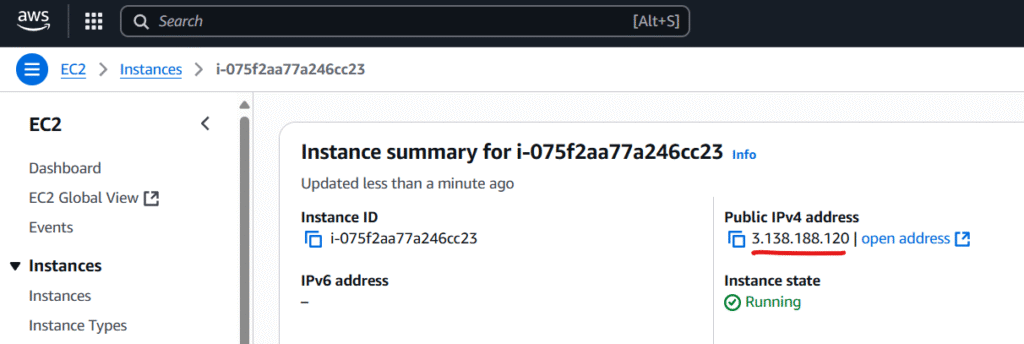
Note down the ip address since we are going to connect to it using our saved private key. we will use our private key “MyLinux.pem” to connect to it which matched with its public key at Amazon AWS server.

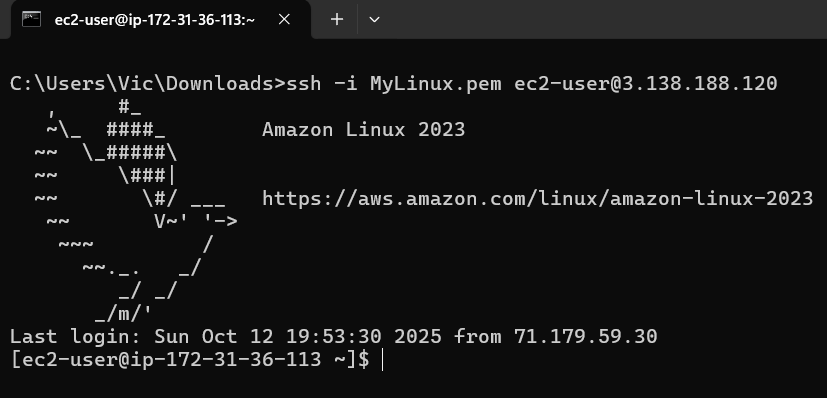
At Command prompt execute:

We are now connected with our Amazon AWS EC2 instance.

Note the user name is always ec2-user for amazon linux OS.

I am going to execute Linux update with yum update command:

but we do not have the privilege to do it so we will have to elevate ourself to root with following command sudo -i

We are now root so we should be able to upgrade our Linux to its latest repo with

yum update
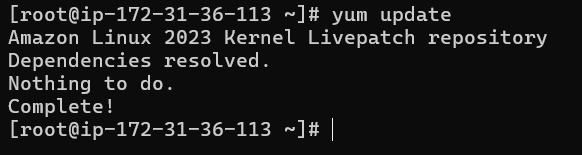
That looks good. our AWS linux instance is update to date with its Kernel repo.
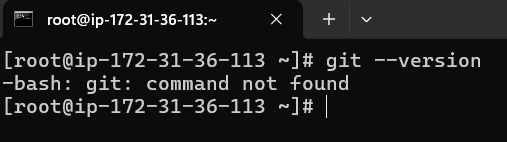
git is not installed yet so we will have to install it with yum install git

yum install git
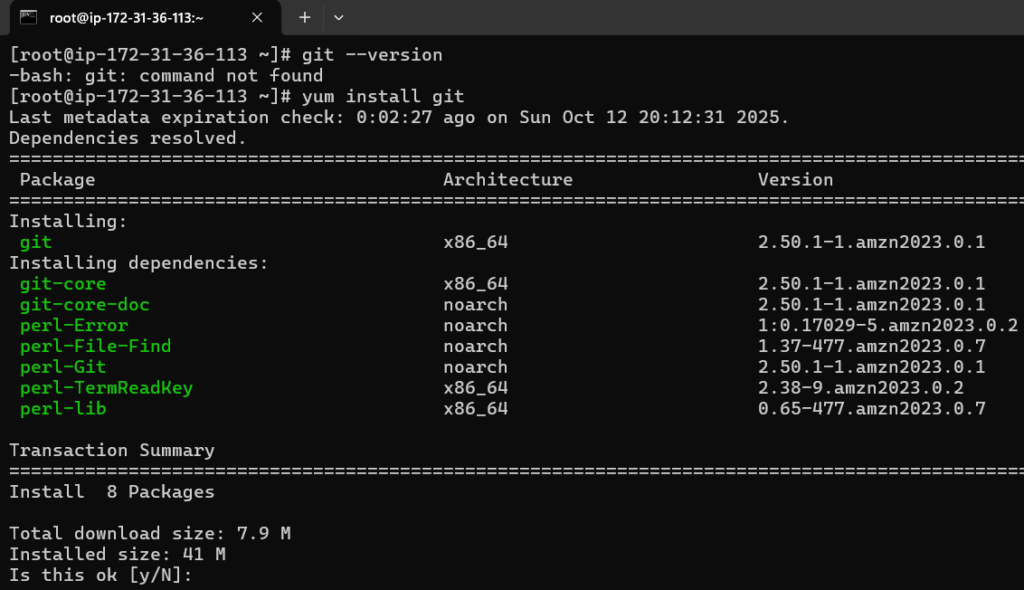
type y to proceed
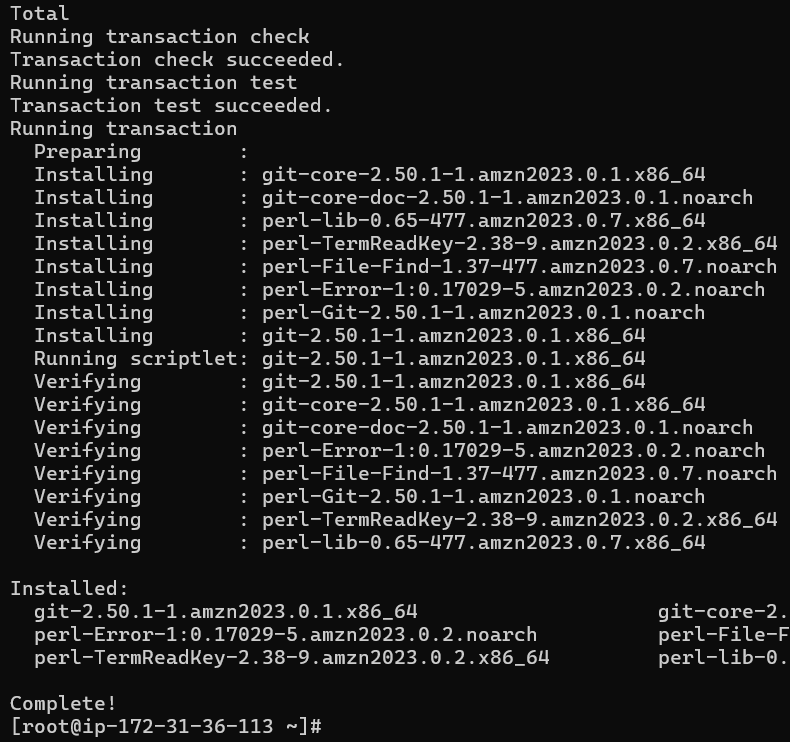
Git install is completed

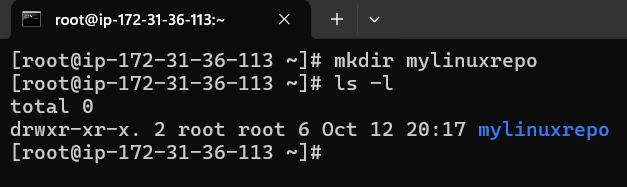
Next we will create a directory called mylinuxrepo

Check if it is created with ls -l
cd to our mylinuxrepo directory and issue git status

it is not a git local repo yet so we will have to convert it to local git reposity with git init
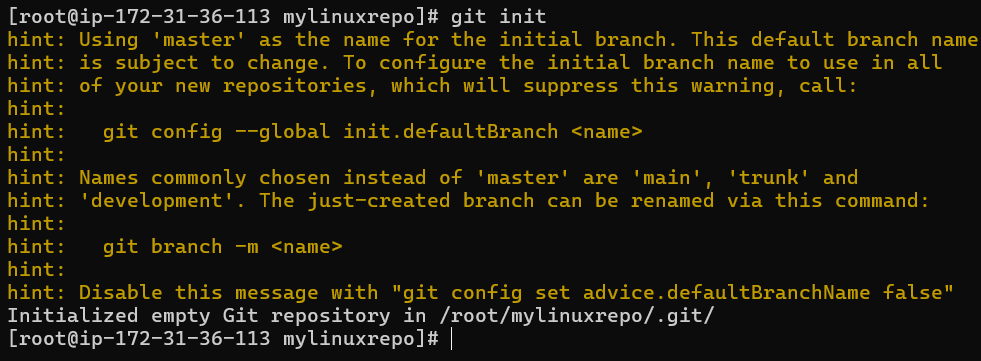
Now check agian with git status
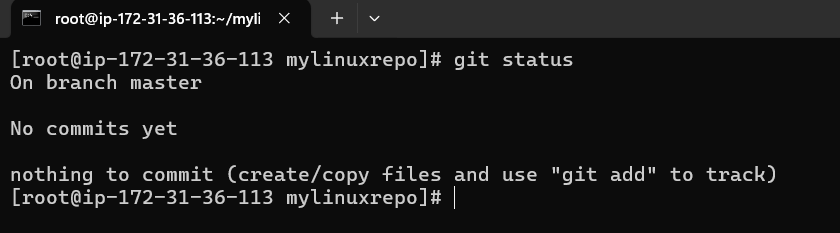
Ok now it is a local git repo. let create a bash script called addcal.py using vi editor

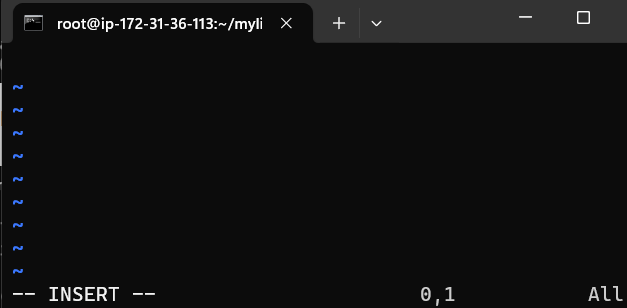
Press i for insertion mode (writing mode)
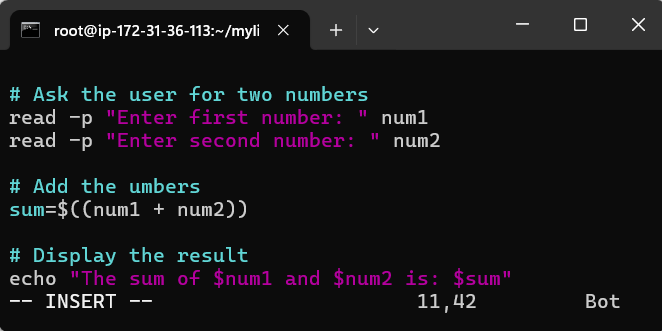
press esc (for mode) and type :wq (w mean write and q mean quit) to write and quit
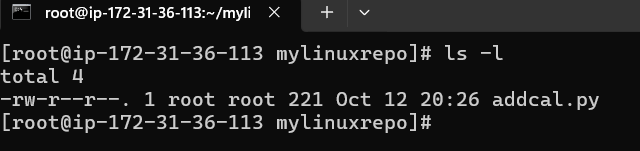
addcal.py is created and let execute it with bash addcal.py
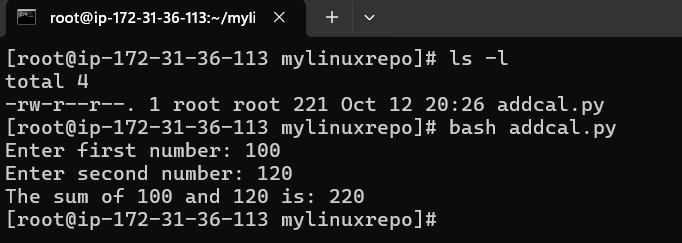
Good our bash script is working.

Note: Also my bad it is not a python script and accidentially naming it .py but it does not matter the name.

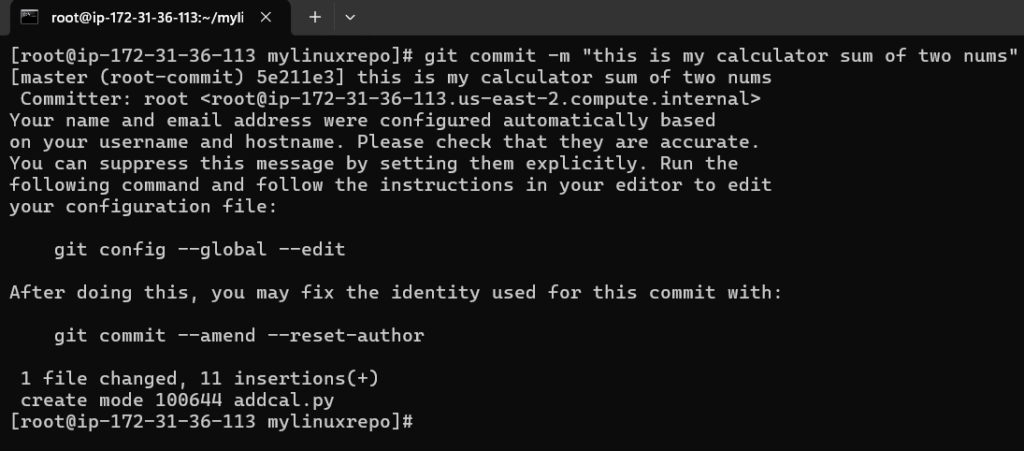
Good, next we will stage it and commit it
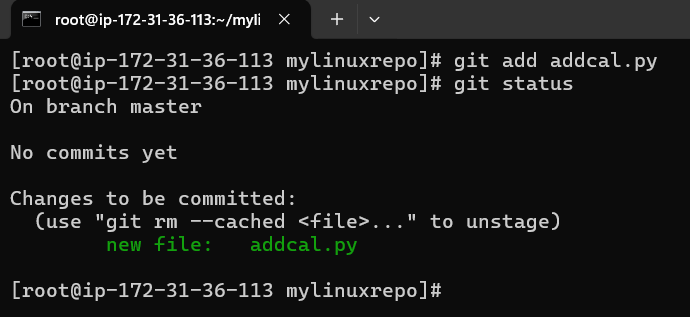
Note that I forgot to set the git config –global user.name and git config –global user.email

you can easily configure this e.g:

git config –global user.name myuserame

git config –global user.email myusername@gmail.com
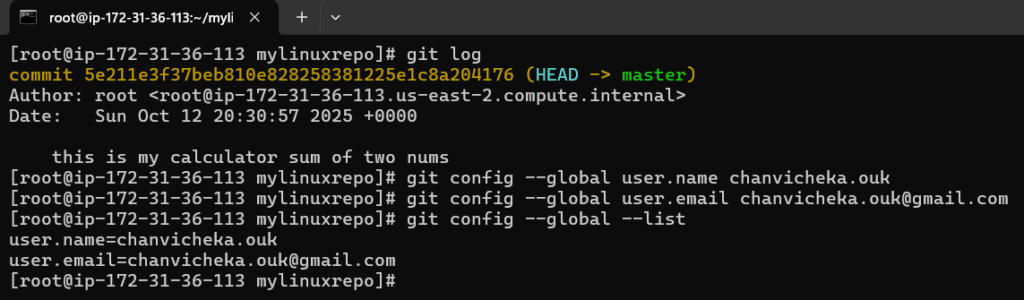
Next, we will have to link it to the central distributed remote repo aka GitHub

Note, also authentication in linux with username, password would not work and we would have to use personal access token.
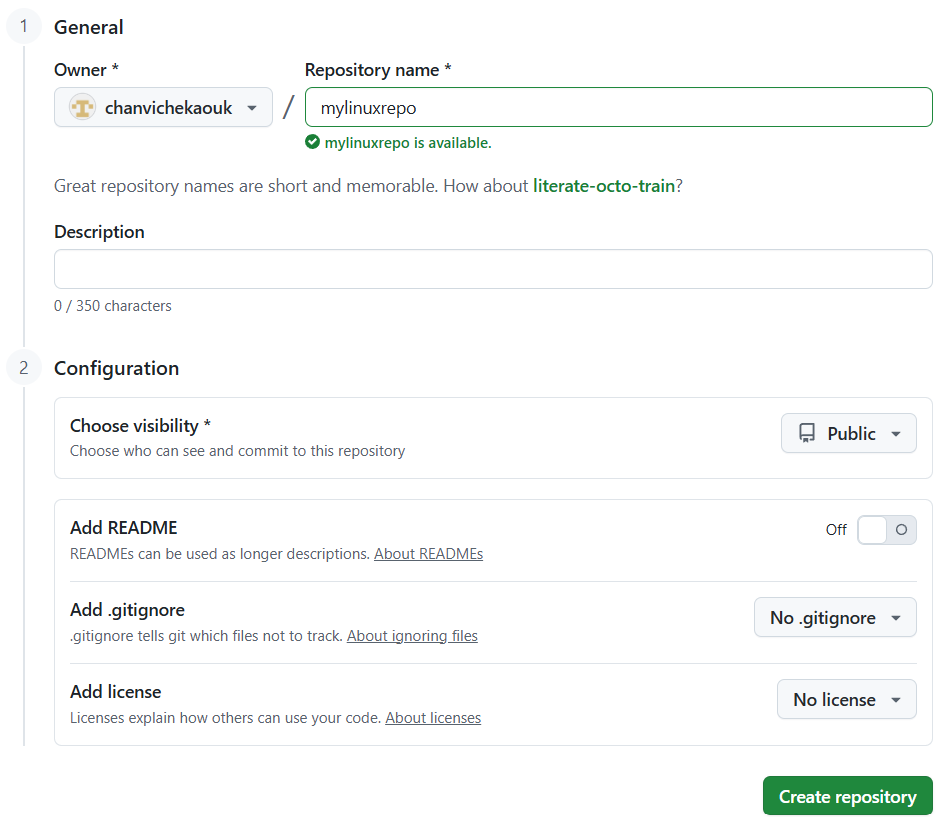
Ok now connect our local repo to remote repo in GitHub

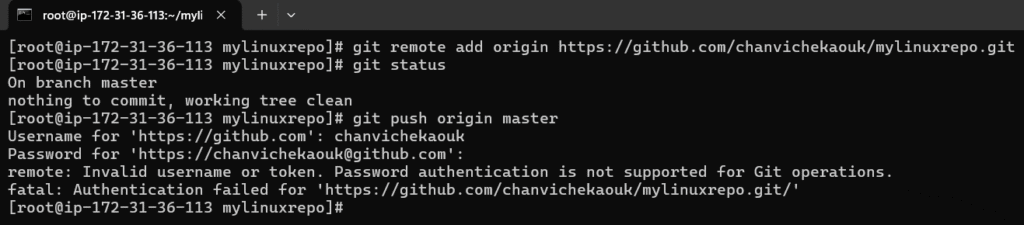
Here when authentication through https with username/password would never work here in Linux so we will have to use token

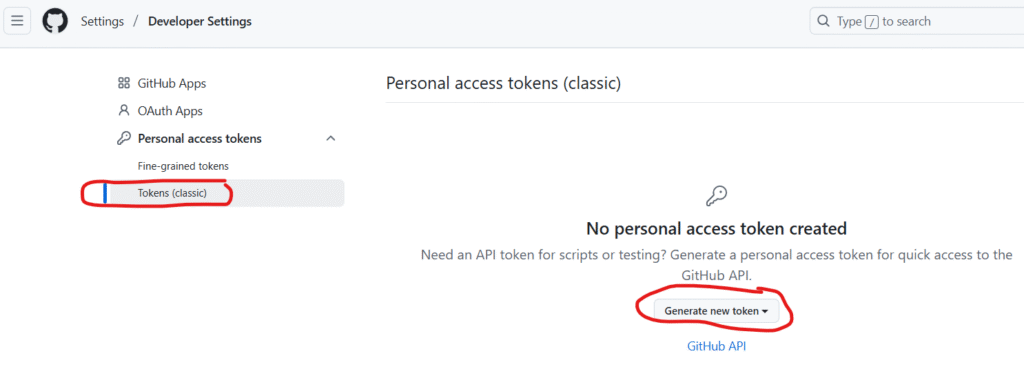
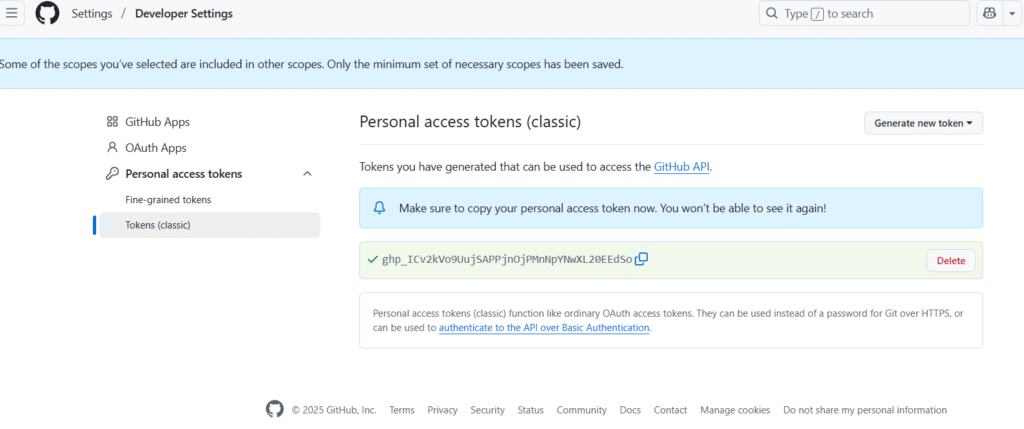
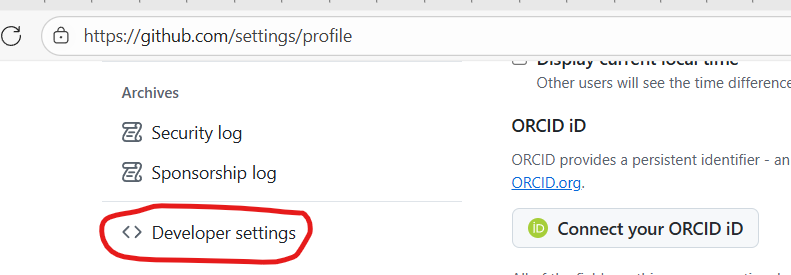
Go to your GitHub profile and setting and click on Developer settings
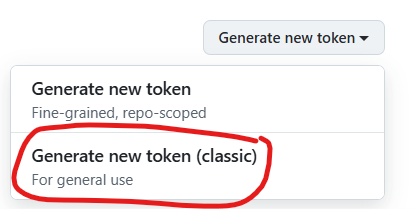
Click on Token (classic) and click Generate a new token
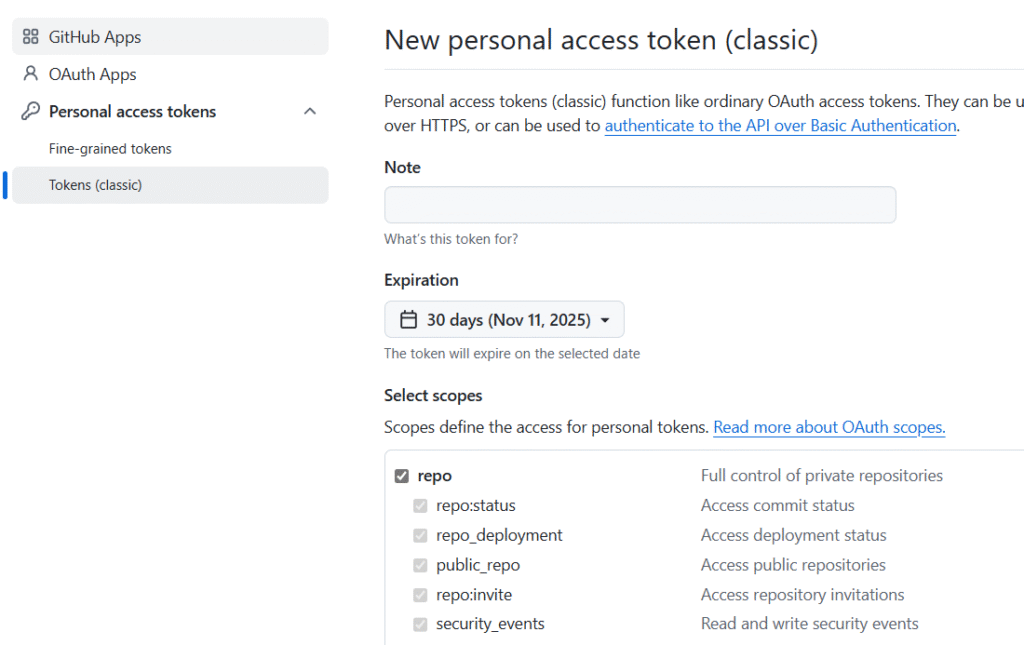
Checked repo and Click Generate token button at the buttom
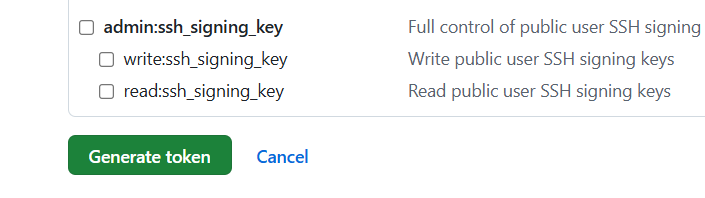
Copy the token and saved it to somewhere secured

Now let try to add our local git repo to remote git hub repo:
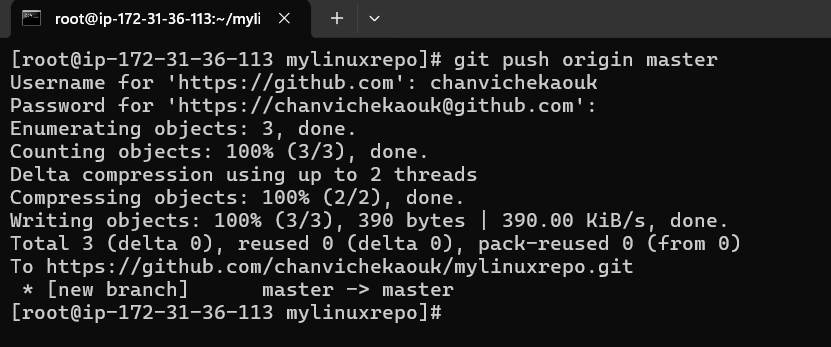
When prompt with Password, past the copied token and here we now successfully link and push our local change in our local git repo to the remote github repo:
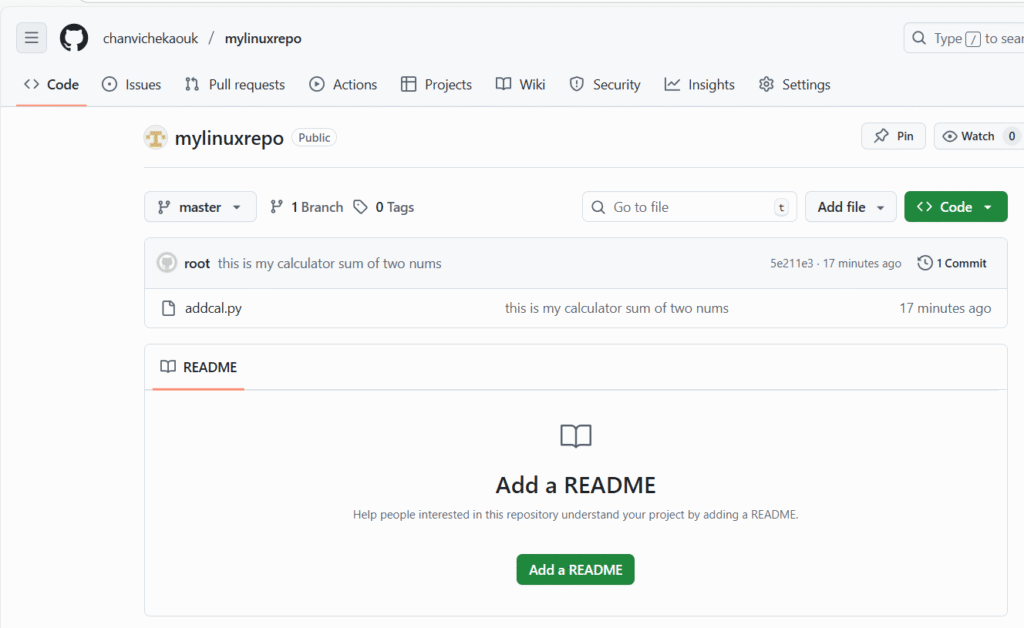
Note: I have to delete this token after this post 🙂
Dispose vs Finalizer

Both Dispose and Finalizer are used to clear resources. Finalizer is usually used to clear unmanaged resources like file handler, database connection handler, network socket handler etc and usually called by GC (CLR garbage collector) and it usually has performance issue since GC is usually forced to run whereas Dispose is usually used to clear both unmanaged resources and managed resources. Dispose is called manually by the developer so it does not have any performance issue like the Finalizer. To implement Dispose, developer has to implement the IDisposable interface and implement Dispose method.

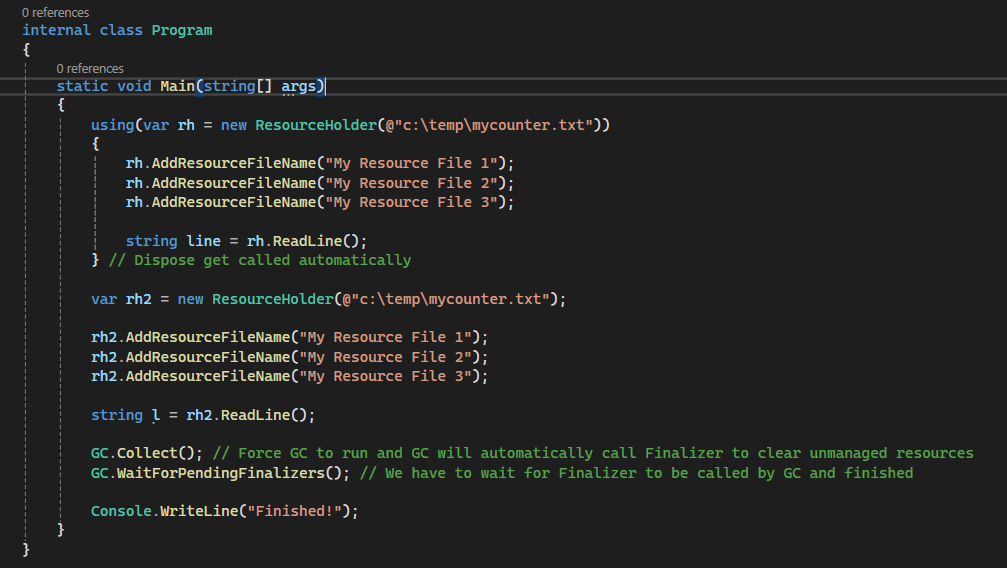
Here is the example to illustrate them in C# console. I used console app so it can be easily demonstrated.

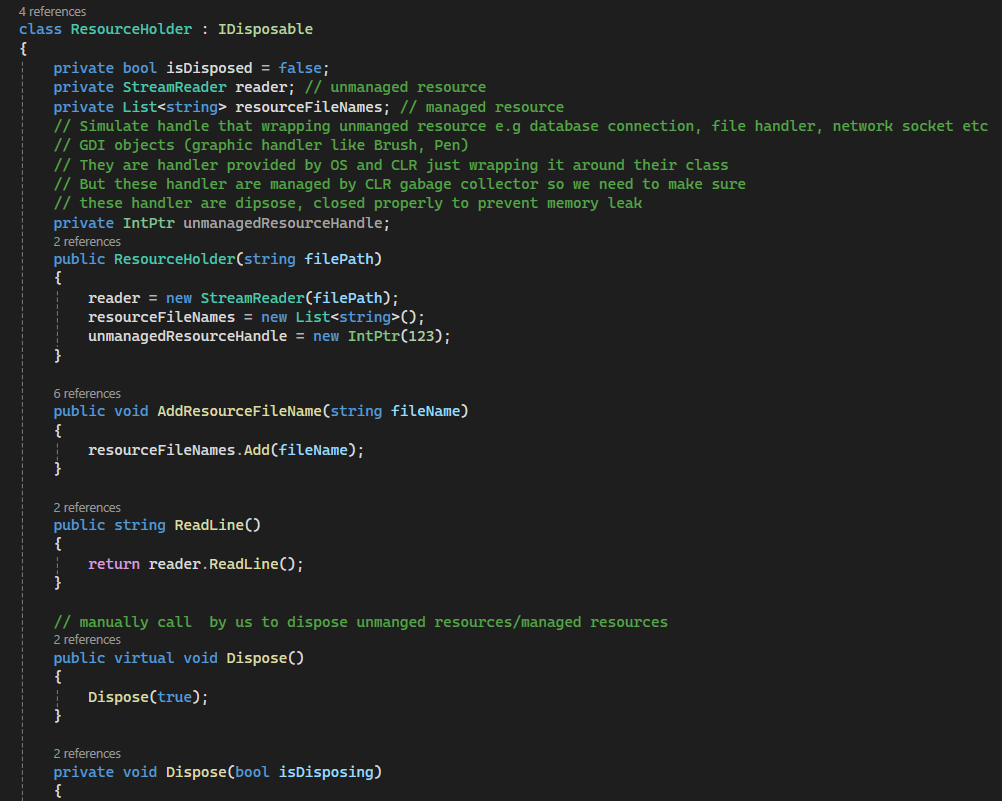
Above, I have a class ResourceHolder that implemented IDisposable interface

  • In the constructor, I initialized the streamReader (file handler), collection List object , and a pointer that is used to simulate a pointer to the handler of unmanaged resource.
  • Two public methods that one is for adding a list of file name and Read line by the stream reader
  • I also have to implement void Dispose(). I made it virtual so any derived class can implement their own Dispose method.
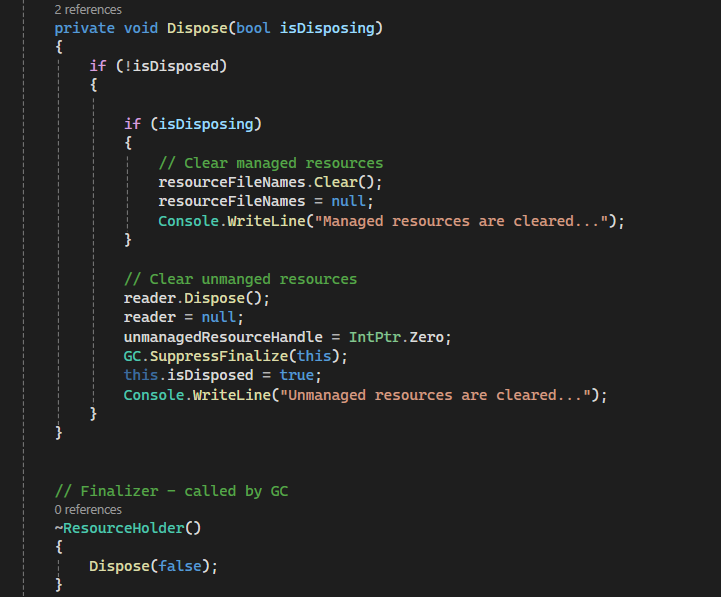
  • I have a private Dispose(bool isDisposing). isDisposing is used as a flag to indicate whether we want to clear managed resource as well. it is useful when we have to call it from the Finalizer.
  • We have a flag isDisposed to check if unmanaged resources have already been cleared.
  • In Finalizer() method ~ClassName(): we call our private Dispose(false) with isDisposing flage = false so to indicate that we only want to clear unmanaged resource.
  • In our main program, we instantiate first object of ResourceHolder rh with using {…} which the compiler knows that it will have to call Dispose method automatically at the end curly bracket.
  • We also instantiate 2nd object of ResourceHolder rh2 but this time we will use finalizer so we will have to force GC to run by calling GC.Collect and wait for it to finish before ending our demo program with GC. WaitForPendingFinalizers();

Sample source code of this demo can be found at my GitHub: https://tinyurl.com/2e33d9rz

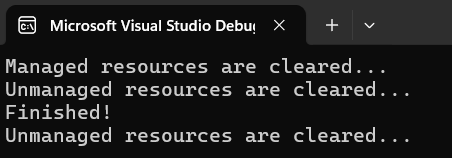
Sample output from this demo program:

Utilizing PlugIn (Library) through C# reflection

First, what is reflection?

reflection is one of the C# .net framework powerful feature which allows application to inspect and interact with metadata of an assemblies like properties, method, type, and assembly at run time.

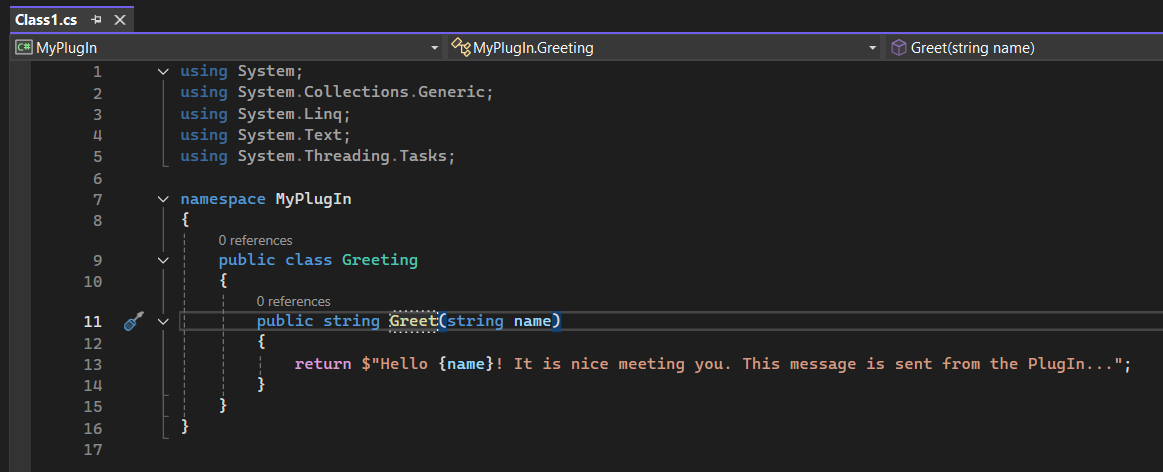
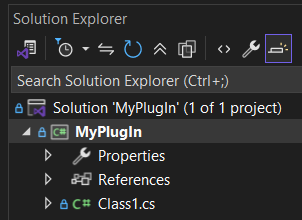
First, we will create a simple plugIn called “MyPlugIn” which is just a DLL library.

It has one function named Greet(name) that takes string value name as an argument and will return a greeting string as seen below

Source at my GitHub: https://tinyurl.com/bddee3ww

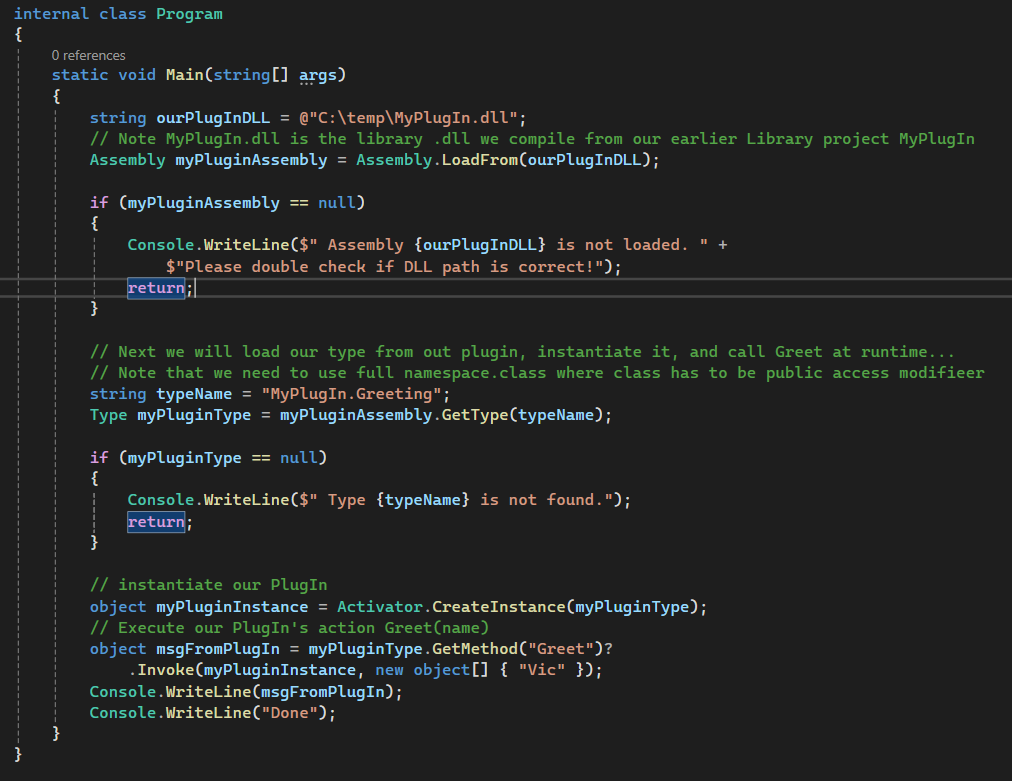
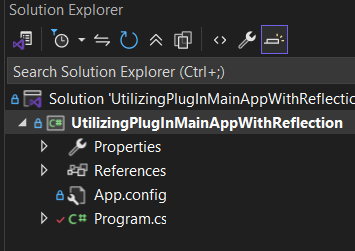
Next, we will create a sample console application that will load this plugin dll which I will store it at c:\temp\MyPlugIn.dll and will instantiate its type and execute its Greet(name) function from the PlugIn at run-time.

Source at my GitHub: https://tinyurl.com/3fuh2tcs

Ouput:

This demonstrates just how powerful reflection can be. Throughout my professional career, we’ve relied on reflection extensively in our enterprise applications. I recall a situation where I needed to use a method from an assembly that wasn’t publicly exposed—it was a private method. You might wonder, how did I even know this private method existed? I used a decompiler tool like jetbrains decompiler to inspect the DLL, traced the stack calls, and discovered a method that could assist with the project I was working on. Although it was inaccessible due to its private access modifier, reflection allowed me to invoke this method disregard its access modified and complete my work successfully.

How can we stop an asynchronous long -running operation task?

We can use CancellationToken and pass it in the async long-running method and in the async method, we check the token for a cancel request and if one is requested we cancel the task.

e.g

async Task DoWorkAsync(CancellationToken token)
{
for (int i = 0; i < 100; i++)
{
token.ThrowIfCancellationRequested(); // stop if cancelled
await Task.Delay(1000); // simulate work
}
}

in the calling code:
--------------------

var cts = new CancellationTokenSource();
var task = DoWorkAsync(cts.token);

// Cancel after 5 seconds
cts.CancelAfter(5000);

try
{
await task;
}
catch(OperationCanceledException)
{
Console.WriteLine("Task was canceled!");
}

Example: Reading HTTP response with cancellation

using System;
using System.Net.Http;
using System.Threading;
using System.Threading.Tasks;

class Program
{
static async Task Main()
{
var cts = new CancellationTokenSource();
cts.CancelAfter(3000); // cancel after 3 seconds

using var httpClient = new HttpClient();
try
{
using var response = await httpClient.GetAsync(
"https://example.com/largefile",
HttpCompletionOption.ResponseHeadersRead,
cts.Token); // pass the cancellation token

using var stream = await response.Content.ReadAsStreamAsync(cts.Token);

byte[] buffer = new byte[8192];
int bytesRead;

while ((bytesRead = await stream.ReadAsync(buffer, 0, buffer.Length, cts.Token)) > 0)
{
// Process bytes (simulate work)
Console.WriteLine($"Read {bytesRead} bytes...");
}

Console.WriteLine("Download complete!");
}
catch (OperationCanceledException)
{
Console.WriteLine("Download was canceled!");
}
catch (Exception ex)
{
Console.WriteLine($"Error: {ex.Message}");
}
}
}

How Asynchronous Concurrency exceptions are handled

With Task.WhenAll, it allows Async Tasks to run simultaneously but how do we handle each task’s exception.

We will try catch it like normally do with synchronous programming. When each task throw exception it is stored in the AggregateException object which has an InnerExceptions, a ReadOnlyCollection<Exception> that contains the list of exceptions that each task thrown.

We can try catch and loop through its InnerExceptions collection to get each of Task’s exception:

Task t1 = Task.Run(() => throw new InvalidOperationException("Task 1 failed"));
Task t2 = Task.Run(() => throw new ArgumentException("Task 2 failed"));

Task allTasks = Task.WhenAll(t1, t2);

try
{
await allTasks; // await all tasks
}
catch
{
// Inspect all exceptions from allTasks
if (allTasks.Exception != null)
{
foreach (var ex in allTasks.Exception.InnerExceptions)
{
Console.WriteLine(ex.Message);
}
}
}

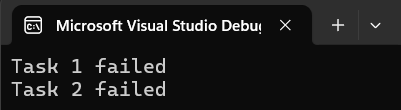
Info: allTasks.Exception is an object of AggregateException Type.

Output:

Parallelism vs Asynchronous Concurrency

  • Asynchronous concurrency: multiple tasks are in progress at the same time, often waiting on I/O (like HTTP requests, file reads). this can be done using Task.WhenAll(task1, task2, .., taskn). Task.WhenAll is great for asynchronous concurrency (I/O bound work like https request, db query etc), but not necessarily multithreaded CPU work.
  • Parallelism / multithreading: multiple threads actively running CPU-bound work simultaneously. e.g image processing

Deadlock in the context of Asynchronous programming and how to avoid it

First what is deadlock?

A deadlock occurs when two entities are waiting on each other, preventing either from moving forward. In multithreading, a deadlock happens when two or more threads are each waiting for resources locked by the other.

For example, imagine two lock objects: _lockA and _lockB.

  • Thread 1 acquires _lockA and then waits for _lockB.
  • Thread 2 acquires _lockB and then waits for _lockA.

Since both threads are holding one lock while waiting for the other to be released, neither can proceed. This circular waiting results in a deadlock.

So what is the deadlock in the context of asynchronous programming. It is the same definition, it is when two things are waiting on each others but in what are those two things we are talking about in term of asynchronous. Let have a look at this example:

var result = GetDataAsync().Result;
public async Task<string> GetDataAsync()
{
await Task.Delay(1000); // async wait
return "Done";
}
  • UI thread call .Result() so blocked waiting for GetDataAsync() to complete and it is a synchronous wait like .Wait()
  • Task.Delay(1000) completes after 1 second and tries to run the continuation (return "Done";) back on the UI thread.
  • But the UI thread is block so it can’t return hence GetDataAsync() can’t complete
  • So Deadlock, UI thread block waiting GetDataAsync() to complete but GetDataAsync cannot complete because UI thead is blocked.

To avoid it, never use .Result() or .Wait() because it is a main thread blocking so instead use await to not blocking the main thread or use .ConfigureAwait(false) to not return back (resume) onto the main thread. Though note that if you use .ConfigureAwait(false) we won’t be on UI thread (the calling thread) so if we need to update UI control we might have to marshal the call back on UI thread using controls .invoke:

e.g

myButton.Invoke(() =>
{
myButton.Text = "Clicked!";
});

WinForm: Async/wait vs raw worker thread regarding updating UI control on UI thread

1. Async/await

await Task.Delay(5000);
statusLabel.Text = "Work Completed!";

This won’t throw exception because

  • When we await, the method pauses, but the UI thread is free to process events.
  • After the await, the continuation automatically resumes on the original calling thread, which in a WinForms/WPF app is the UI thread.
  • That’s why we can update UI controls directly

2. Raw worker thread

Thread worker = new Thread(() =>
{
Thread.Sleep(5000);
statusLabel.Text = "Work Completed!"; //❌
});
worker.Start();
  • The worker thread runs completely separate from the UI thread.
  • Attempting to update a control directly causes an exception.
  • We must marshal the call to the UI thread:
statusLabel.Invoke(new Action(() =>
{
statusLabel.Text = "Work Completed!";
}));

So this is just to show the advantage of using asynchronous programming with async/await/Task which was introduced in 2012 alongside .NET Framework 4.5.

Before .Net Framework 4.5 we have to do the nasty thing you see with Invoke.

Synchronize Thread and Process using Mutex

A mutex (short for mutual exclusion) is a synchronization object used to control access to a shared resource so that only one thread or process can access it at a time.

Key points:

  1. Purpose: Prevent race conditions where multiple threads or processes try to read/write the same resource simultaneously.
  2. Scope:
    • In-process mutex: Synchronizes threads within the same application.
    • Named/system-wide mutex: Can synchronize access across different processes.
  3. How it works:
    • A thread/process requests the mutex.
    • If it’s available, it acquires the lock and enters the critical section.
    • If it’s already held, the thread waits until it’s released.
    • After finishing, the thread releases the mutex so another can acquire it.

Analogy: Think of a mutex like a single bathroom key: only one person can enter at a time, and everyone else must wait until the key is returned.

// In-process
var mutex = new Mutex();

// Named mutex (cross-process)
var namedMutex = new Mutex(false, “Global\MyMutex”);

In this post, we will use named mutex or can be called cross-process mutex between two processes, process1 and process2 where both will read the counter from and write to the same file mycounter.txt. With mutex, it prevents Process1 and Process2 from overwriting each other at the same time by locking another process from access mycounter.txt till the lock, mutex here is released. In real world, multiple instance of web server might log to the same files so with mutex it will ensure they won’t overwrite each other’s logging.

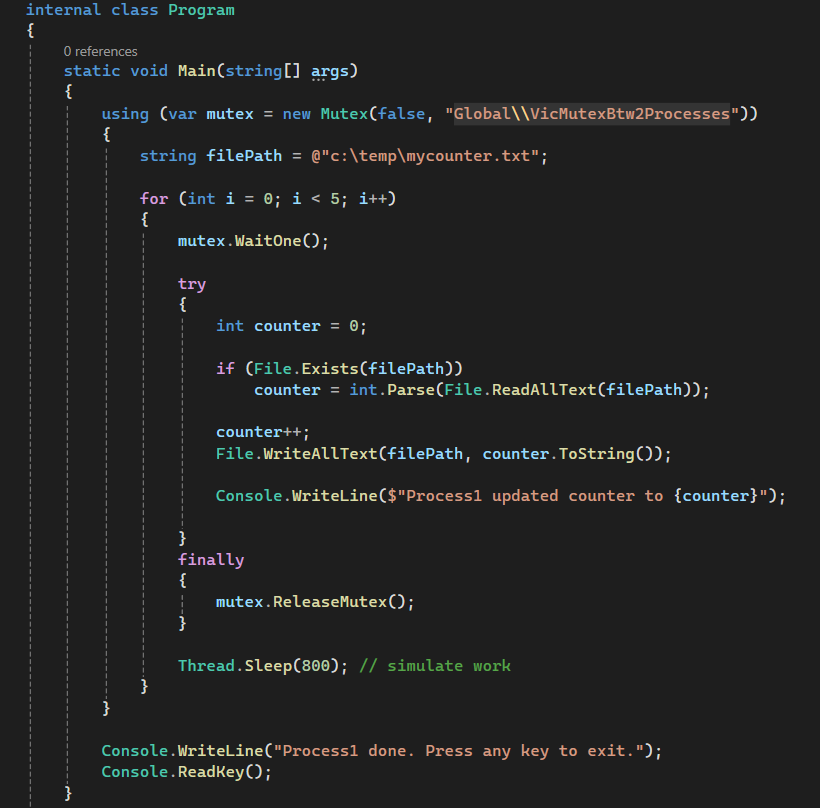
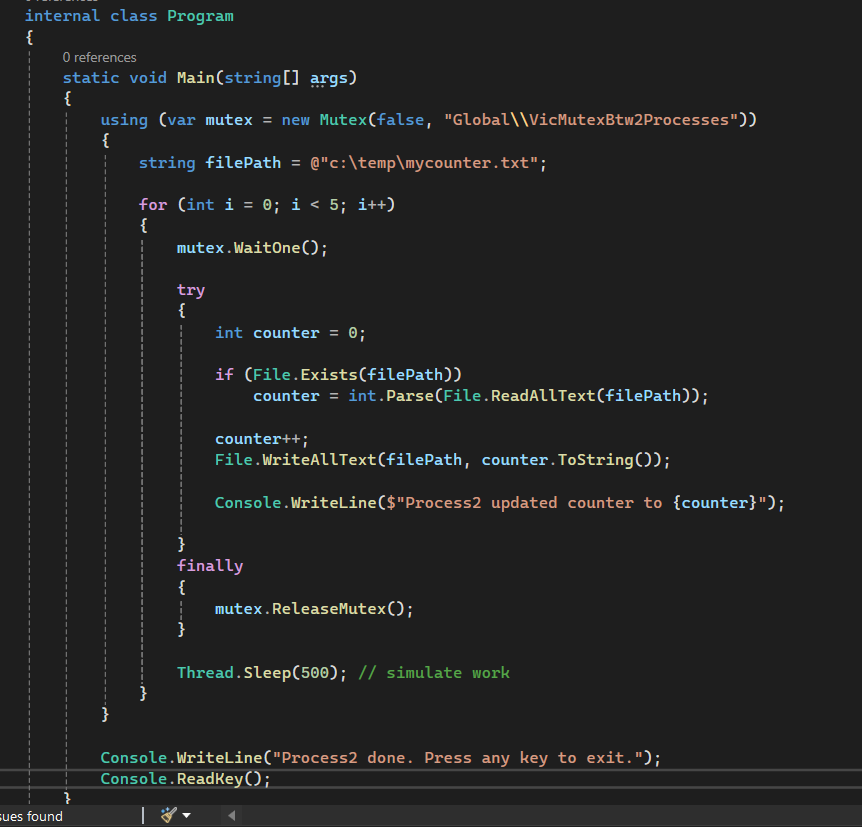
Here is our process1 &2 console app with pipename mutex called “Global\VicMutexBtw2Processes” and do work 5 times reading and writing the field counter to and from mycounter.txt

Note: Global is keyword to tell the OS that it is a system-wide pipename that shared cross sessions whereas local is keyword to tell OS for within only current session.

P1

P2

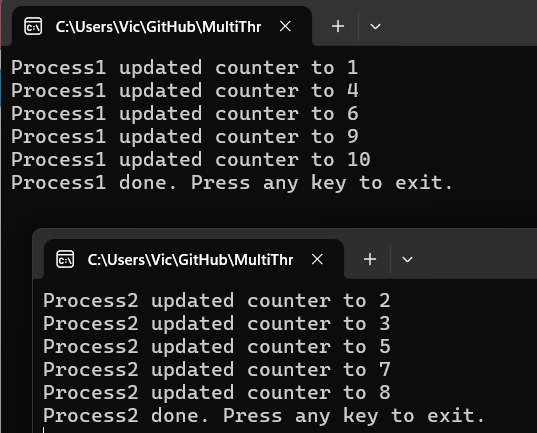
Running P1 & P2 at the same time:

As expected with mutex, even though P1 & P2 both read and write to the same file mycounter.txt, they synchronize each other instead of overwritten one another

because with shared mutex pipedname “Global\\VicMutexBtw2Processes“, it allows one process to access the shared resource one at a time

with its mutex.WaitOne() to acquire the lock (mutex) and mutex.ReleaseMutex() to unlock it (to release mutex)

Sample of P1 and P2: https://tinyurl.com/bddpnrrz

Multithreading with threadsafe using simple lock object

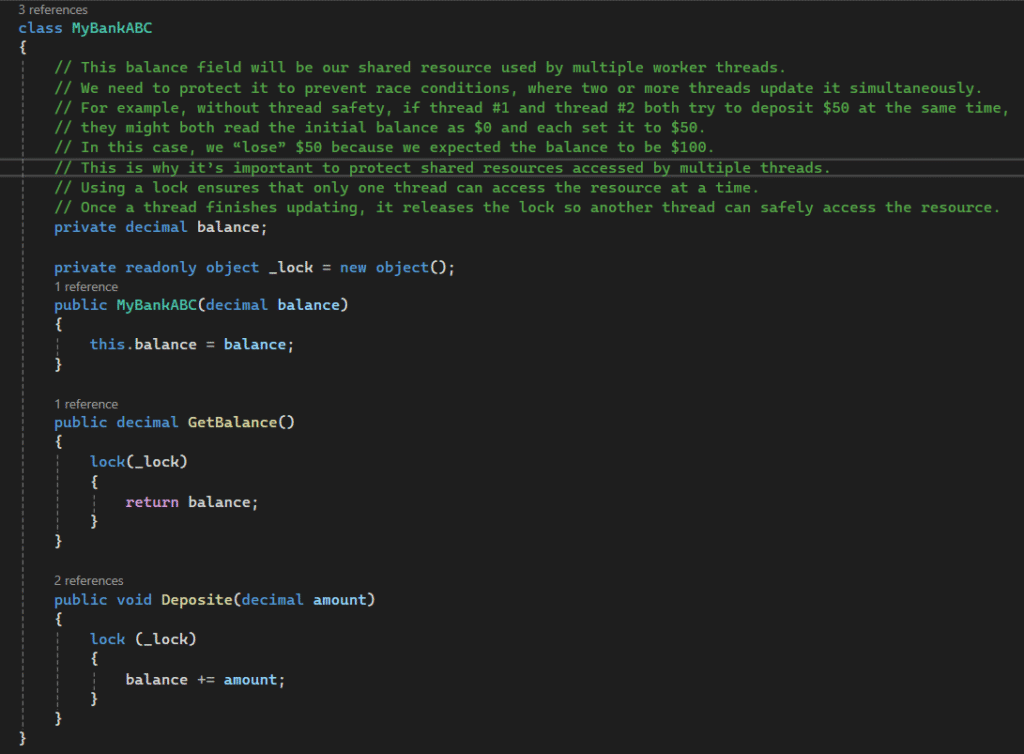
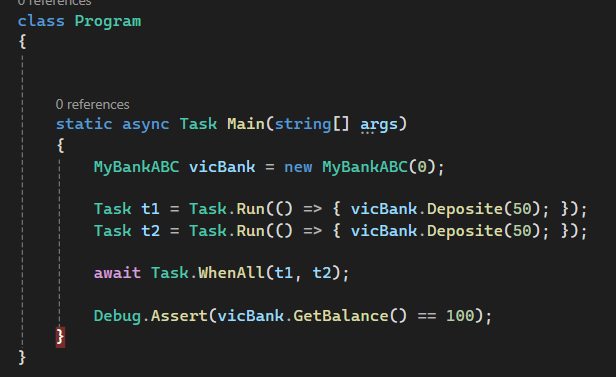
we will use a simple console app to demonstrate thread safe in multiple threading using lock object to prevent race condition. race condition could occur when more than one thread access the shared resource at the same time. For example below we have a bank account class that can be deposit amount of money to shared field balance.

We need to protect it to prevent race conditions, where two or more threads update it simultaneously. For example, without thread safety, if thread #1 and thread #2 both try to deposit $50 at the same time, they might both read the initial balance as $0 and each set it to $50. In this case, we “lose” $50 because we expected the balance to be $100.
This is why it’s important to protect shared resources accessed by multiple threads.
Using a lock ensures that only one thread can access the resource at a time.
Once a thread finishes updating, it releases the lock so another thread can safely access the resource.

Our main program running on the main thread instantiate the MyBankABC object and then kick off 2 workers threads t1 and t2 doing the deposit 50 at the same time. Since we protect our balance field with lock object ensuring only one thread can update this field so at the end we call assert to make sure that our balance is 100.

Complete console app: https://tinyurl.com/389b3kdp