Through my professional career, I was tasked to start support our client on Linux since our competitor started supporting theirs on Linux. I started developing our C# daemon service that acted as a client loader (it periodically talks to the enterprise to see if there are any packages scheduled to be deployed/downloaded and transferred to target client – Linux platform). it runs at startup in the background, and it is in fact a WCF where its front-end client is an embedded browser Chromium Embedded Framework (CEF) running Html/Css/Js etc for the UI and it interacts to this client loader C# daemon (wcf) through its service contract. I really love this project since I started its development from scratch and I learned a lots about Linux. I learned about firewalld (we locked down lots of ports by default for security), Linux securities (proxy, sudoers etc..), learn how to launch UI application since our Linux Image does not have desktop, bash script (for automation rpm build and within rpm itself), systemd (for daemon service related), bash script for automation, learned how to build rpm since we need to bundle its related files (dependencies dlls, noted we use mono so I have to bundle mono with it as well) as an rpm which can then be easily preinstalled on our Linux Hardware image by our hardware team, which we periodically release internally with our hardware team (yes we sell our enterprise application with our discounted Hardware devices e.g end user only has to pay $1 for the device as long as they buy our software contract). I also automated its rpm build nightly using Jenkin hudson where the Hudson jenkins agent running in Windows would execute its job per schedule in Hudson job configuration and I used it to execute some automation win32 batch scripts where it does automated things like Msbuild our .sln and then copied the related output files passwordless via ssh using private/public key to our Linux build machine where its designated bash script would then be executed for the rpm build. I wrote both the windows batch script and also Linux bash script for the automation of our daemon rpm nightly build so I can share the output rpm internally between hardware team and qa team to test it.
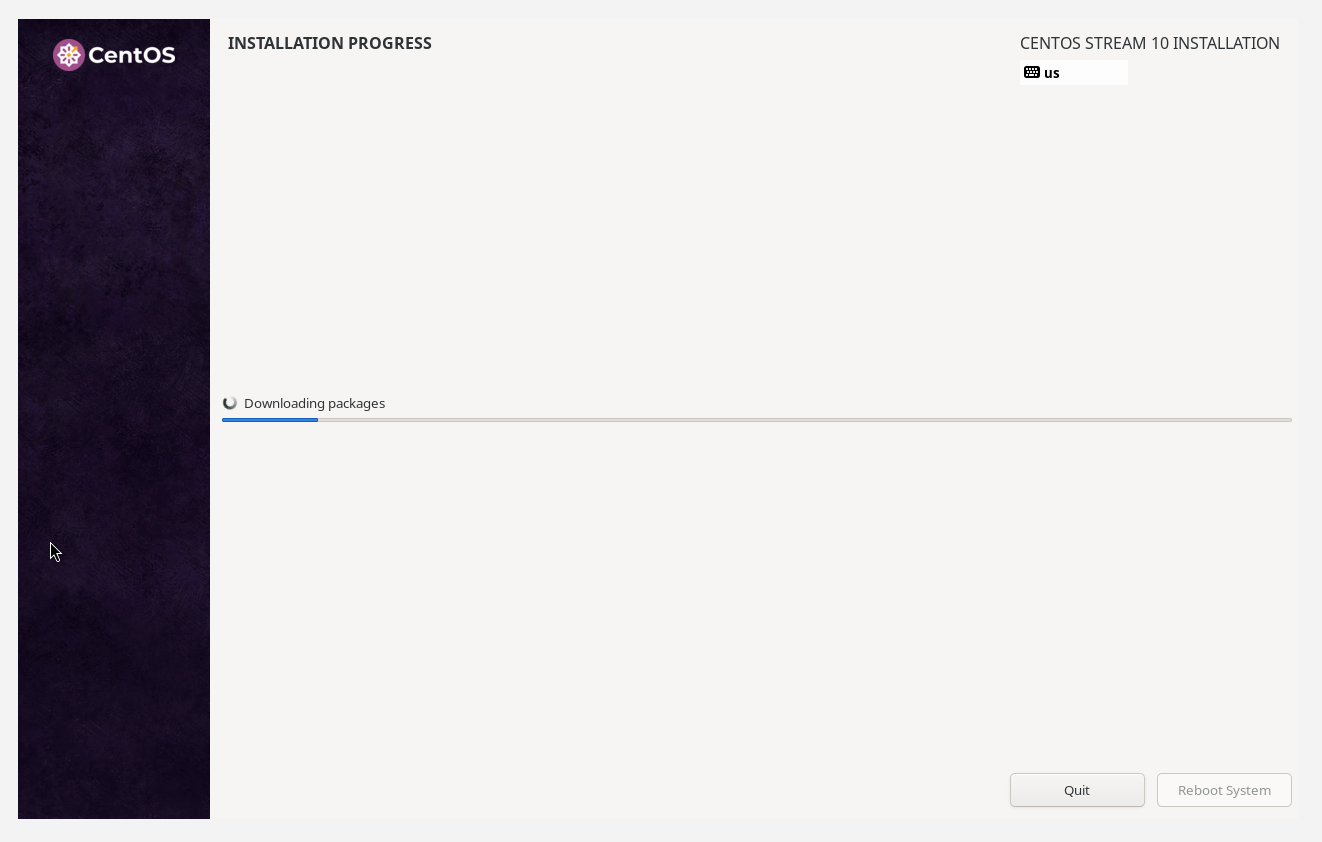
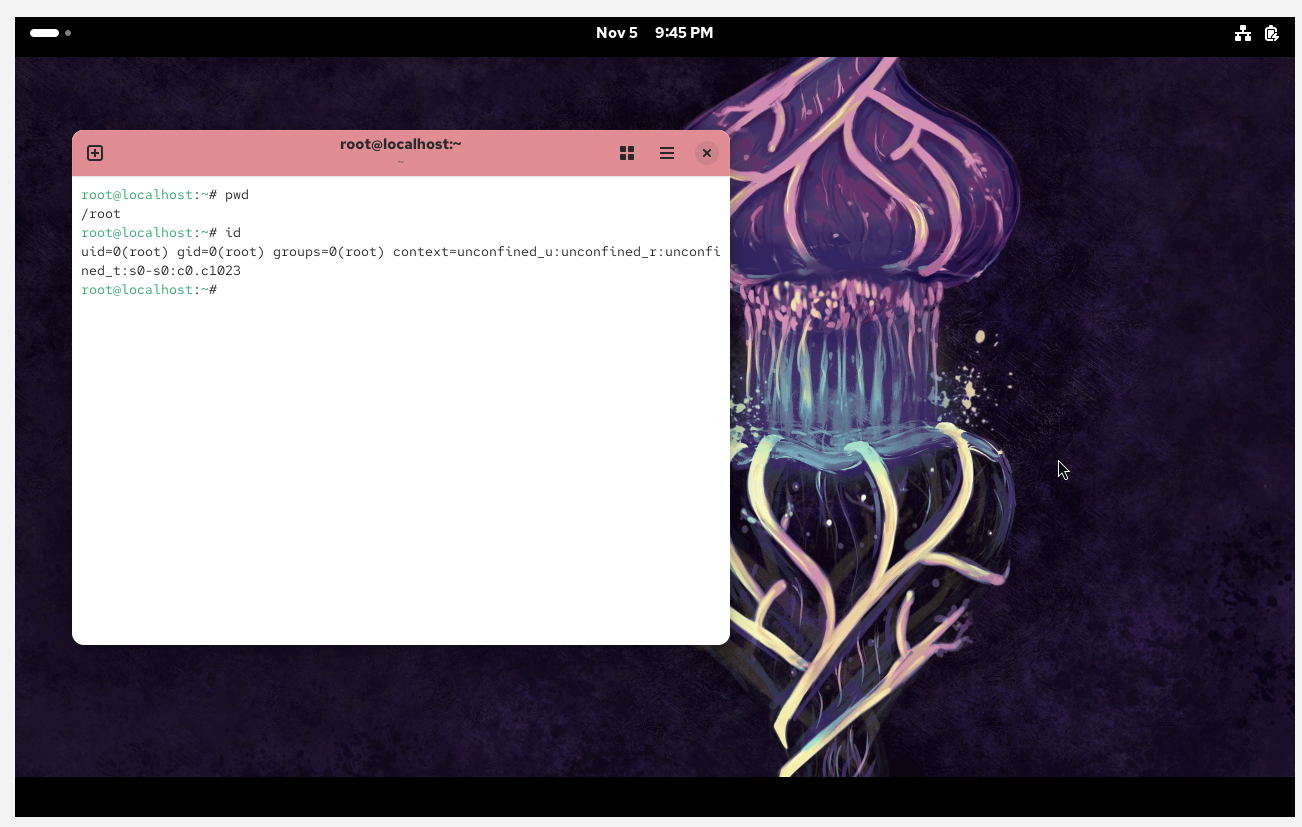
Also, when we started our development, we tried it with Ubuntu, later Centos, then Oracle Linux. And Oracle Linux is quite similiar to Centos because both are the Rebuilds of Red Hat Enterprise Linux (RHEL)
Our client is now running on Linux using .Net Core and now .Net 8
Note:
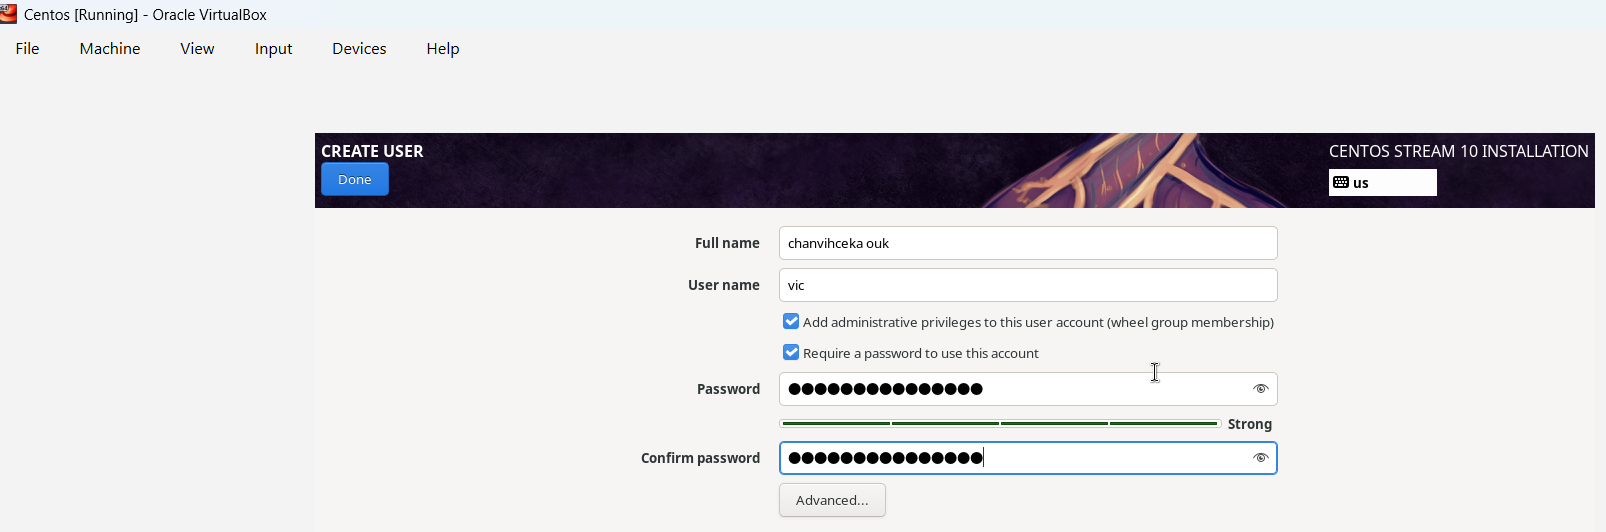
I just noticed that I wrote my full name wrong urgh.
I have used and programmed in both languages professionally and academically.
For C#, I prefer VS studio or its light weighted version VS code whereas Java, I prefer Eclipse or NetBean.
These two languages are high level languages object oriented programming languages where it uses Class and Object for organizing code and code reusability/scalability.
These two programming languages are quite similar, in my own opinion it is 88% similar since they operate based on the same concept of OOP e.g Class, Object, A. P.I.E (Abstraction, Polymorphism, Inheritance & Encapsulation), Multithreading, Thread-safe capability, Exception Error Handling, Auto memory management with its memory garbage collector, Communication between multithreading, Primitive types and Reference types, Type safety, access modifier. C# supports both strongly type and weakly type like dynamic (runtime type) whereas Java only supports strongly (statically) type.
In short, they both emphasize SOLID capabilities.
S: Single Responsibility principle:
a class should only have one reason to change or in short, a class should only have single responsibility.
E.g: if an employee class has EmployeeSalaryCalculation() and also SaveEmployeeData(), it breaks this principle since these two actions are two different responsibilities and to satify this principle we should separate it to another class e.g Employee class (salary related etc.) and EmployeeReposity (data/db related etc.)
O: Open/Closed principle:
Open for Extention but Closed for modification. In short, it refers to abstract class and sub class where sub class can derive from abstract class and make its own version (extension) of abstract class method (abstract method) but no modication can be made to the abstract method because abstract method has no implementation (Closed for modification).
L: Liskov principle:
In short, it refers to polymorphism. Poly means many form. it refers to the ability of object to take on many forms. e.g a sub class can be used in place of the parent class and its method can change based on the version of each sub class (object can take on many forms). There is two types of polymorphism. Overloading (compile time polymorphism) and overriding (runtime polymorphism). Overloading e.g method overloading where same method name with different number of arguments can behave diferently based on the number of arguments whereas Overriding e.g several diferent sub class override parent class’s method.
I: Interface Segregation principle:
a client should not be forced to implement interface that they do not need or use. In short, we should always try to break big interface into subtle interface so that way it is easy for a client to only implement interface it needs and also since both Java and C# support multiple interfaces implmentation.
D: Dependency inversion principle:
This principle emphasizes the importane of decoupling high level modules from low level module. high level module should not depend on low level module and vice versa through abstraction and interface. In short, we can accomplish this principle through dependeny injection so instead of having low level class as member of our high level class (hard coupling) we should introduce interface and have interface as a member instead so that way the low level classes that implement the interface can be inject at runtime either through constructor or method that accept the interface type as an argument.
Ok let get back to illustrate that both langauge are quite similar. if you can program in C#, you should definitely be able to program in Java easily.
Both support Class and instantiate of the Class aka Object
Both do not support multiple inheritance
Java
-------------------------------------
Class MySubClass extends MySuperClass
C#
-------------------------------
Class MySubClass : MySuperClass
Both support ability to call super class (base class)constructor
Java
super(args)
C#
base(args)
Both support multiple interfaces implementation
Java

class MySubClass implements MyInterface1, MyInterface2
C#
class MySubClass : MyInterface1, MyInterface2
Both support the ability to prevent other classes from inheriting from a class
Java
final class Vehicle {
    void display() {
        System.out.println("This is a vehicle");
    }
}

// This will cause a compile-time error
// Error: Cannot inherit from final 'Vehicle'
class Car extends Vehicle {

}
C#
sealed class Vehicle
{
    public void Display()
    {
        Console.WriteLine("This is a vehicle");
    }
}

// This will cause a compile-time error
// Error: 'Vehicle' is sealed and cannot be inherited
class Car : Vehicle
{
}
Java final field and C# readonly field
Both does the exact same thing: Once assigned, cannot be changed.
Java final method and C# sealed override method
Both does exact same thing: it prevents sub class from overriding the super class method.
Both support Multithreading through Thread class
Java
a) Create Thread through Extend Thread class
class MyThread extends Thread {
    public void run() {
        System.out.println("Thread running");
    }
}

public class Main {
    public static void main(String[] args) {
        MyThread t1 = new MyThread();
        t1.start();

        MyThread t2 = new MyThread();
        t2.start();
    }
}

b)Create Thread through Implement Runnable interface
class MyRunnable implements Runnable {
    public void run() {
        System.out.println("Runnable running");
    }
}

public class Main {
    public static void main(String[] args) {
        Thread t1 = new Thread(new MyRunnable());
        t1.start();

        Thread t2 = new Thread(new MyRunnable());
        t2.start();
    }
}
C# using System; using System.Threading;
class Program { static void Main() { Thread t1 = new Thread(new ThreadStart(Run)); t1.Start();
Thread t2 = new Thread(new ThreadStart(Run)); t2.Start(); }
Both support Exception and Error handling through try/catch/finally block
Java
try {
    // code that might throw an exception
    int result = 10 / 0;
} catch (ArithmeticException e) {
    System.out.println("Cannot divide by zero");
} finally {
    System.out.println("Finally block always executes");
}
C#
try {
    int result = 10 / 0;
} catch (DivideByZeroException e) {
    Console.WriteLine("Cannot divide by zero");
} finally {
    Console.WriteLine("Finally block always executes");
}
Both support throws exception within a method so as for a calling method to handle/catching the exception and log exception appropriately
Note: there is subtle difference where Java support checked Exception (forced checking exception by the compiler so the calling method has to properly handle it) through throw whereas C# does not have checked Exception.
Java
void readFile() throws IOException {
    //code
    throw new IOException("File not found");
}
C#
void ReadFile() {
    throw new IOException("File not found");
}
Both support Encapsulation through access modified e.g private, protected, public etc…
Java Access Modifiers:
Modifier
Class
Package
Subclass
The rest of the World
private
✅ Yes
❌ No
❌ No
❌ No
default (no modifier)
✅ Yes
✅ Yes
❌ No
❌ No
protected
✅ Yes
✅ Yes
✅ Yes
❌ No
public
✅ Yes
✅ Yes
✅ Yes
✅ Yes
C# Access Modifiers:
Modifier
Class
Derived Classes
Same Assembly
Other Assemblies
private
✅ Yes
❌ No
❌ No
❌ No
protected
✅ Yes
✅ Yes
❌ No
❌ No
internal
✅ Yes
❌ No
✅ Yes
❌ No
protected internal
✅ Yes
✅ Yes
✅ Yes
❌ No
public
✅ Yes
✅ Yes
✅ Yes
✅ Yes
Note: in C#
class without access modifier = internal class.
class members without access modifier = private field.
Both support ThreadSafety
First what is thread safe. Thread safe means to prevent race condition between multiple thread. race codition occures when multiple threads access and update a shared resource at the same time. To prevent race condition in multiple thread, C# use lock object and Java use synchronize object so only one thread can acquired the shared resource and update it once at a time.
Both support communication between multiple thread
C# use AutoResetEvent or ManualResetEvent to allow one thread to signal one or more waiting threads that some event has occurred whereas Java uses notify() and notifyAll()
There are a few more but with these it shows that both languages are quite similar so if we can program in C# we can say we can program in Java. Java is an independent platform language and with .net core, it makes c# also an independent platform language.
I’ll go over this topic this weekend, as it will also help me refresh my own memory of it.
In earlier topics, we have to manually create the Amazon AWS EC2 cloud instance manually but with Terraform – A tool from HashiCorp that lets us define infrastructure as code and it allows us to automate the provision of this instance automatically through hcl code (HashiCorp Configuration Language) and it is file with .tf extension — for example1: main.tf
In short, with Terraform, we can use it to define infrastructure as code as seen above so it allows us to automate the infrastructure (AWS, GCP, Azure, etc.) through GitLab Pipelines instead of manual provisioning. It’s very useful since manual processes are typically more prone to errors than automated ones.
e.g we would have a GitLab project that is responsible to automate the infrastructure of the cloud providers like AWS, Google Cloud Platform (GCP), Azure etc. and another GitLab project that is responsible to do the actual software development on that said infrastructure.
And with this automation of the infrastructure of the cloud providers we can quickly provision them through code – hcl code. It is an advance topic.
Setup aws ec2 cloud amazon linux and install Apache HTTP WebServer (httpd)
Configure the handshake between GitLab’s CI/CD pipeline and Apache WebServer through ssh using private/public key
Give GitLab CI/CD pipeline instruction in .gitlab-ci.yml
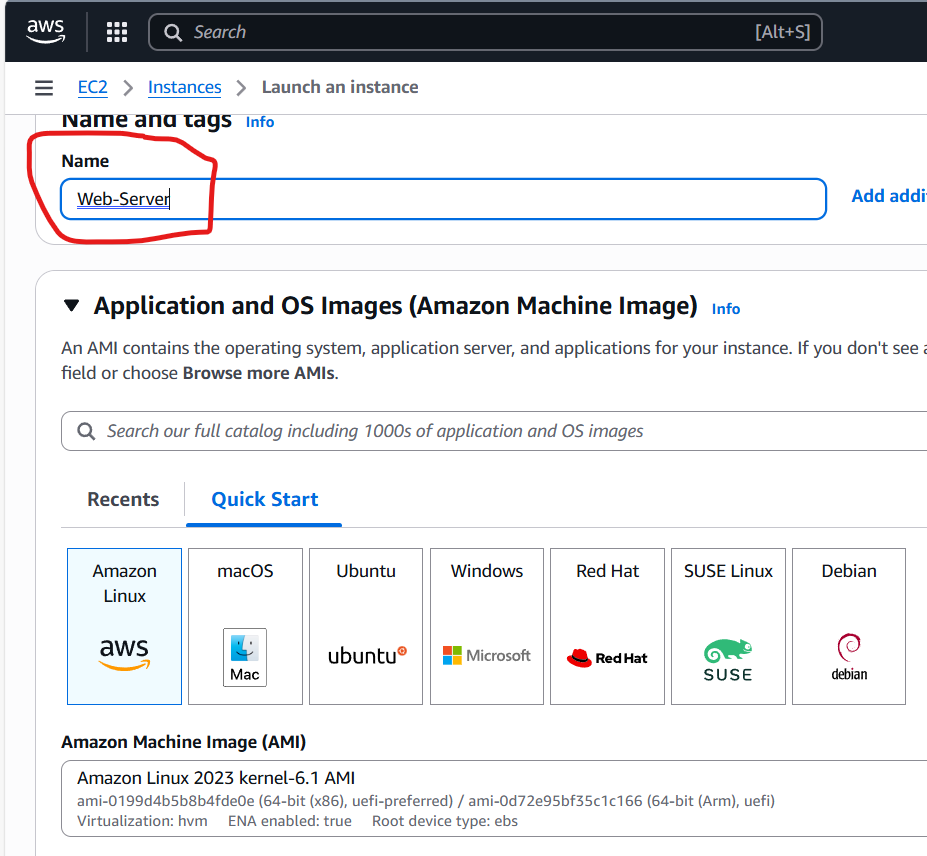
First, let setup our web server using aws ec2 cloud amazon linux instanceand then install Apache WebSever
Name: Web-Server
Choose Amazone Linux
Use my existing keypair
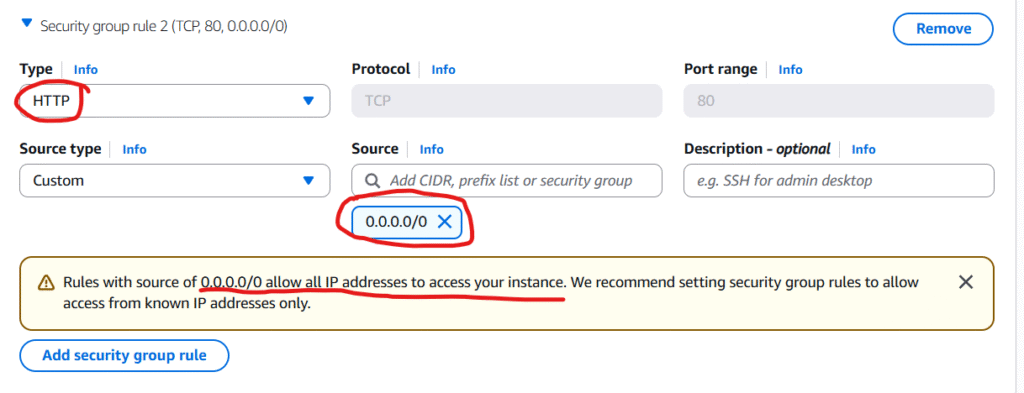
In Network settings section, we are going to click on Edit and Click Add security group rule
Note: for the simplicity of this post/demonstration, I choose http type (I know it is not secured) because if we choose https we have to configure and use tls for traffic encryption but that is not the intention of this post so I will go with http for simplicity’s sake.
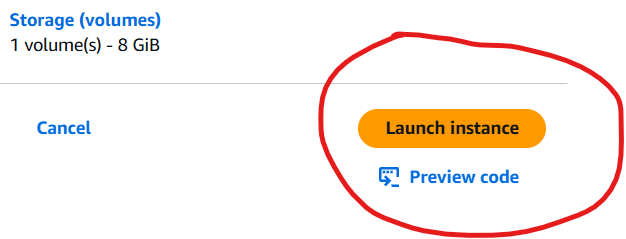
Go ahead and we click on Launch instance ec2
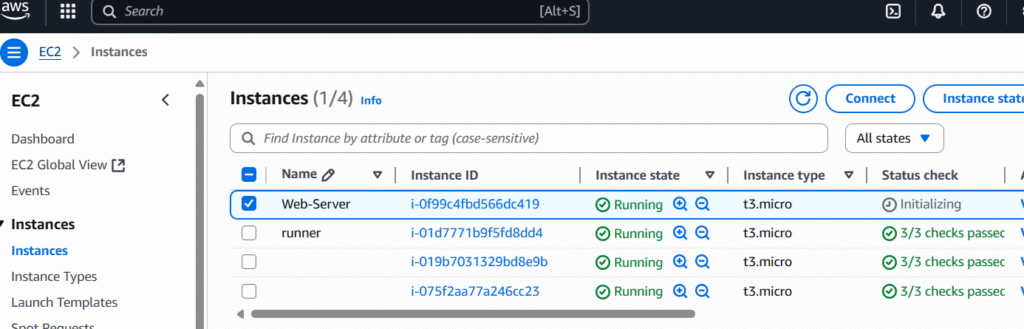
Ok our designated Web-server linux instance is running.
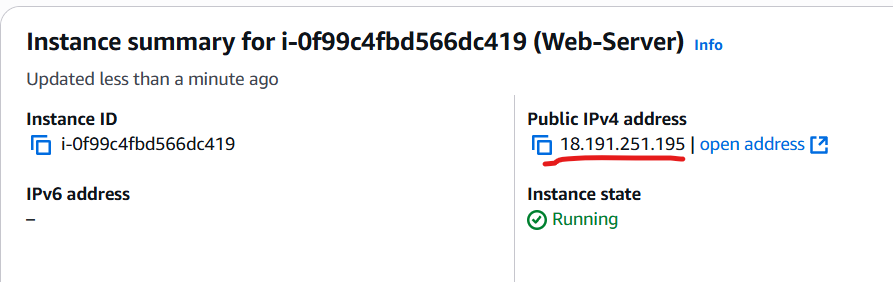
Note down its ip address above
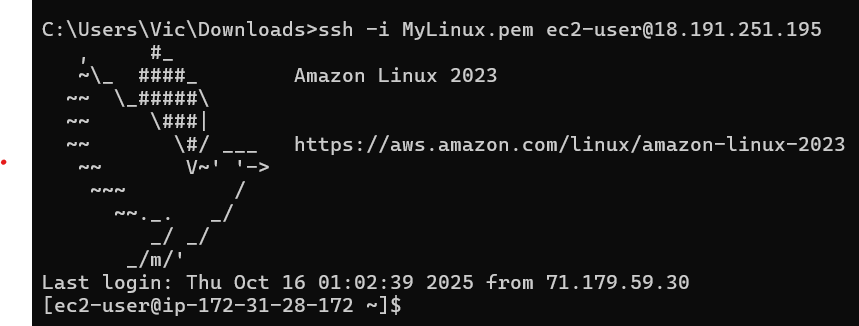
at our win machine, we will remote ssh to it using private key MyLinux.pem so we can then install our Apache web server there
we are connected. next, we will have to elevate ourselves to root with sudo -i so we can install the Apache web server
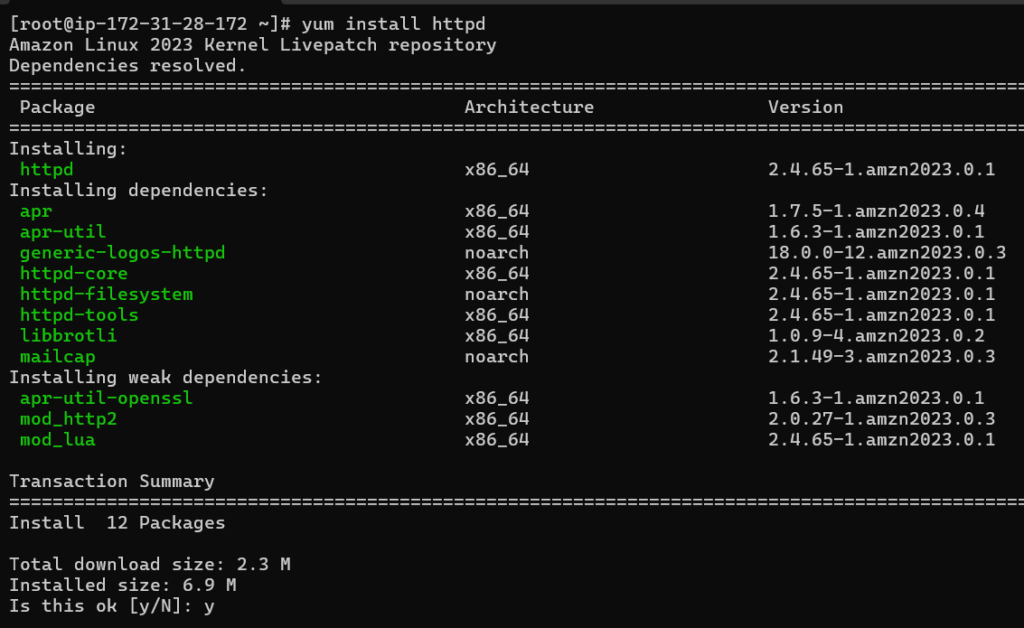
Next, we will yum install it where httpd is the Apache Web Server.
type y and enter to confirm the installation
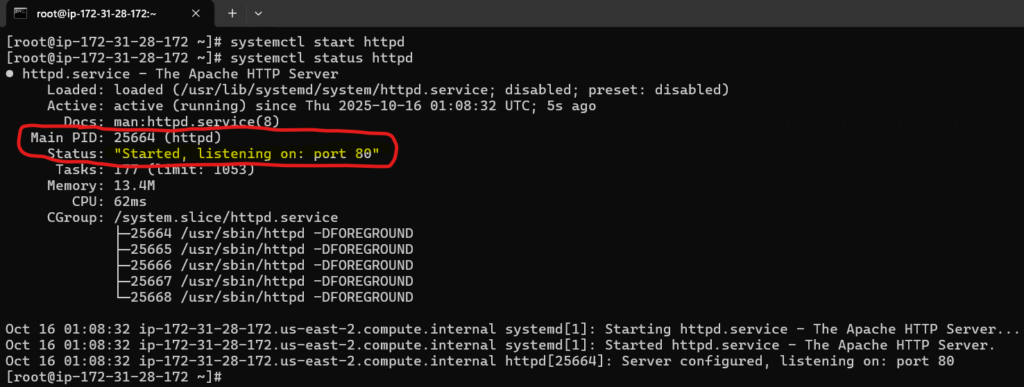
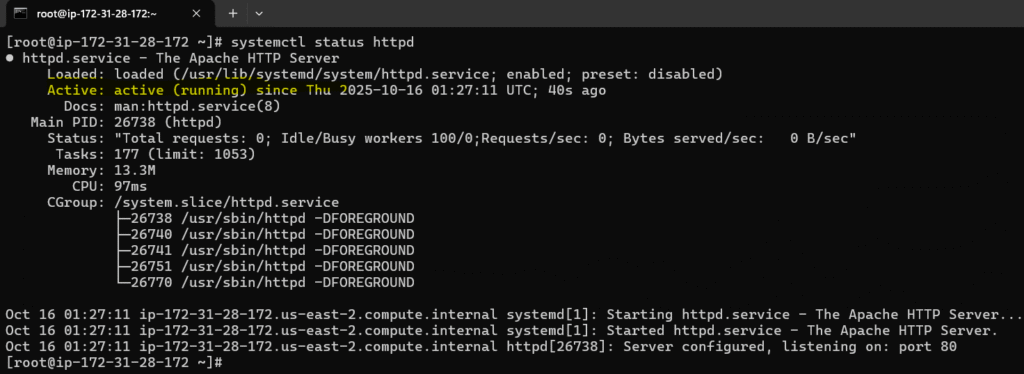
install completed and this looks good so let start and check the status of our Apache web server daemon service
systemctl start httpd
systemctl status httpd
Good, it started and running with pid 25664
we can check it in the task managers with ps aux | grep 25664
yes it is there running as daemon /usr/sbin/httpd -DFORGROUND
let makes it run at start up with systemctl enable httpd
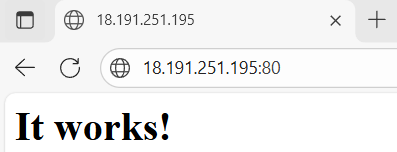
let check our web server through the browser client to make sure it is actually running as well and listing on port 80 that we have configured in the security group rule
By going to the browser and type our web server amazon linux public ip address (note we don’t have to specify its default 80) and yes it is running and listening on port 80 as expected
Second, we need to configure the handshake between our web server here and gitlab.
that is being said, we will do that through ssh where gitlab will use private key and our apache webserver would then use the mactching public key so gitlab can remotely deploy stuff to our apache web server. So let turn on public key authentication for our apache web server:
Enable Public Key Authentication in SSH Server
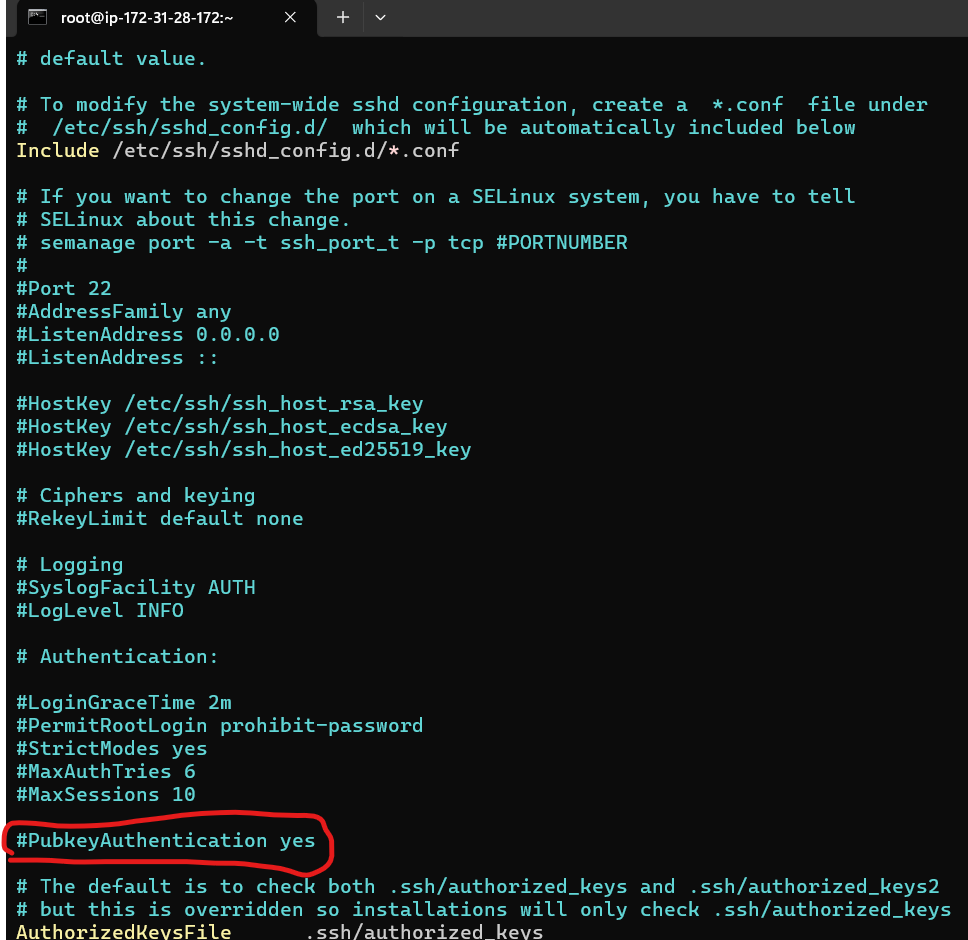
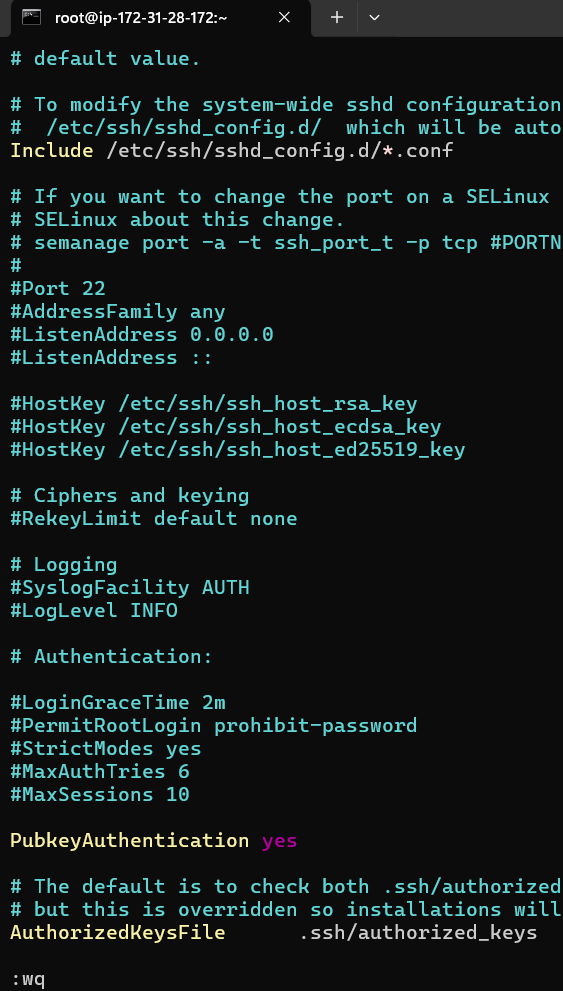
sudo vi /etc/ssh/sshd_config
scroll down and we will see that pubkey auth is commented out by default so we are going to uncomment it. press i for writing mode and remove #
press esc then type :wq to write and quit
since we made a change in its configuration file, we need to restart it so the change will be taken into account with systemctl restart httpd
check its status: systemctl status httpd
Ok good it is running and taken into account our configuration change.
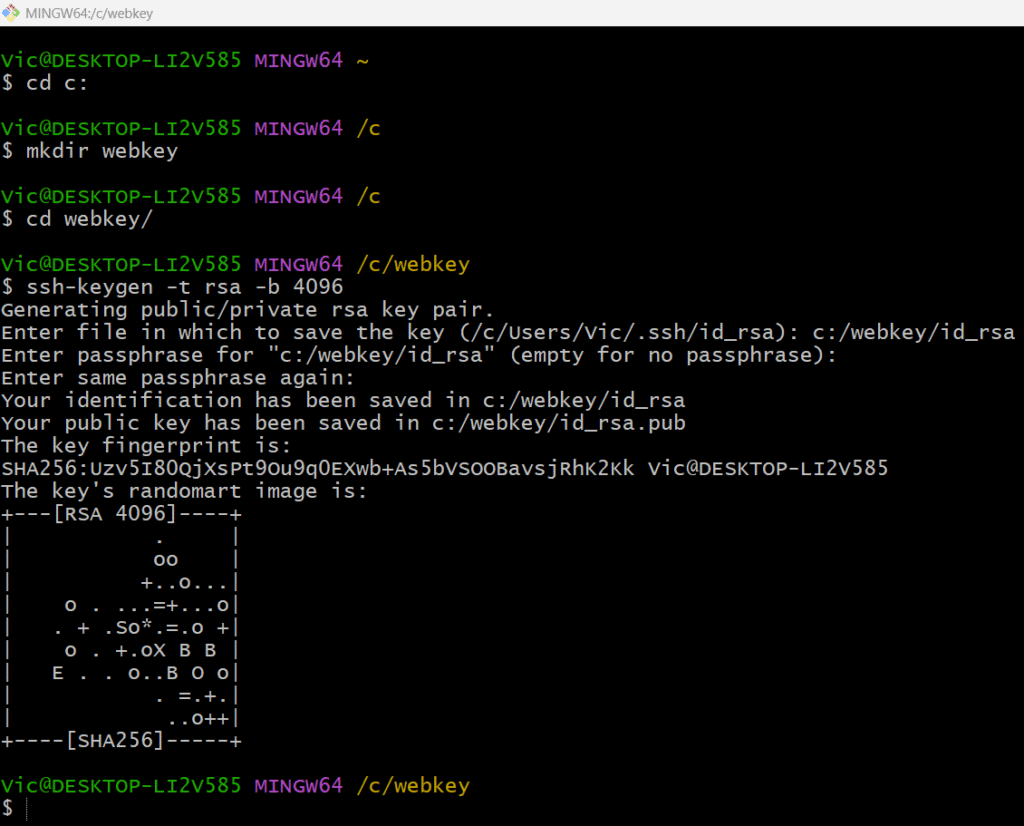
Next we will need to generate public/private key pair from our local repo which is windows
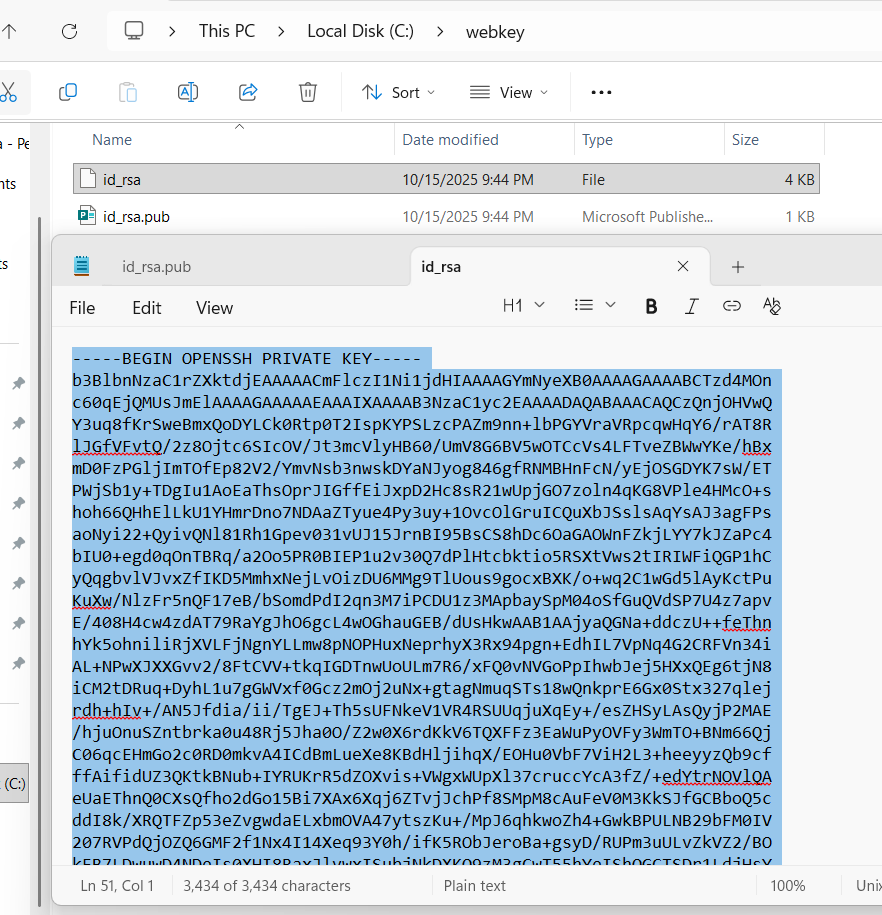
and save it at c:\webkey folder with ssh-keygen -t rsa -b 4096
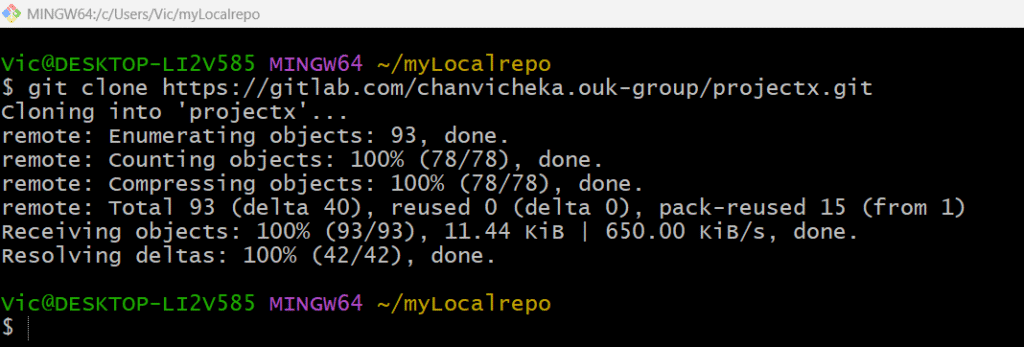
Next, getting my remote repo “projectX” to my local repo since I already have remote repo “projectX” at the GitLab so I will just clone it in my local directory
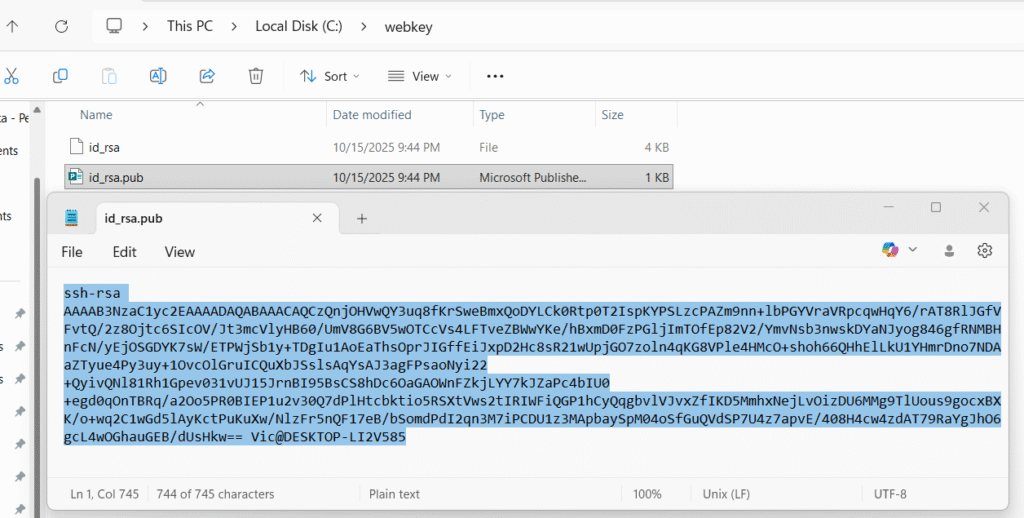
Next, copy our public key id_rsa.pub from our local repo id_rsa.pub and input it in our webserver’s public key aka “authorized_key”
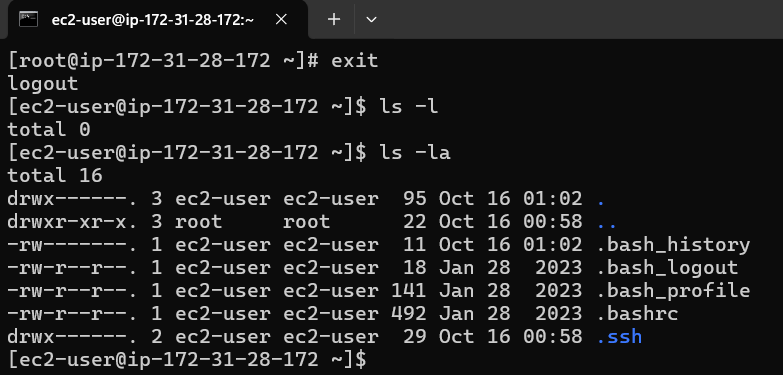
Logout from root and cd to the hidden folder .ssh
cd to the hidden .ssh and we will see authorized_keys file there
vi authozied_keys
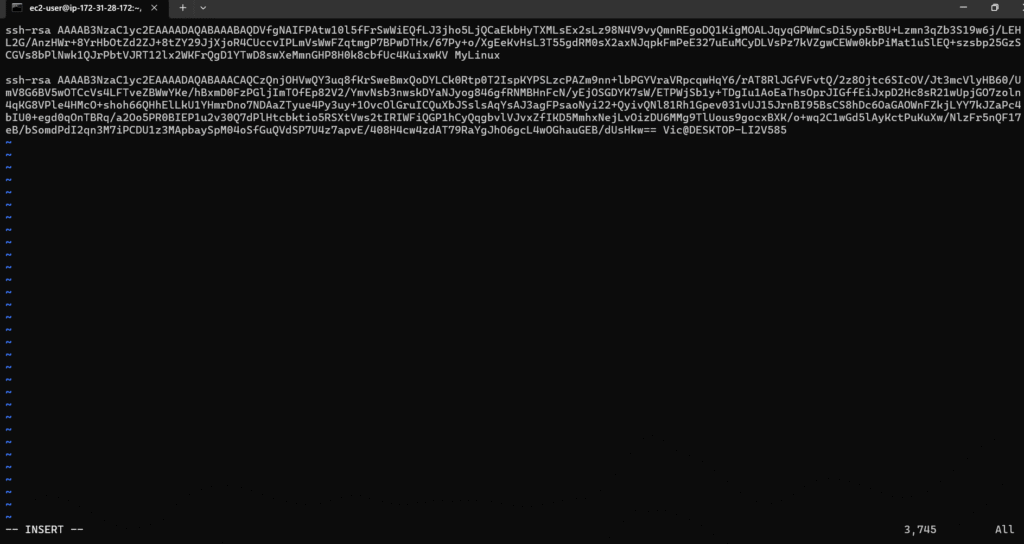
press i for writing mode and then copy our public key from our windows local repo id_rsa.pub
and paste in this authorized_keys file and save it
press esc then :wq to write and quit vi
Good that concludes that we have configure public key in our designated webserver Apache.
Next we will configure private key in our GitLab.
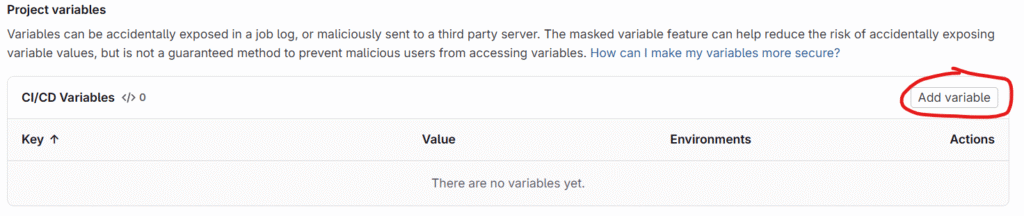
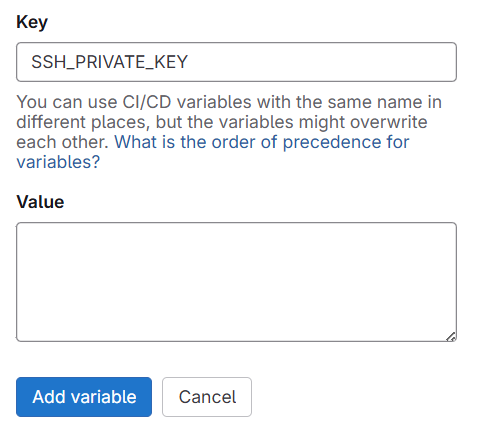
Project → Settings → CI/CD → Variables → Project variables and click on Add varaible
scroll down till you see below two value key/value pair
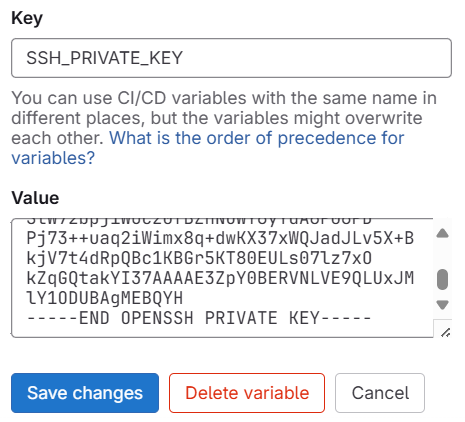
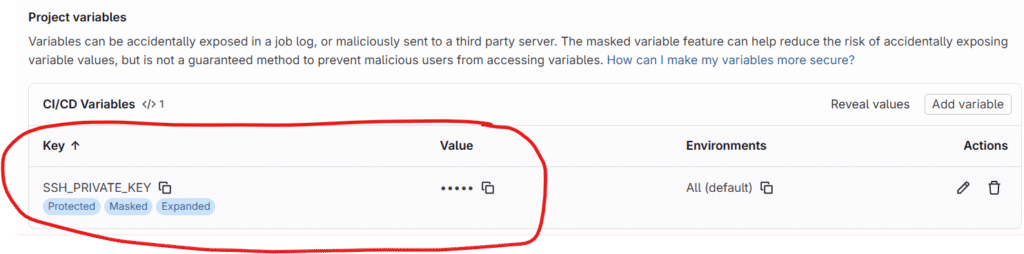
Give Key as SSH_PRIVATE_KEY and Value we will copy and paste the private key we generated from our local repo in windows PC
this concludes the handshake btw our GitLab’s CI/CD pipeline and AWS EC2 Linux Apache WebServer where CI/CD would use privatekey and the WebServer would use the matching public key.
Third, we will have to configure our .gitlab-ci.yml for set of instruction for ci/cd pipeline
image: node:latest
stages: - test - deploy
# ------------------------- # Test Stage # ------------------------- test-job: stage: test script: - npm install -g html-validator-cli - html-validator --file=index.html --verbose only: - main
First we tell gitlab that we want an image that have node js already installed as it has a dependency with html-validator-cli that we used in the test job on ubuntu runner.
2nd we only want two stage test and deploy
For test job, we will use ubuntu and install html-validator-cli and use it to valide our index.html for html syntax (note index.html I already created in the repo ProjectX)
For deploy job, we update our ubuntu and install openssh-client.
create .ssh at root home directory on Ubuntu
then write the privatekey value from our gitlab project variable SSH_PRIVATE_KEY to ~/.ssh/id_rsa on Ubuntu (~ mean home directory and in this case the home of the root user)
Finally securely copied index.html from Ubuntu over the network to our designated AWS ec2 cloud Apache Webserver at ec2-user@18.191.251.195 and put it in directory /var/www/html which is the main directory of our Apache webserver : authentication with ~/.ssh/id_rsa which is the private key value written from $SSH_PRIVATE_KEY variable.
only: - main means: “Run this job only when the pipeline is triggered from the main branch.”
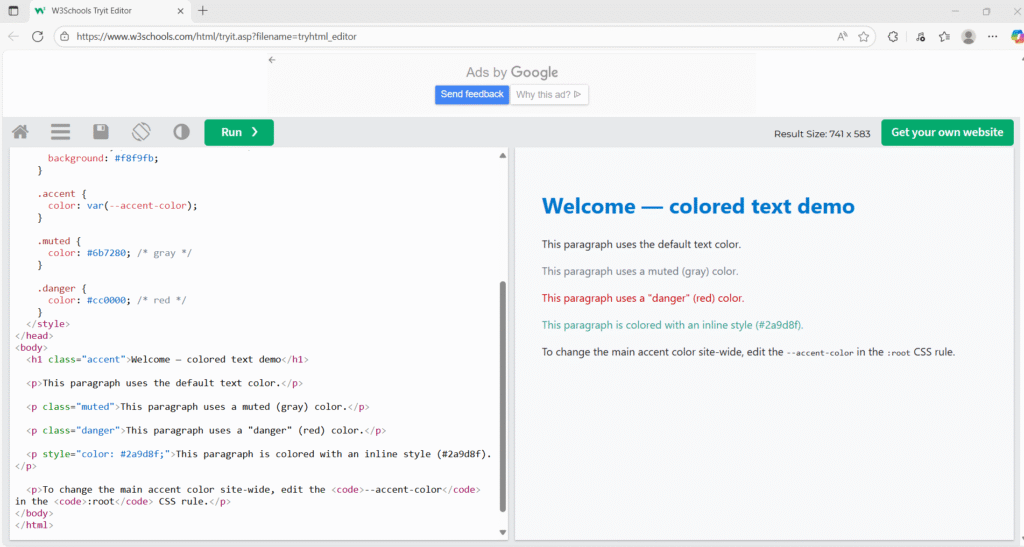
Our index.html from GitLab should look like this after GitLab CI/CD validate its html syntax and deploy it to the target webserver at AWS EC2.
<!doctype html>
<html lang="en">
<head>
  <meta charset="utf-8" />
  <meta name="viewport" content="width=device-width,initial-scale=1" />
  <title>Colored Text Example</title>
  <style>
    :root {
      --accent-color: #0077cc; /* change this to update the accent color site-wide */
    }

    body {
      font-family: system-ui, -apple-system, "Segoe UI", Roboto, "Helvetica Neue", Arial;
      line-height: 1.5;
      padding: 2rem;
      color: #222; /* default text color */
      background: #f8f9fb;
    }

    .accent {
      color: var(--accent-color);
    }

    .muted {
      color: #6b7280; /* gray */
    }

    .danger {
      color: #cc0000; /* red */
    }
  </style>
</head>
<body>
  <h1 class="accent">Welcome — colored text demo</h1>

  <p>This paragraph uses the default text color.</p>

  <p class="muted">This paragraph uses a muted (gray) color.</p>

  <p class="danger">This paragraph uses a "danger" (red) color.</p>

  <p style="color: #2a9d8f;">This paragraph is colored with an inline style (#2a9d8f).</p>

  <p>To change the main accent color site-wide, edit the <code>--accent-color</code> in the <code>:root</code> CSS rule.</p>
</body>
</html>
our index.html
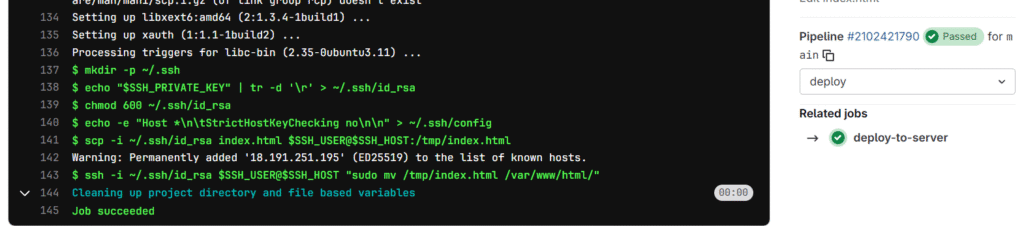
Now let check our CI/CD pipeline deploy stag’s logging.
It runs successfully and deployed index.html from remote repo in GitLab to the target AWS EC2 cloud Apache Web server at default directory /var/www/html
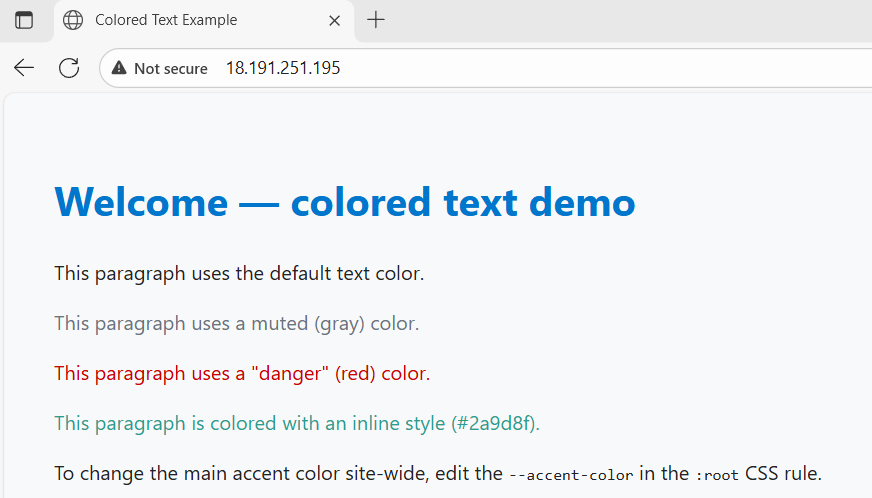
so if we go to the browser and put in our web server public ip, the web server should render our index.html. (note the Not Secure because we use http protocol instead of https as using https requires TLS configure which is not intended for this simplicity of this post)
Voila works as expected.
This conclude that our CI/CD deploy stage is able to deploy work to targeted AWS EC2 cloud Apache web server on Amazon Linux successfully.
Runner is a GitLab component that actually executes our CI/CD pipeline (Continuous Integration (CI)/Continuous Delivery (CD) ).
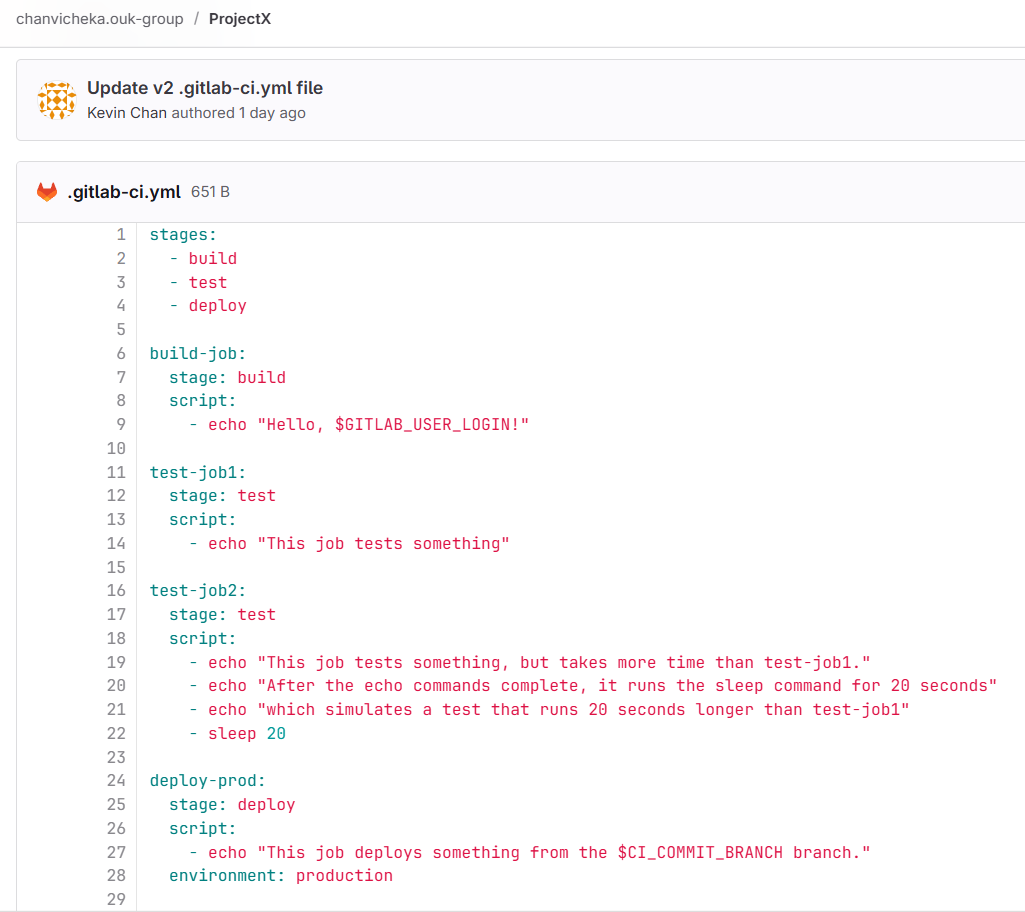
We define our CI/CD pipeline stage and job using its .gitlab-ci.yml (.yaml) file which defines jobs (like builds, tests, deploys), the runner is what runs those scripts on some compute environment e.g our aws ec2 cloud instance amazon linux.
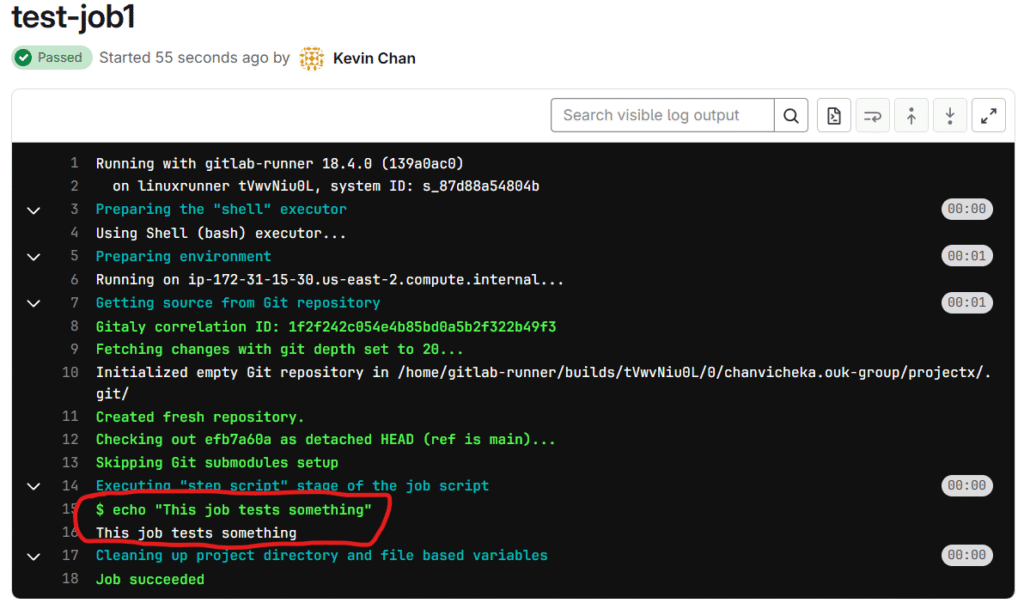
test-job1: stage: test script: - echo "This job tests something"
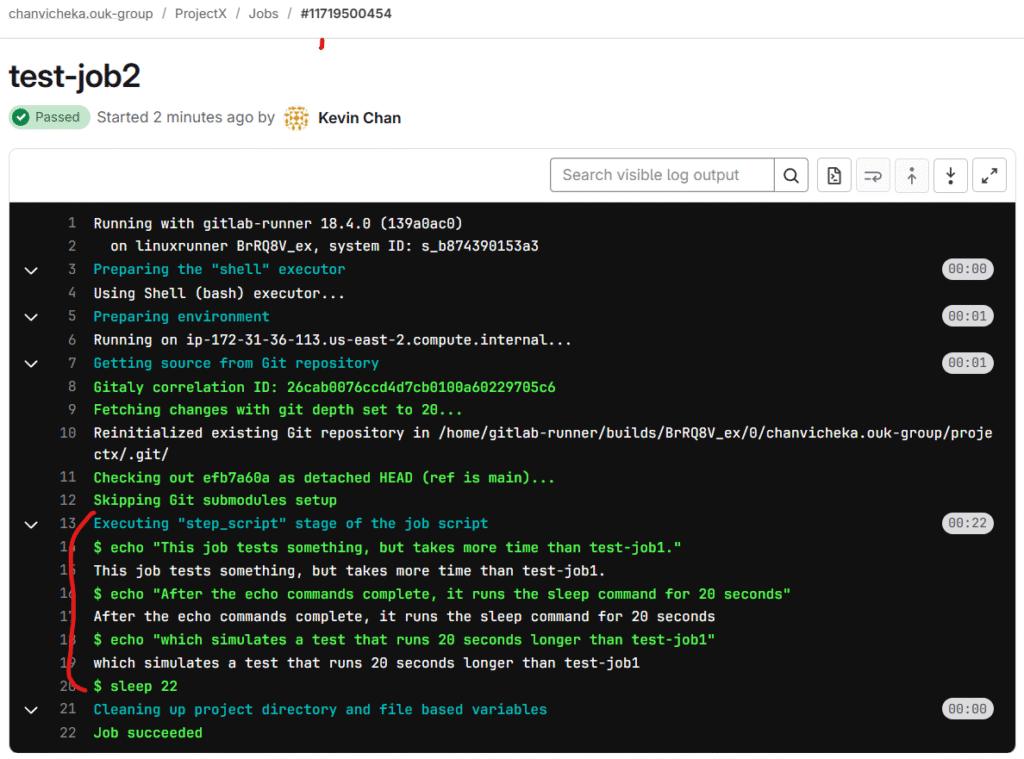
test-job2: stage: test script: - echo "This job tests something, but takes more time than test-job1." - echo "After the echo commands complete, it runs the sleep command for 20 seconds" - echo "which simulates a test that runs 20 seconds longer than test-job1" - sleep 20
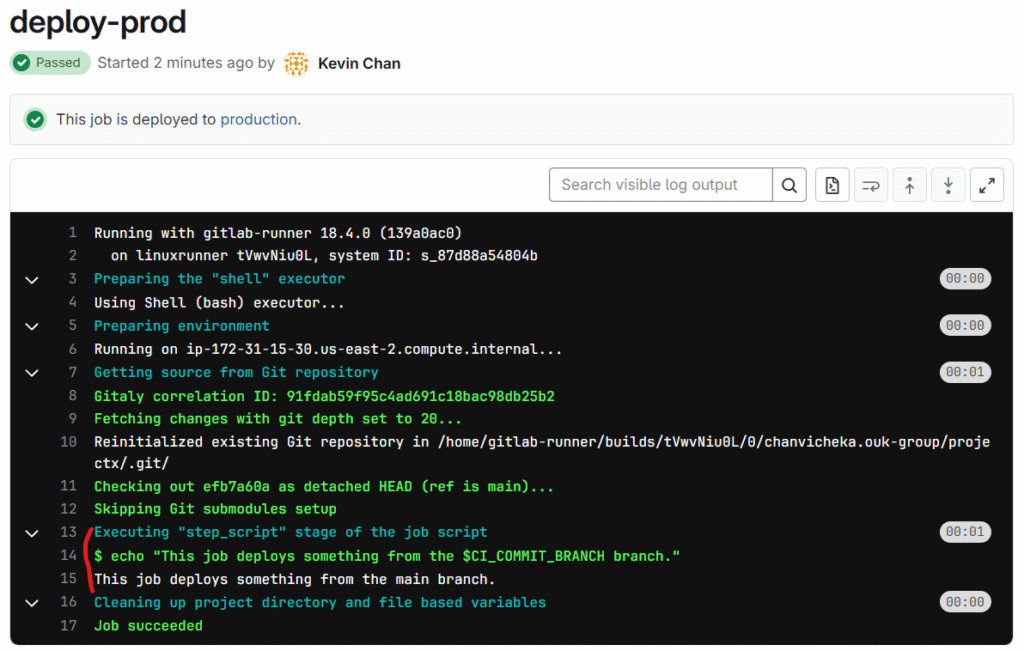
deploy-prod: stage: deploy script: - echo "This job deploys something from the $CI_COMMIT_BRANCH branch." environment: production
with .yml above, it is like set of instruction that we tell how GitLab would run the runners for our CI/CD pipeline. Like above, we tell GitLab that the runner would have 3 stages
first stage is build, second stage is test, and third stage is deploy.
First we will have to add GitLab runner repo and then yum install it:
by executing below curl piped command to add the repo & yum install command to install it at terminal:
# Add the official GitLab Runner repository
curl -L https://packages.gitlab.com/install/repositories/runner/gitlab-runner/script.rpm.sh | sudo bash

# Install the runner
sudo yum install gitlab-runner -y
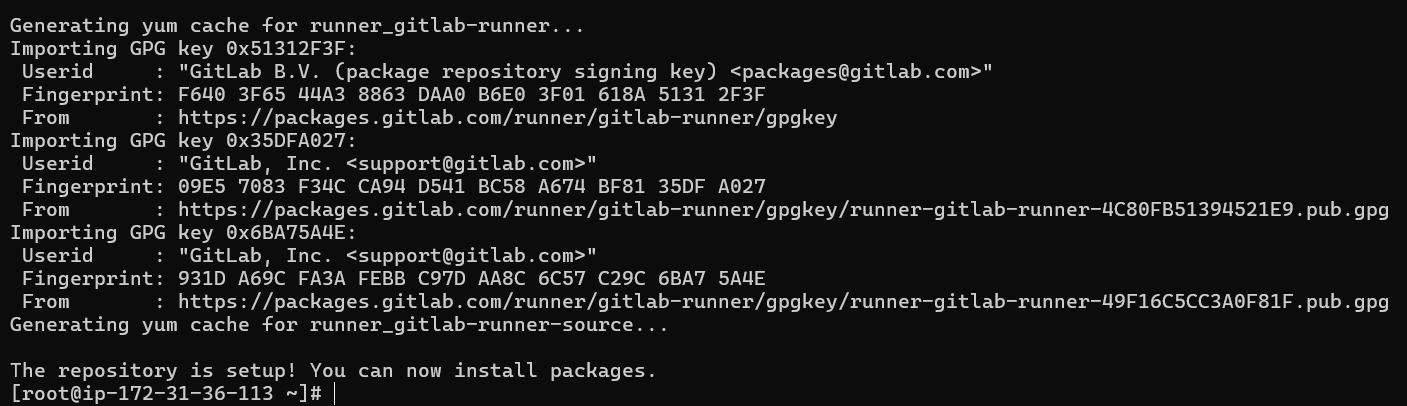
after the piped command we should see this which mean our gitlab repo is added to our amazon linux distro repos:
This looks good our GitLab’s runner is now installed in our AWS ec2 cloud linux distro successfully.
Next, we need to setup our GitLab’s repo and point our runner to our AWS ec2 cloud linux runner instance.
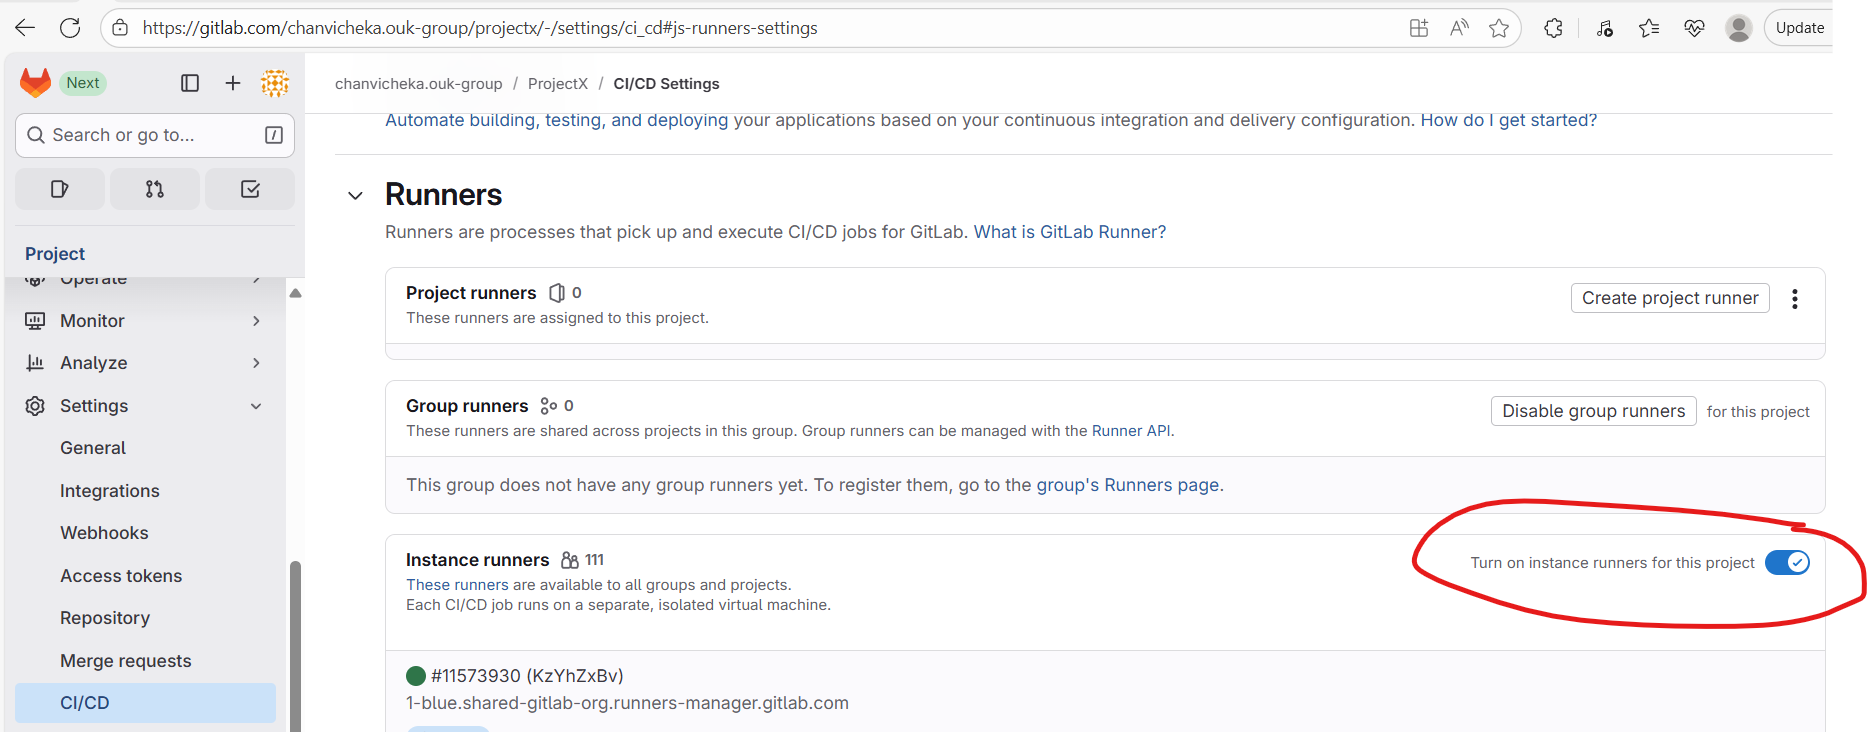
Go to our project’s repository, then navigate to Settings → CI/CD → Runners, and disable the instance (SaaS) runners by toggling them off.
Next, go to Project Runners → Create project runner
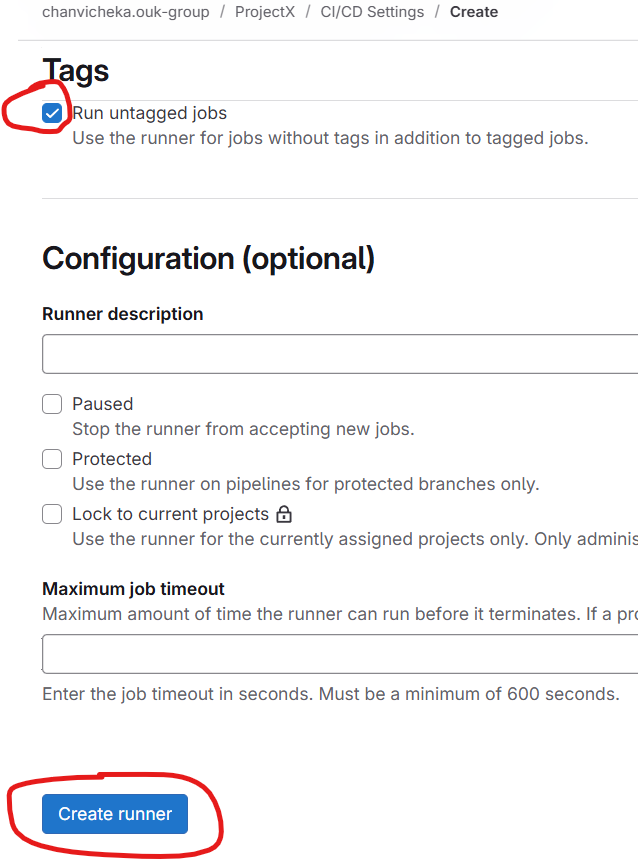
For the simplicity, we will check untagged and click create runner
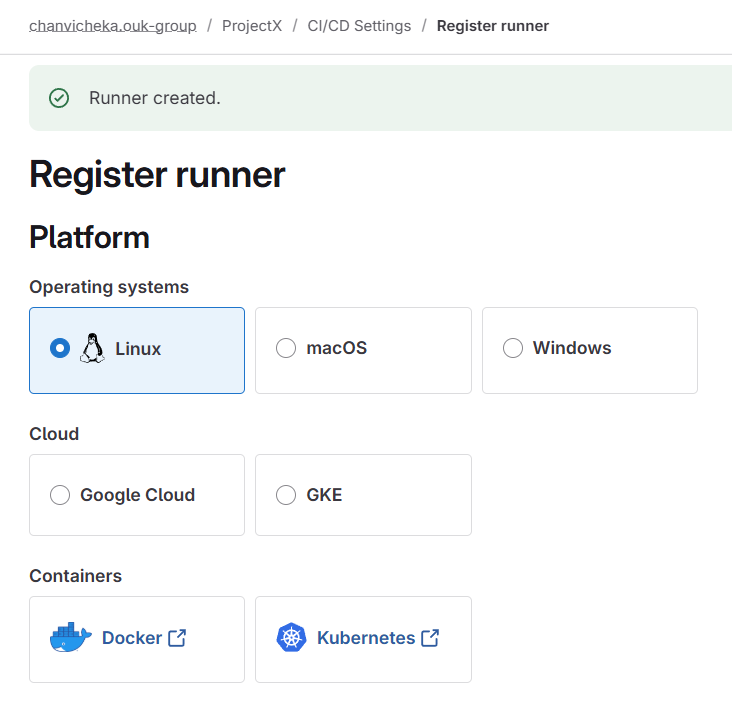
Choose Linux since our AWS cloud is EC2 Amazon linux
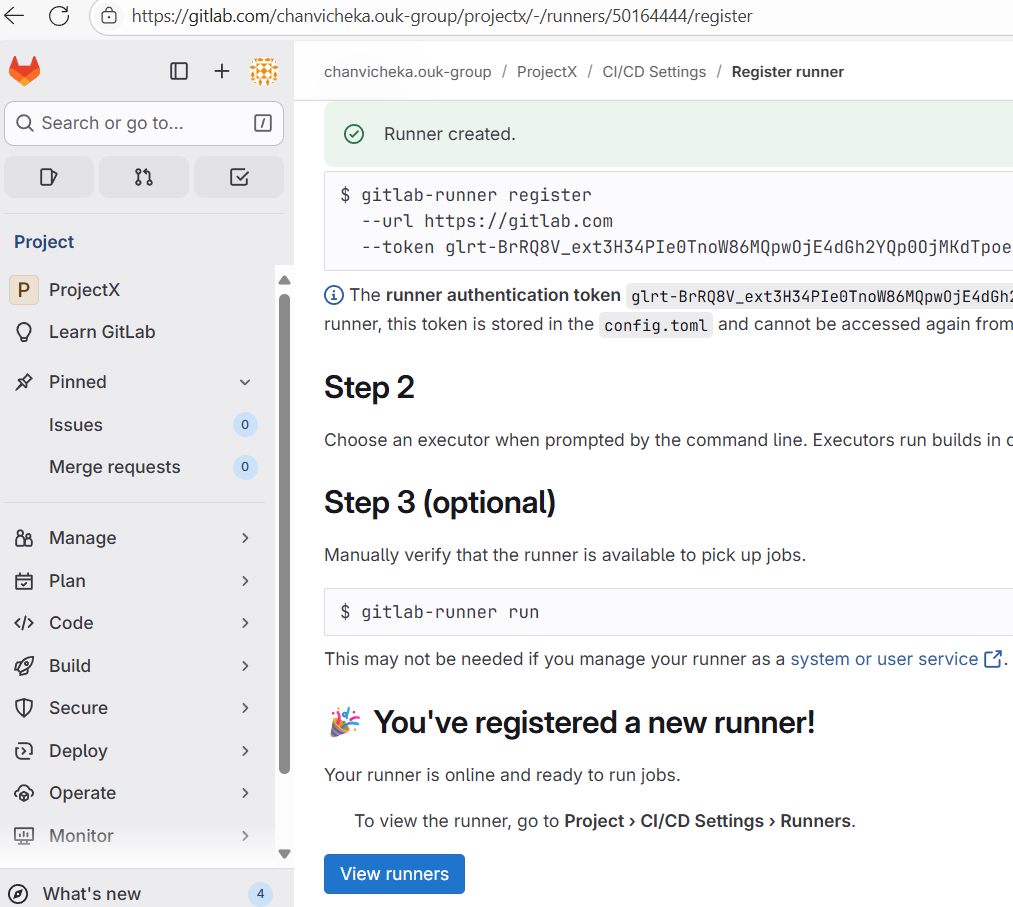
And copied and paste the following command at our aws ec2 cloud instance (amazon linux) to register it there (to link them: Gitlab <-> aws ec2 linux runner instance)
hit enter since we will use the default url https://gitlab.com
and enter “linuxrunner” as the name our self-managed runner here:
next type shell for the executor and hit enter (since this is a simple demonstration of the setup of self-managed runner, we chose shell for our .gitlab-ci.yml’s script aka bash, but if you want you can choose vm, or docker etc and chose by typing the executor type here)
This looks good:
we use https://gitlab.com as instance url,
named it “linuxrunner”
and chose shell as an executor.
At our GitLab project settings CI/CD we would see this below:
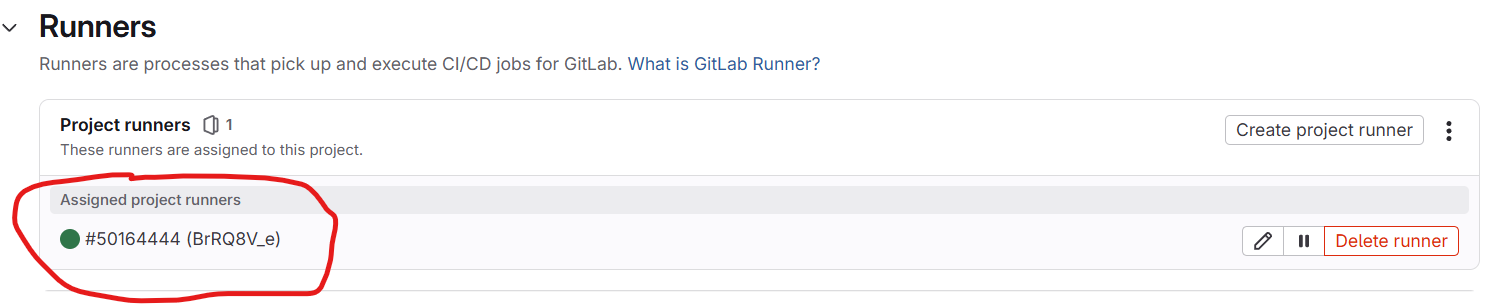
Click on View runners and we should see our project runner is registered successfully and online (green means it is online)
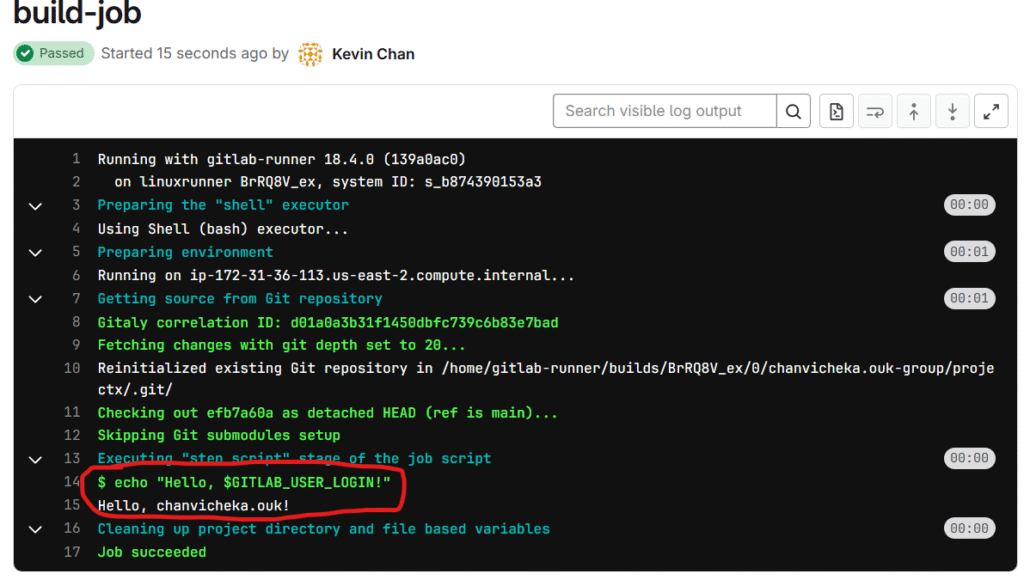
Note that our simple .gitlab-ci.yml is as below: 3 stages (build, test, deploy), 1 build job, 2 test jobs, and one deploy job.
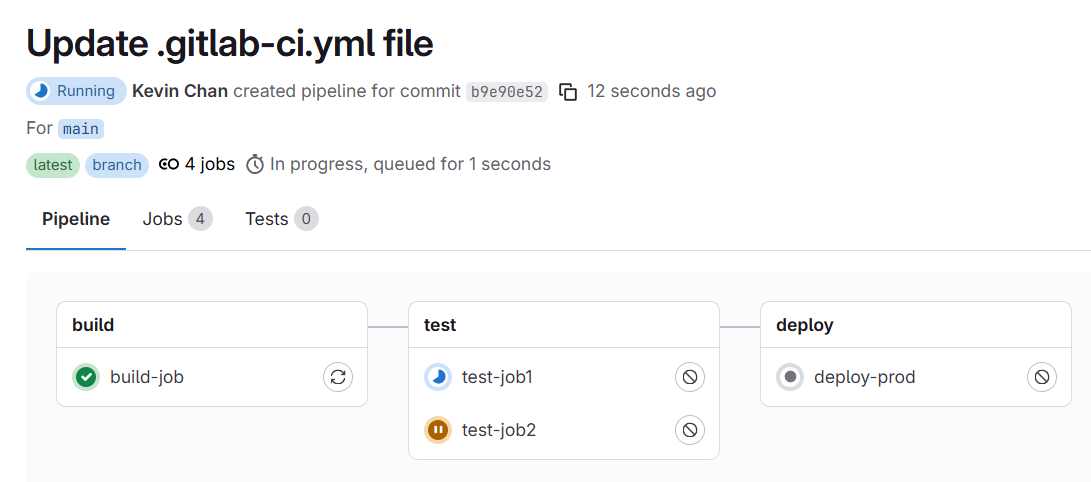
so any commit to our main branch of our project branch would trigger the pipeline as seen below:
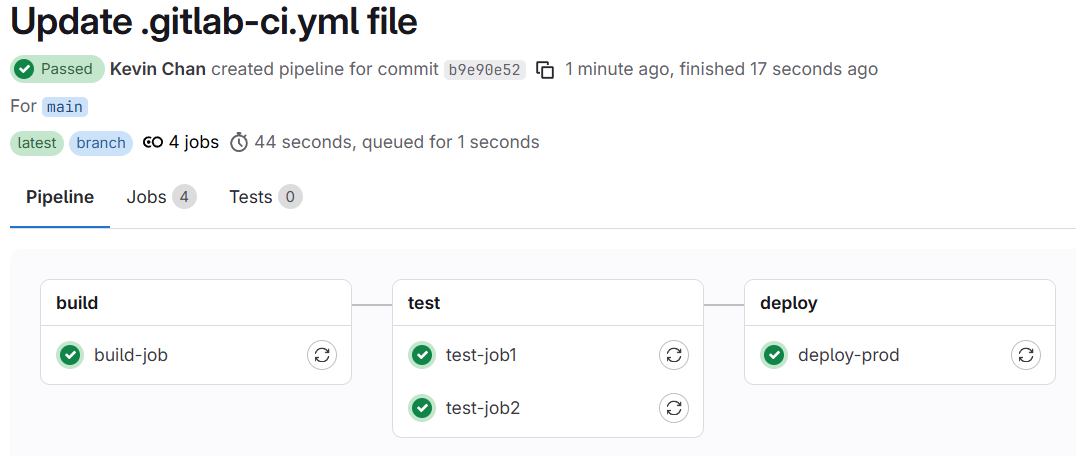
All the jobs completed and passed successfully
We can check our ci/cd pipeline jobs log as seen above and we saw that our script were executed successfully.
This concluded that we have pointed our project’s CI/CD pipeline runner to our self-managed runner on AWS EC2 cloud Amzon Linux successfully.
In addition, how do we check the status of our runner whether it is running or not?
our runner is actually a daemon. think of daemon like a windows service which we can check using service.msc but how do we check the status of daemon service in linux?
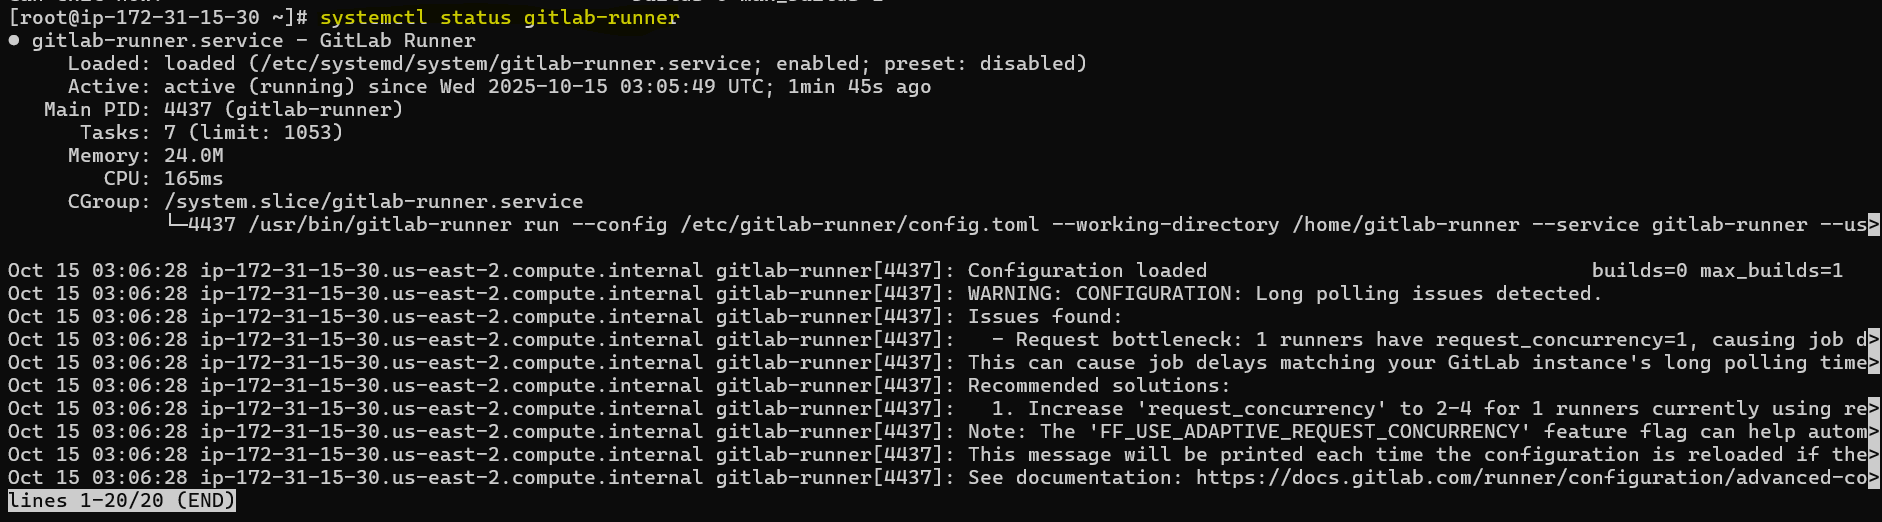
A Linux daemon service is a background process that runs continuously on a Linux system, typically without direct user interaction. Daemons are often used for system or network services — like web servers, database servers, or schedulers — and are managed using the systemd service manager in most modern Linux distributions.
in centos family like Amazon linux distribution, we can check it using
sudo systemctl status <daemon_service_name>
e.g:
sudo systemctl status gitlab-runner
to make gitlab-runner daemon service run automatically at start up we can execute command below:
First of all, go to Amazon AWS and create our free AWS account and saved its private key.
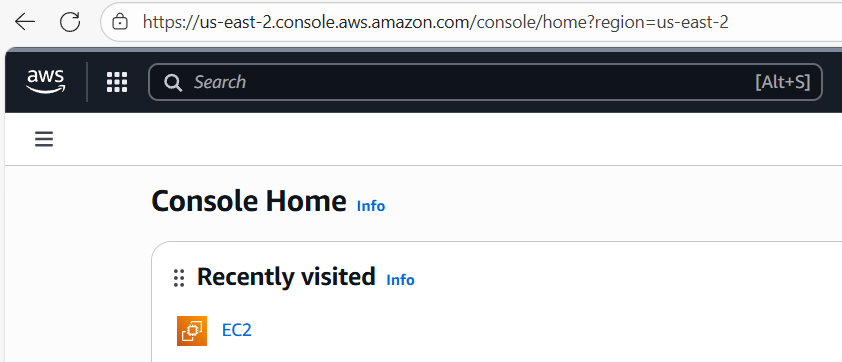
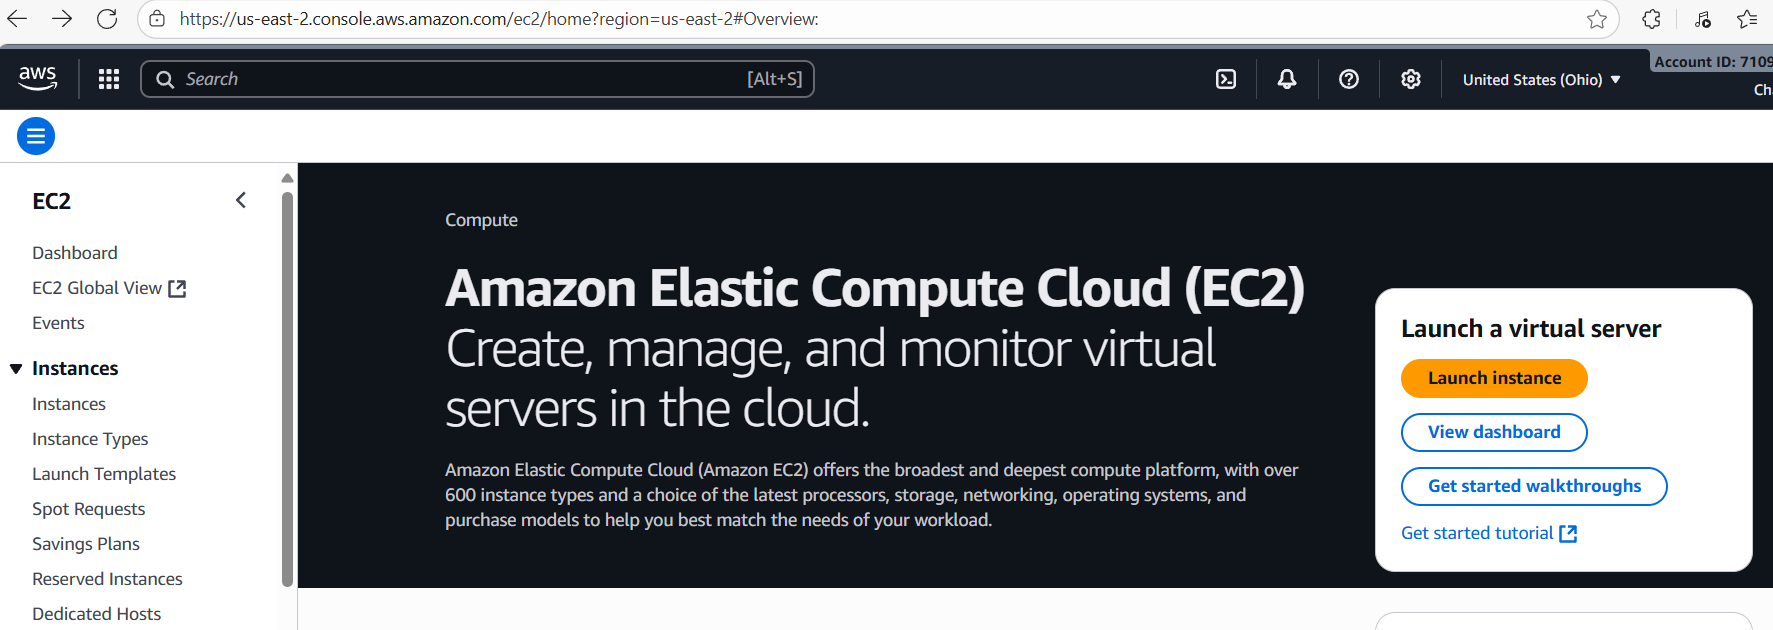
Once we login to our aws console, we can search ec2 and since I have visited it before here I will just click on EC2
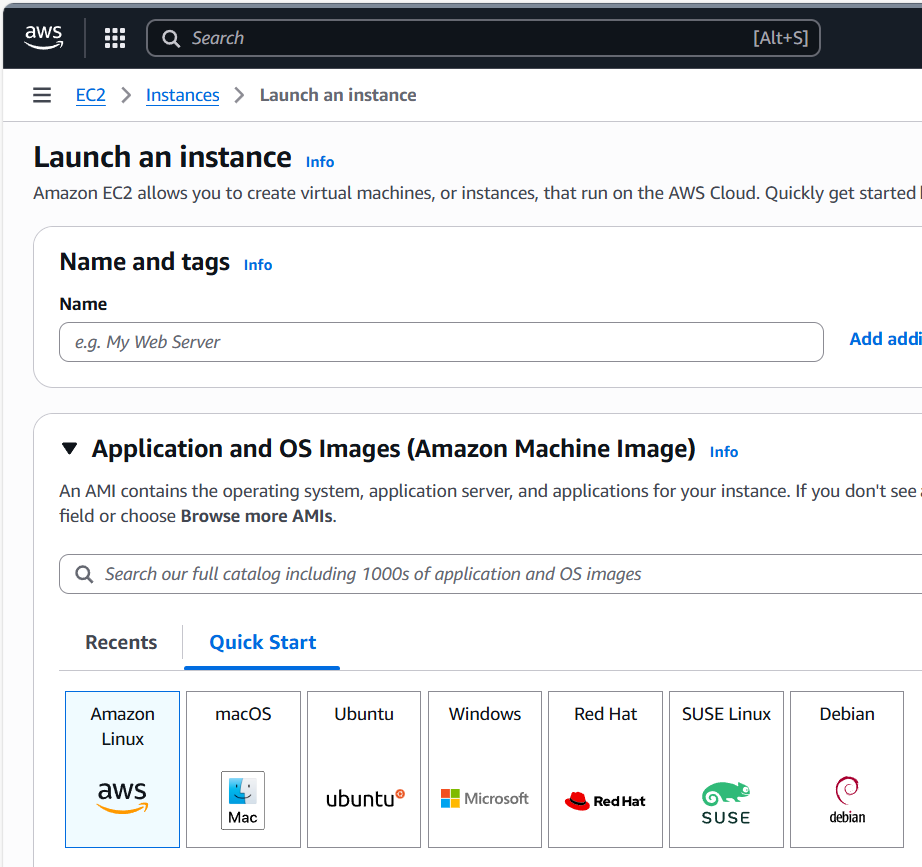
Then click on Launch instance
We are going to use Amazon Linux
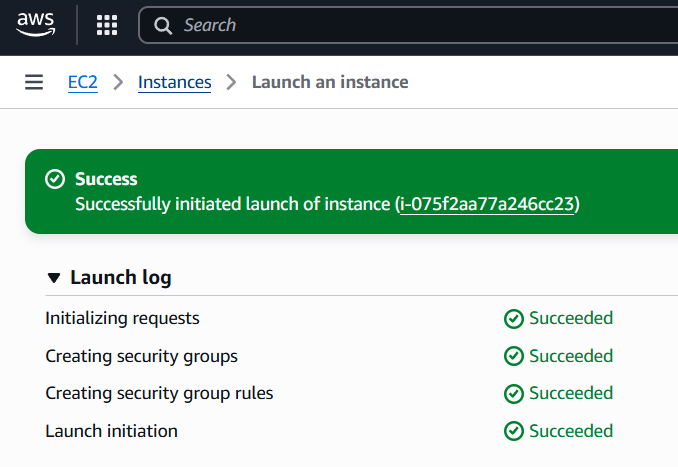
Ok it launched successfully. Then click on its instance name guid as seen above “i-075f2…”
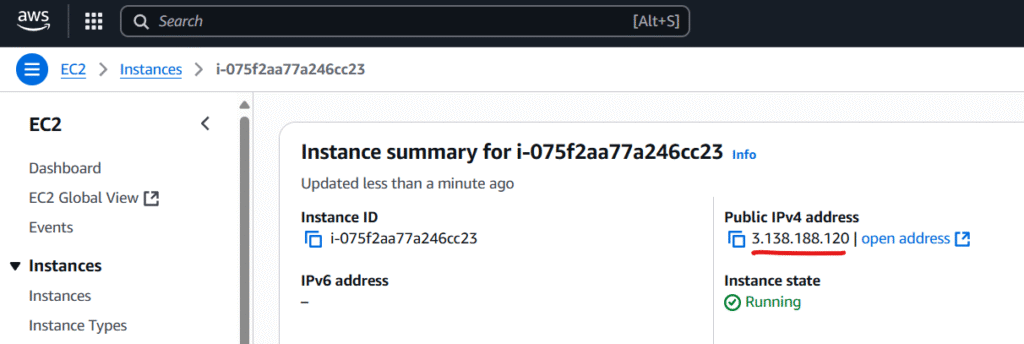
Note down the ip address since we are going to connect to it using our saved private key. we will use our private key “MyLinux.pem” to connect to it which matched with its public key at Amazon AWS server.
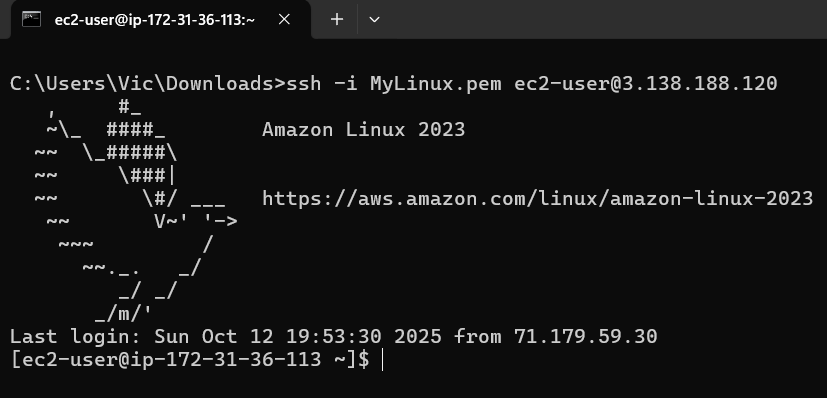
At Command prompt execute:
We are now connected with our Amazon AWS EC2 instance.
Note the user name is always ec2-user for amazon linux OS.
I am going to execute Linux update with yum update command:
but we do not have the privilege to do it so we will have to elevate ourself to root with following command sudo -i
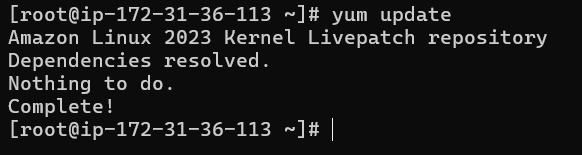
We are now root so we should be able to upgrade our Linux to its latest repo with
yum update
That looks good. our AWS linux instance is update to date with its Kernel repo.
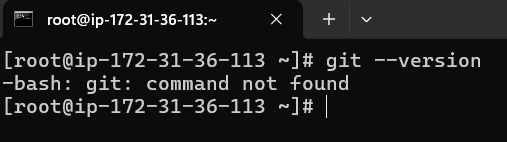
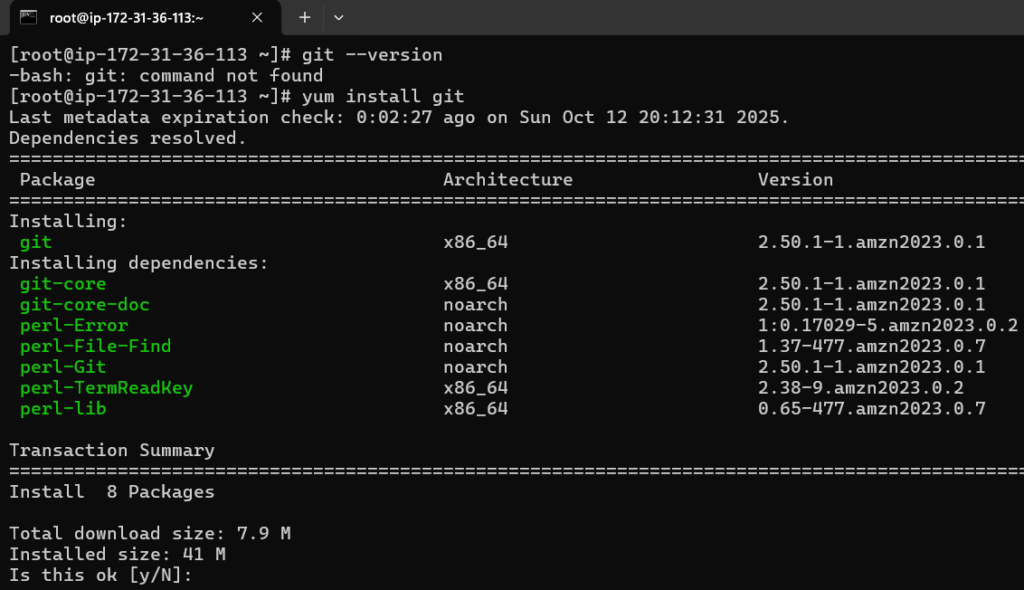
git is not installed yet so we will have to install it with yum install git
yum install git
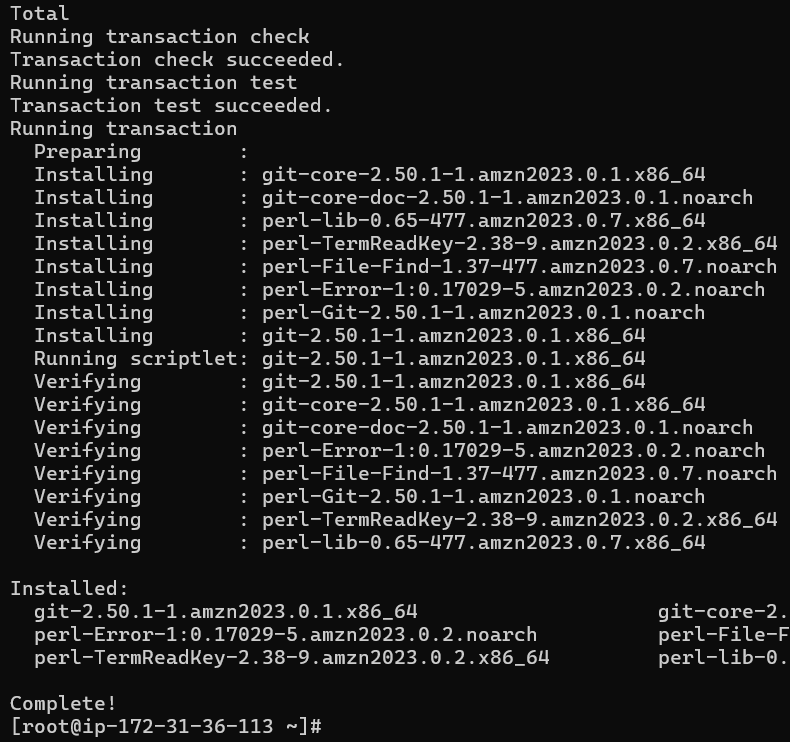
type y to proceed
Git install is completed
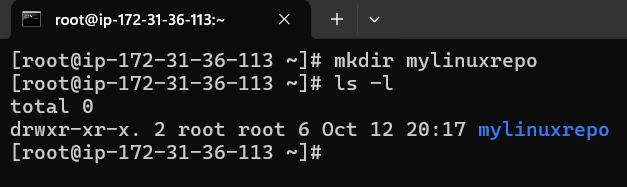
Next we will create a directory called mylinuxrepo
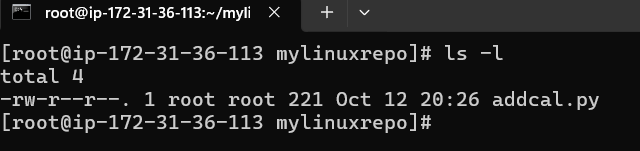
Check if it is created with ls -l
cd to our mylinuxrepo directory and issue git status
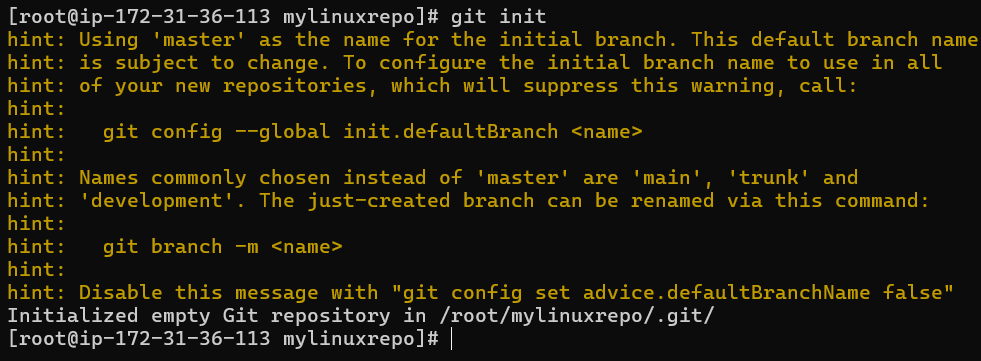
it is not a git local repo yet so we will have to convert it to local git reposity with git init
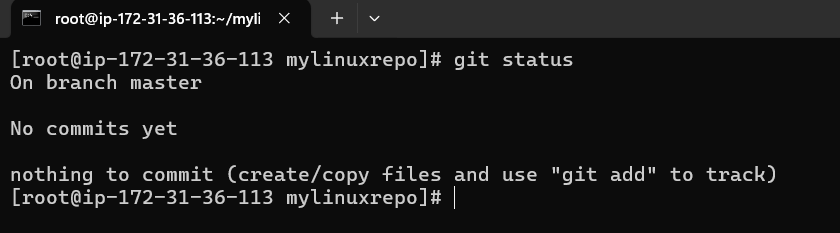
Now check agian with git status
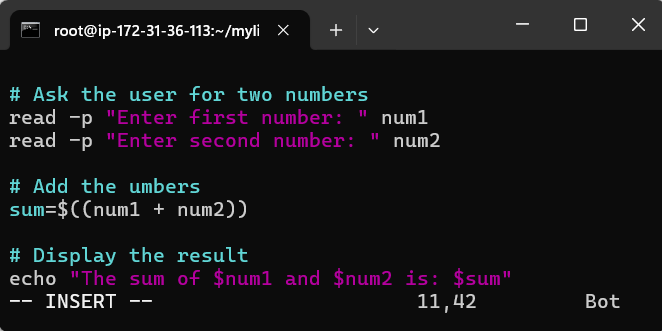
Ok now it is a local git repo. let create a bash script called addcal.py using vi editor
Press i for insertion mode (writing mode)
press esc (for mode) and type :wq (w mean write and q mean quit) to write and quit
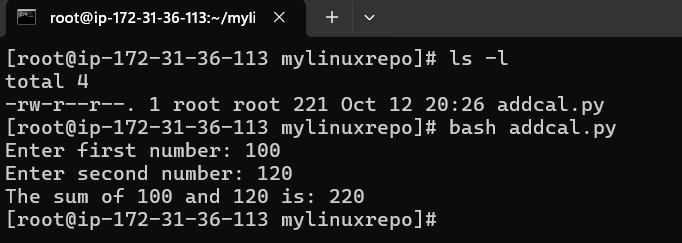
addcal.py is created and let execute it with bash addcal.py
Good our bash script is working.
Note: Also my bad it is not a python script and accidentially naming it .py but it does not matter the name.
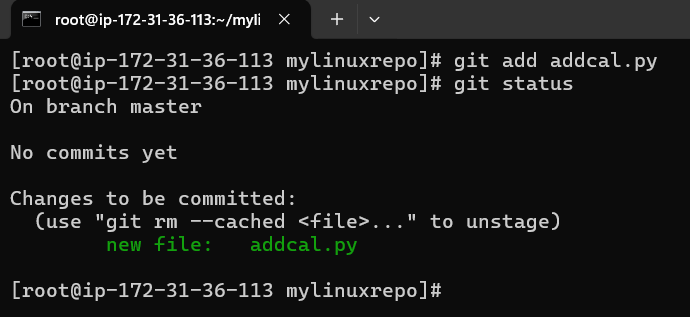
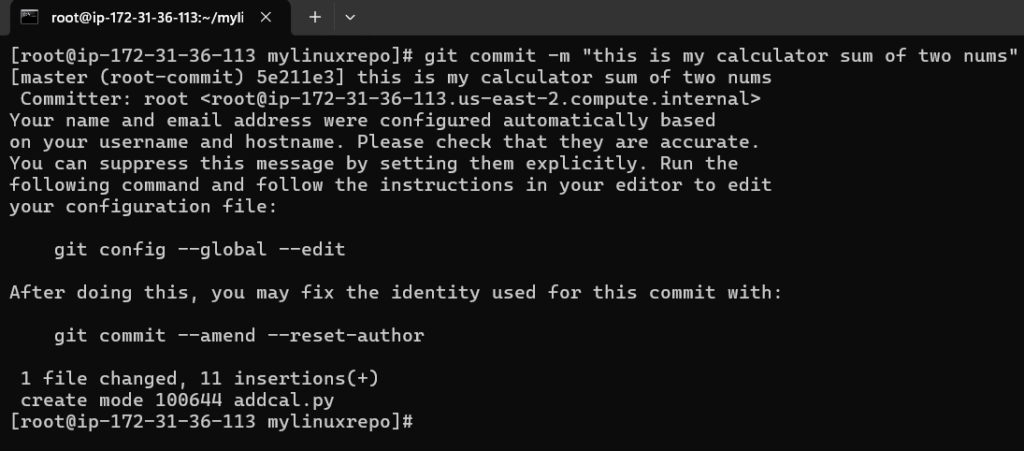
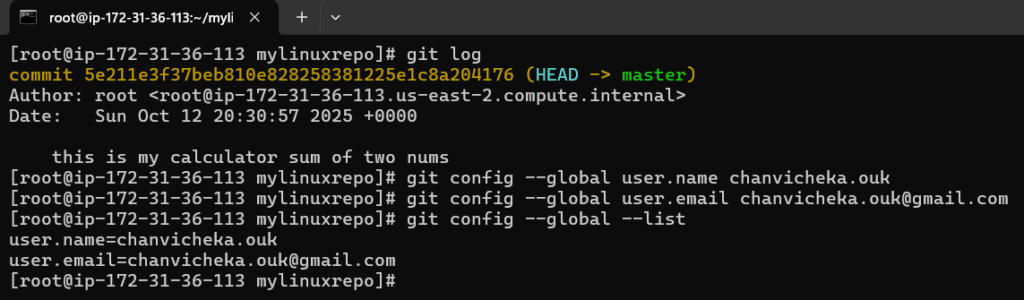
Good, next we will stage it and commit it
Note that I forgot to set the git config –global user.name and git config –global user.email
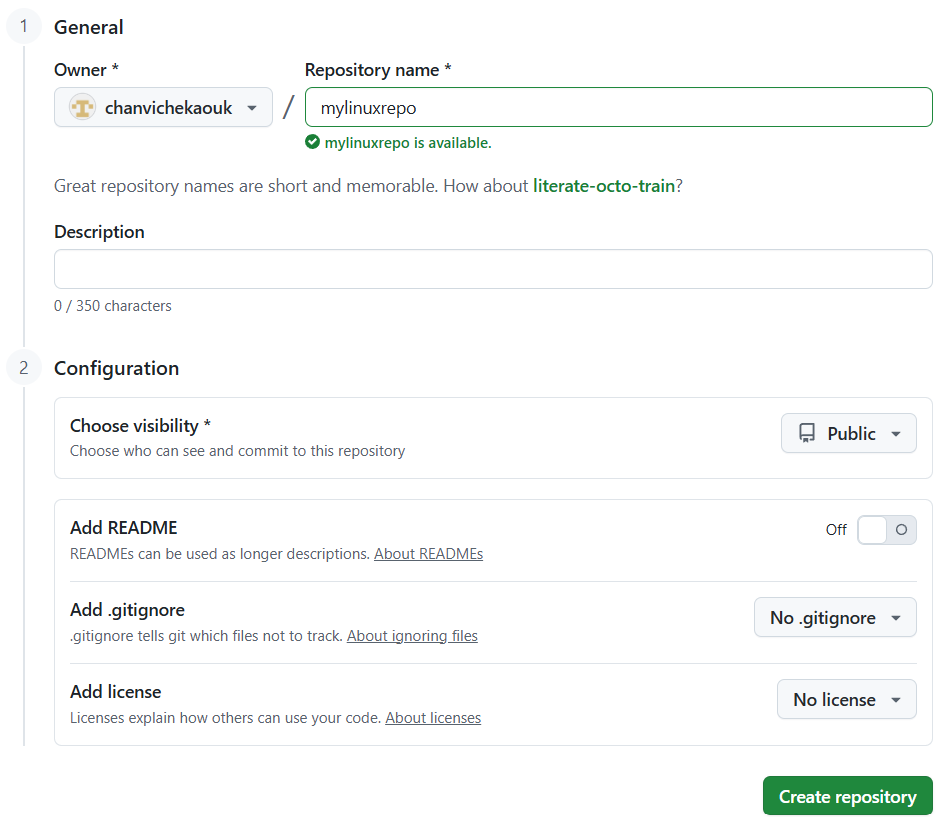
Next, we will have to link it to the central distributed remote repo aka GitHub
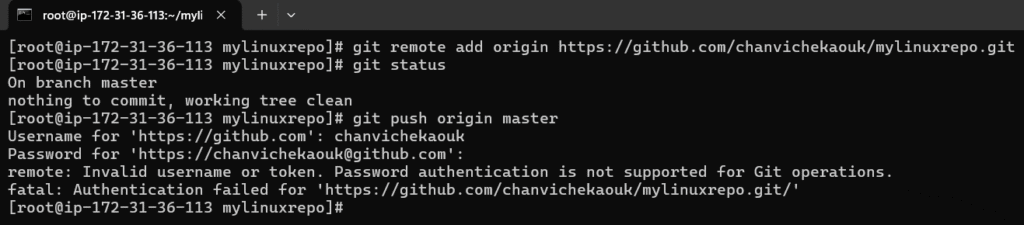
Note, also authentication in linux with username, password would not work and we would have to use personal access token.
Ok now connect our local repo to remote repo in GitHub
Here when authentication through https with username/password would never work here in Linux so we will have to use token
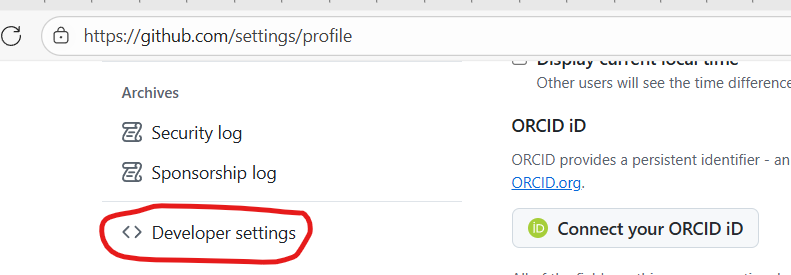
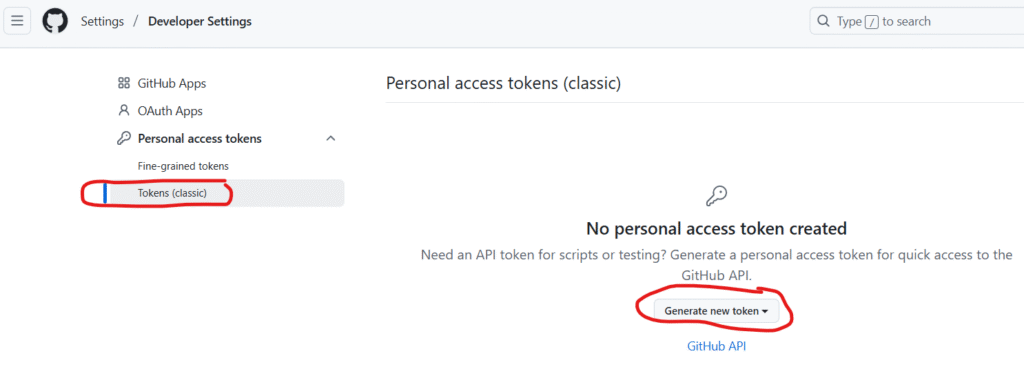
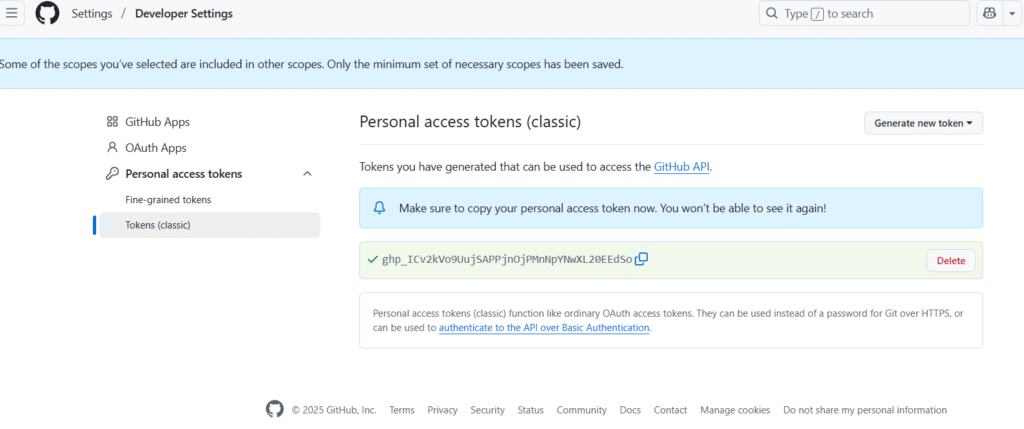
Go to your GitHub profile and setting and click on Developer settings
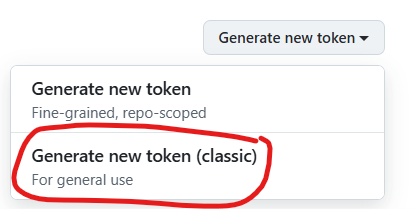
Click on Token (classic) and click Generate a new token
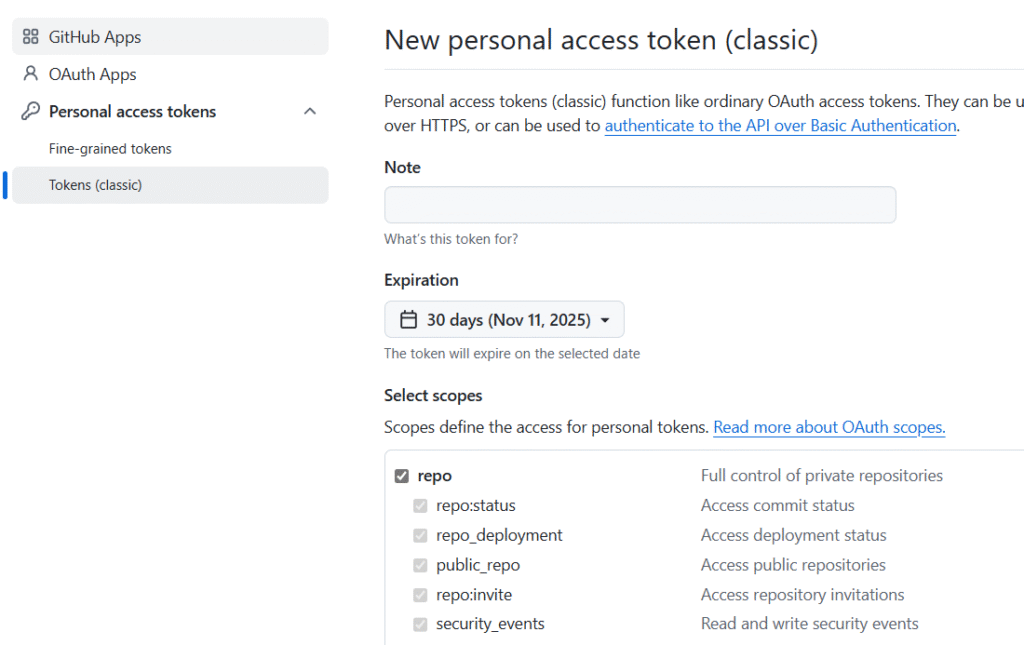
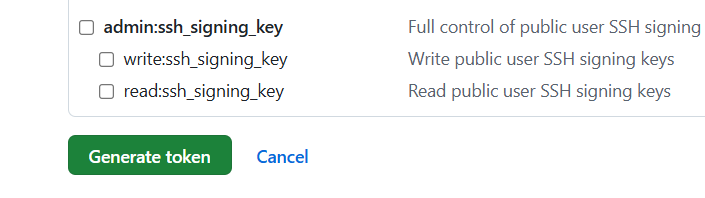
Checked repo and Click Generate token button at the buttom
Copy the token and saved it to somewhere secured
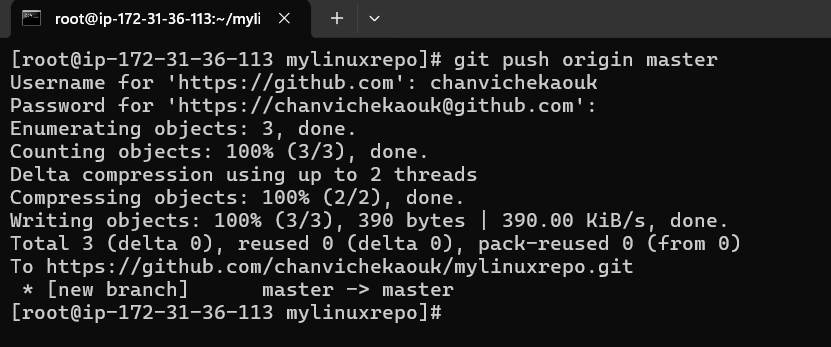
Now let try to add our local git repo to remote git hub repo:
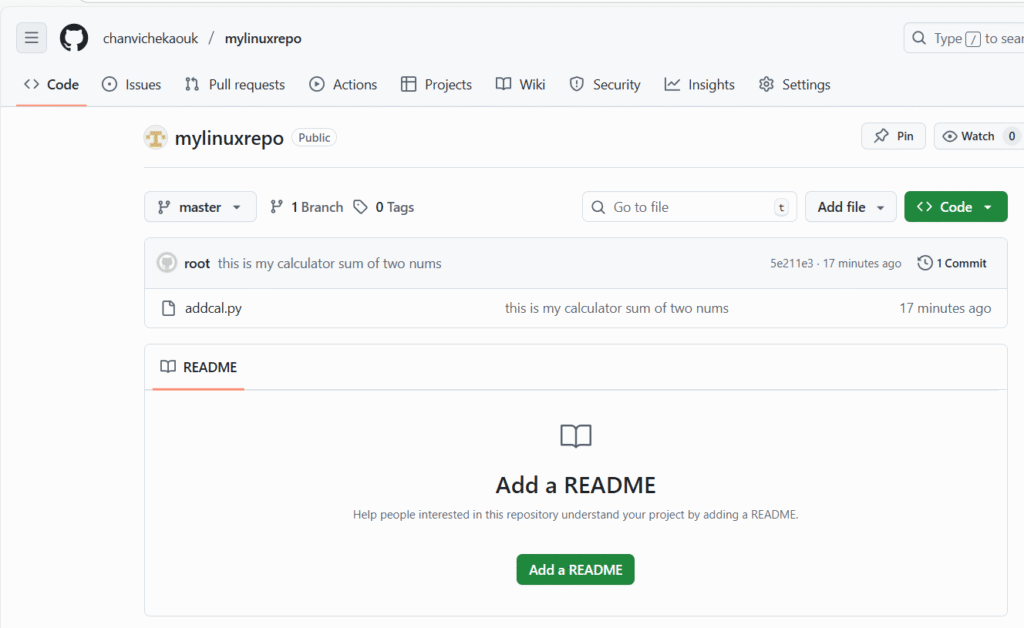
When prompt with Password, past the copied token and here we now successfully link and push our local change in our local git repo to the remote github repo:
Note: I have to delete this token after this post 🙂
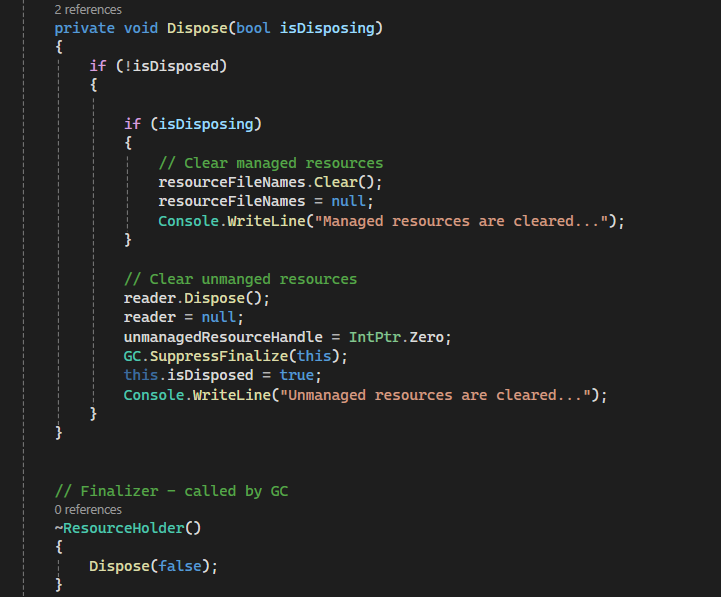
Both Dispose and Finalizer are used to clear resources. Finalizer is usually used to clear unmanaged resources like file handler, database connection handler, network socket handler etc and usually called by GC (CLR garbage collector) and it usually has performance issue since GC is usually forced to run whereas Dispose is usually used to clear both unmanaged resources and managed resources. Dispose is called manually by the developer so it does not have any performance issue like the Finalizer. To implement Dispose, developer has to implement the IDisposable interface and implement Dispose method.
Here is the example to illustrate them in C# console. I used console app so it can be easily demonstrated.
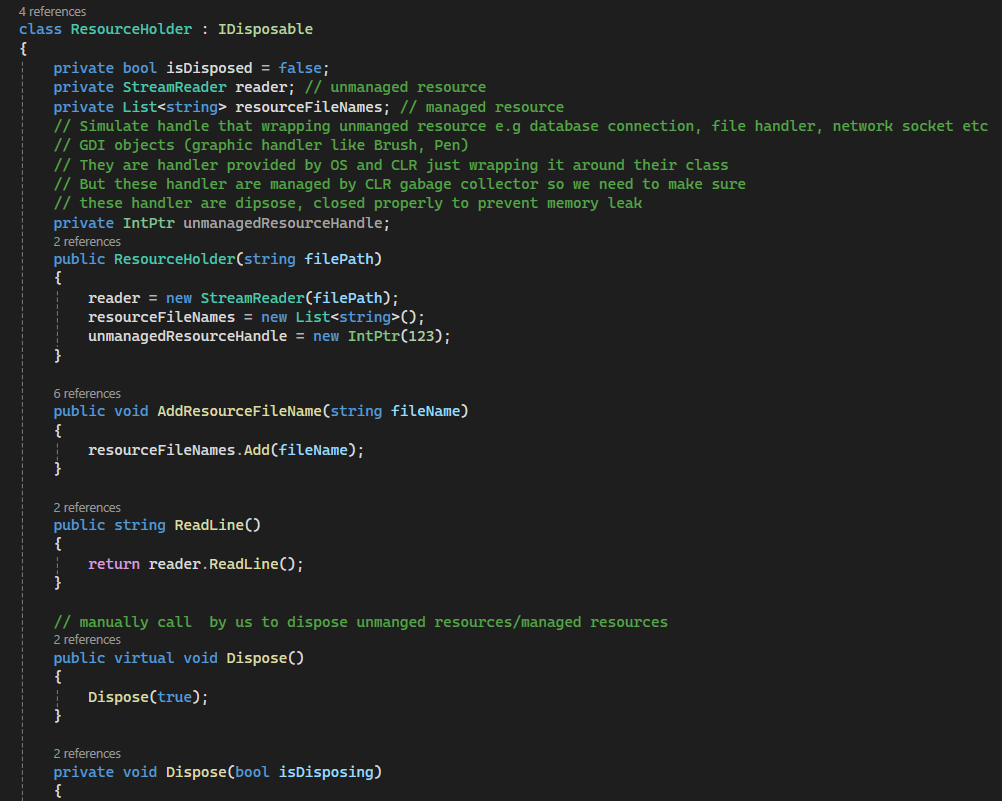
Above, I have a class ResourceHolder that implemented IDisposable interface
In the constructor, I initialized the streamReader (file handler), collection List object , and a pointer that is used to simulate a pointer to the handler of unmanaged resource.
Two public methods that one is for adding a list of file name and Read line by the stream reader
I also have to implement void Dispose(). I made it virtual so any derived class can implement their own Dispose method.
I have a private Dispose(bool isDisposing). isDisposing is used as a flag to indicate whether we want to clear managed resource as well. it is useful when we have to call it from the Finalizer.
We have a flag isDisposed to check if unmanaged resources have already been cleared.
In Finalizer() method ~ClassName(): we call our private Dispose(false) with isDisposing flage = false so to indicate that we only want to clear unmanaged resource.
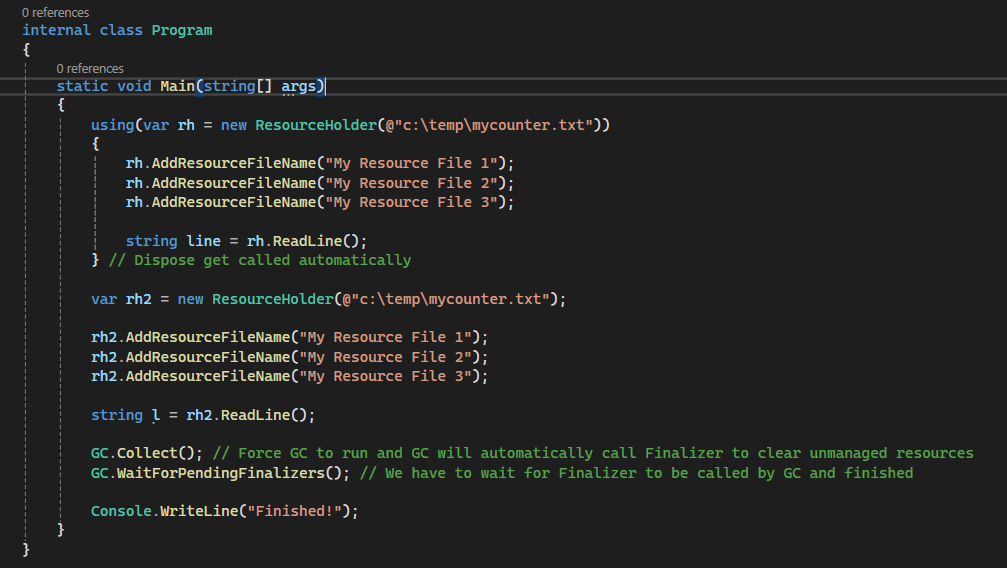
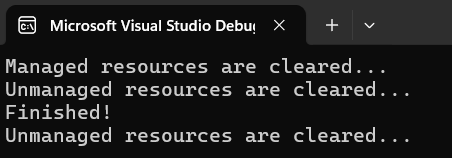
In our main program, we instantiate first object of ResourceHolder rh with using {…} which the compiler knows that it will have to call Dispose method automatically at the end curly bracket.
We also instantiate 2nd object of ResourceHolder rh2 but this time we will use finalizer so we will have to force GC to run by calling GC.Collect and wait for it to finish before ending our demo program with GC. WaitForPendingFinalizers();
reflection is one of the C# .net framework powerful feature which allows application to inspect and interact with metadata of an assemblies like properties, method, type, and assembly at run time.
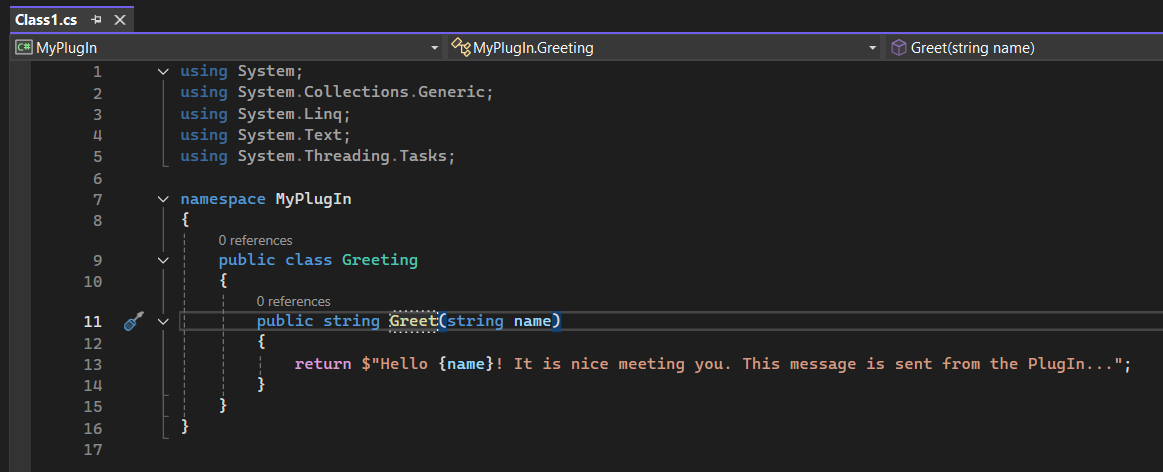
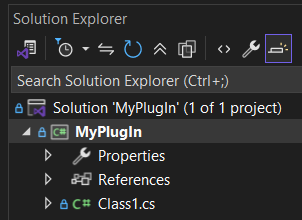
First, we will create a simple plugIn called “MyPlugIn” which is just a DLL library.
It has one function named Greet(name) that takes string value name as an argument and will return a greeting string as seen below
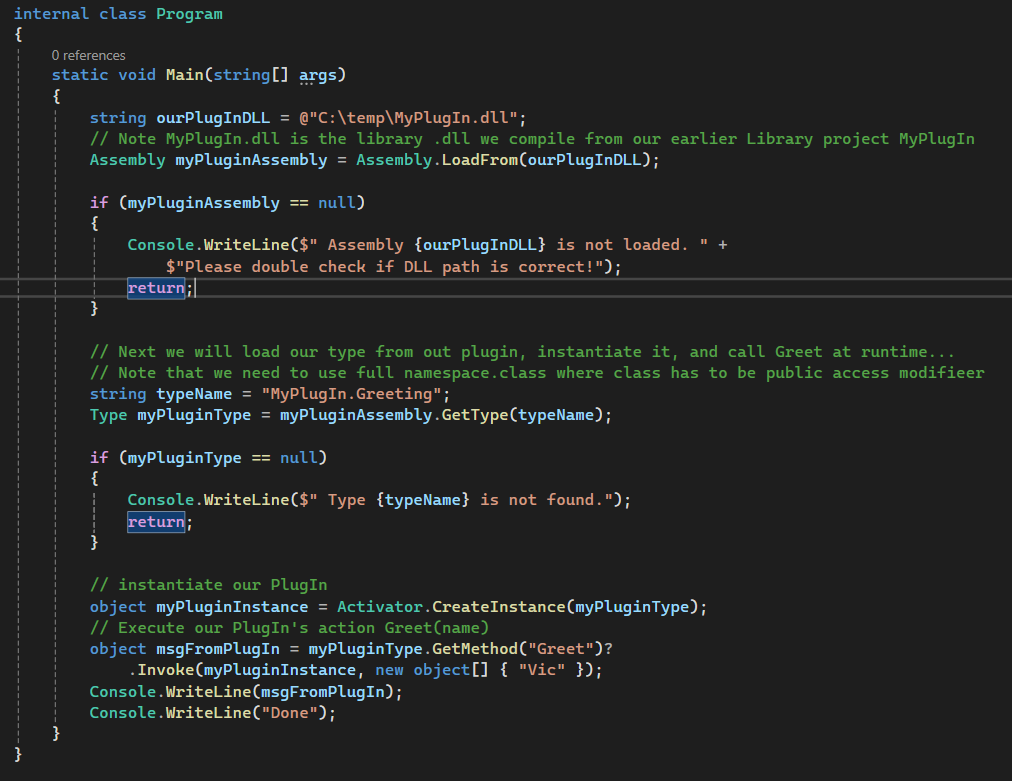
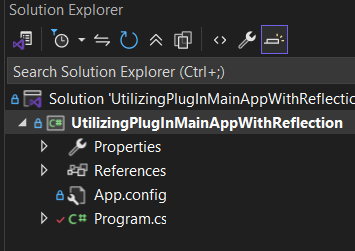
Next, we will create a sample console application that will load this plugin dll which I will store it at c:\temp\MyPlugIn.dll and will instantiate its type and execute its Greet(name) function from the PlugIn at run-time.
This demonstrates just how powerful reflection can be. Throughout my professional career, we’ve relied on reflection extensively in our enterprise applications. I recall a situation where I needed to use a method from an assembly that wasn’t publicly exposed—it was a private method. You might wonder, how did I even know this private method existed? I used a decompiler tool like jetbrains decompiler to inspect the DLL, traced the stack calls, and discovered a method that could assist with the project I was working on. Although it was inaccessible due to its private access modifier, reflection allowed me to invoke this method disregard its access modified and complete my work successfully.